Monday, November 29, 2010

Do Inanimate objects have feelings?

That question is non-photo-related (NPR). It has to do with my car.

I've been thinking about changing cars. I drive a 2003 VW Passat with 210,000 km on it, and it's time. I need a bigger vehicle and AWD would be a good thing to have up here, so I've been hunting for a Subaru Forester and we found one: a 2007 in silver, the usual goodies (I'm not that fussy. If I get in, and turn the key, it should start. It should drive to where I want to go with the minimum of fuss and not burn a lot of dead dinosaur goo. It should have power locks and windows, and I don't care about much else. It shouldn't be black because then I'd have to wash it...).

Anyway, a couple of weeks ago, before heading up to Wawa for the Gales of November workshop, a 2000 km drive into potentially snow country, I brought it in to have the winter tires put on. I think the car knew that this was going to be our last long trip together, because Rusty came over to me in his waiting area and said, "did you know you don't have any front brakes?" $450 later, I did have. Could the car have been punishing me for thinking about breaking up with it?


Oh, a side note. They didn't install the brakes correctly. And this being the country, the mechanic drove me the 15 km home and picked me up when the car was ready, apologizing for the "crunchy" noises the brakes were making, saying it was because he used metallic pads, that's all they could get at the last minute. Crunchy and grabby was a real understatement. Still, as long as the car stopped when I pressed on the pedal... anyway, around 5pm, the night before I was leaving for Lake Gitchigumi, a car pulls into my driveway. It was the mechanic. He said, "I was thinking about your brakes and I think I didn't install them correctly". I said, "well, I don't have time to bring it in..." and he said, "don't worry, I brought my tools". He then worked on my car in my own garage and presto! No more crunchy! Can you imagine a city mechanic actually doing that for you? I love living in the country.

Back to the car. On Thursday this week, I drove to Toronto. When I stopped at the first traffic light I encountered (I live in the country, remember?), the car started running rough. In fact I had to work to keep it running. To make a long story short (too late!), I spend most of Friday, and $641, at the VW dealer. It was the thermostat and another acronymy thing, $80 worth of parts and $500 in labour.

Oh, on Friday morning, Philip, my leasing broker colleague told me he had found a Subaru for me. I swear the car knew it.

Not over yet. On Friday I discovered a crack in my windshield. This on a car that was due to be sold. So I had to have it fixed, I chose the 'repair' instead of 'replace' option. You can still see the crack, but it's small and no threat.

So I think inanimate objects have feelings and make them known to you.

The thought of changing to Mac from PC has entered my mind. Today, my laptop decided it didn't want to recognize the fact that it had a battery installed...

This is a message to my D300, and my 70-200 f/2.8 lens, and most of my other photo stuff, also a message to my laptop computer: "I'm not now nor am I EVER (shhh!) thinking about replacing you. I love you all..."

OK but I do have some stuff I want to sell.

I have a studio setup that I never use. Two 600w monolights, one 150w mono, Manfrotto stands, backdrops and backdrop supports, etc. Worth probably around $1500 on the used market. Contact me if you're interested but keep it quiet, I don't want the equipment to hear about it. I'll break it to them gently that I've found them a new and loving home...

More on the Moose Peterson book

I realize now that Moose was documenting his photography career and the work at the beginning of the book was when he was new and young. The book is fascinating. This is an incredibly dedicated and talented man and his work is outstanding. If you're at all interested in wildlife and/or bird photography, you must read this book. Click on the NAPP link at right (or this one here) to order it.

By the way, this guy HANDHOLDS a 600mm f/4 lens with a 1.7x teleconverter on it. And refuses to crank his ISO up above 100. I swear, that's a physical impossibility!

Time to share some pictures

It always seems to be creeping up on 3am when I'm writing this stuff. So here are some images to enjoy (I hope you do!) and then I'm going to bed.


It's only a chickadee but I worked hard for this shot! Shot in the fading dusk light, the exposure was 1/13 second at f/2.8, ISO 2000. This is about half a frame on my D300. I used Topaz denoise -- works rather well, wouldn't you say? PS: clearly the camera was on a tripod but it took over 100 frames to get one where the little guy held still long enough!


When I refilled the suet feeder, I put the remnants on the deck in the hopes of attracting something photographicable and got a visit from this little guy. The exposure is 1/40 second at f/8, ISO 400 and the lens is the 200mm and the 2x teleconverter, or 400mm. It took MANY shots to get one in tack sharp focus. Needless to say, the camera was on the tripod, autofocus and VR turned off, so I manually focused and used a cable release. These shots are not easy!

I haven't done any pixel painting in a couple of years, and I totally forget how. I did this in Painter 11, spending a lot of time trying to remember how it works (sometimes, I'm painting on a new layer and absolutely NOTHING is happening. I don't remember how!). Anyway, the only thing in this painting that was in the original photo is the bird itself. I created everything else from scratch — the fence, the seed in his mouth, everything. I think I should spend some more time doing paintings!
That's it for now! Drop by any time!

Saturday, November 20, 2010

Do as I SAY not as I DO

I have a lot to learn. Especially about things I don't do very often. My mother would say, "yeah, like dusting the house". My fellow motorcycle instructors would say, "like cleaning your bike", my dentist (sorry, Dr. Ron!) would say, "like flossing your teeth", (anyone detecting a common thread here?), my ex-wife would say... well never mind. When you don't do something very often, you tend to forget how, or at least you're not very good at it.

I don't print pictures. No I mean I REALLY don't make prints, except for ID photos which don't count. This week I decided to print a bunch of images from the Gales of November weekend, because it's time to change some of the pictures hanging in the house and maybe add a few. By the way when I say "print" I really mean "upload to Costco and get them to print them". I REALLY don't make prints! Anyway, I didn't edit them very well.

First of all, there's the issue of monitor calibration. I have a Spider, I've used it from time to time, but it never seems to give me consistent results. I'll do the two big monitors that sit side by side, and afterwards, they'll look different. Close, but no cigar. The HP monitor has a much brighter, glossy appearance compared to the Dell, so I just write it off to perception. The colour balance seems to be consistent, though.

One of the pictures I printed was a fall scene. Dull. Lifeless. I need to pump up the saturation. Same thing with the Michipicoten Light shot with the sand in the front that I posted in the last blog entry. OK, mental rule #1 -- pump up the saturation if you're going to print. Also the blacks are a lot stronger on the print than on the screen. Like in the black and white Harris Creek waterfall image I posted a few days ago. Rule #2, tone down the blacks.

Rule #3, and this is the big one: Look a LOT more closely at the editing you do BEFORE going to print. I took out some hydro wires and a guy wire from a couple of pictures but when you get the prints back, there they are! BLOW IT UP and take care to edit properly!


The first image is from the original that I printed. Both of these are tight crop blowups. Notice the wires and stuff I didn't remove properly? You may not notice them when looking at a normal sized image onscree, but they sure pop out at you when you make a print! Removed, by the way, with the healing brush in CS5 with context aware fill turned on.


The same thing is true if you're going to submit images for competition. Blow it up and scroll all around the image looking for things to fix. Dust spots, for one thing. I have an open smooth water shot where I took the time to do that — not only dust, but little ripples and stuff floating in the water — and it paid off because that image came out well.

So did the night starry shot of the Inn (3rd one down in the previous post). I was a bit afraid that star movement due to the 30 second exposure would make the sky look fuzzy, but it didn't. Almost, though. If you're going to do star field shots, use a wide angle lens and keep it down to 30 seconds or less. Rule #4.

By the way, I don't know what I was thinking. I only have two frames/mattes that fit 18x12, and I now have 10 images suitable for framing, or at least I will have when I get these reprinted. I have 4 other frames set up for 18x9, guess I'm not changing those. So I'll get a few more frames done (that's a LOT more expensive than making the prints!). Maybe I'll rethink the print sizes...

Dropbox

I've been using Dropbox lately for my "cloud computing". For those who are not familiar with the concept, there are several solutions out there for people who want, as Dropbox says, "Secure backup, sync and sharing made easy". Here's how it works: Go to their website and sign up. Install Dropbox on any and all of your computers (which would include your PC, Mac, iPad, iPhone, Blackberry...). Now any file you put in your Dropbox on any machine is visible on all of the other machines. Not instantly, it has to upload to their secure server. If you share those files with other people, they can see them too. If they're Dropbox users, they can edit them, you can collaborate. Doesn't matter what format the file is -- unlike Google Docs, for instance. Right now I'm using it for 2 or 3 things -- the most IMPORTANT of which is, to back up my critical files (I have two: a database and a set of Quickbooks company files that I use every day). I drag a copy into my Dropbox and there's now a secure copy stored on a server somewhere in California, I think, in case my house burns down or I get burglarized. I also share pictures and eBooks with friends, and transfer stuff to my iPad from my PC without going through that annoying iTunes.

Anyway, it's free (up to 2Gb). You can get more free space by referring people to them, so do me a favour -- if you go to check them out, use this link  so I get my referral credits.

By the way, I'm writing this on my laptop but I intend to use the desktop to upload the post to the blog, so as I write this, I'm storing it in my Dropbox and will open it on the other computer when I'm ready ot post, after doing the other stuff (like edit the pictures I talked about above and haven't done yet!).

Next FACzen Workshop

I've been asked by a number of people when I plan to host my next workshop. I've had a couple of thoughts. On January 22 and 23, 2011 is the Haliburton Highlands Dogsled Derby at the Pinestone Resort. I've been there for the past 2 years and captured some excellent images. Outdoor winter shooting is a challenge, and it should be a good opportunity to get together.


The other event is bigger. It's the "2011 Ontario Senior Games — Winterfest" happening on February 15-17. There are a bunch of sanctioned sports and events for the over-55 crowd, ranging from skiing and hockey to badminton and bridge. All fantastic photo ops. It will be busy up here -- most of the resorts are noted as "athlete villages" including the Red Umbrella Inn across the road. More detail later...

If you would like to come up and participate in either or both of these weekends, please drop me a note. If you would like to help by sharing your photographic skills, in other words, help teach or mentor others, let me know as well. I'm going to do some more work on these two events in the meantime.

Moose Peterson Book

Did anyone else buy the Moose Peterson book ("CAPTURED") from Kelby? Moose is a renowned wildlife photographer and birder, and this is his story and tips and techniques on wildlife photography. The jury is out. I'm on page 150 of 400 pages, I vowed to start at the beginning and not skip ahead. At the beginning of the book, the pictures are CRAP. But as I read further, I realize, that's where he started as a teenager, and besides he was shooting FILM. I cheated and leafed through the rest of the book and I realize that any doubts in my mind that digital is better in every way than the old 35mm film/slide days have been put to rest. Good book, although I find his writing style somewhat tedious and although the highlited "pullout quotes" and tips boxes are cute graphically, I find them hard to read on their green backgrounds. Still, if you want to take wildlife pictures, you'd better read this book. You can buy it at NAPP, click the link at right.


This is a picture of me taken by Ron Goodlin up in Wawa. You can see that it's wise to wear waterproof boots when photographing on the shoreline. Later that day I learned that one should never turn one's back on the waves or one will end up with soaked feet, regardless of waterproofing (when the water goes halfway up your leg!)
So here's one more image from the Gales of November weekend. Not actually in the Wawa area, it was taken at a burned out gas station somewhere along the road between Wawa and the Soo.


Broken Window. The putty really did look like that.
I used Topaz Adjust to add some extra depth to the image.

Sunday, November 14, 2010

Gales of November revised!

That PowerPoint thing doesn't work. Some — most — people can't see the video or hear the music.

So I installed the upgrade to ProShow Gold and recreated the presentation. This time you can easily see it two ways:

go to www.faczen.com/gales.html. When it asks you to install activex controls, go for it. click on the photo to run the presentation. Note: this is a non-commercial video, using the original Gordon Lightfoot sound track.
 Or

watch it on YouTube. I put it up with a custom soundtrack because of copyright issues. The original Lightfoot track is more appropriate, but I can't use it. So I added a soundtrack that I composed and played myself on my Yamaha keyboard (just a loose microphone so the audio quality isn't great. Neither is the keyboarder....). I'll be back in a few minutes with the link as soon as it finishes uploading.
OK, here it is: http://www.youtube.com/watch?v=4K-141U3krU&fmt=18. As the photographer, the composer, the musician and the writer, I guess I don't have a copyright problem!

These work MUCH better. ProShow Gold is pretty good — almost no learning curve although I'm sure I've missed some things. For instance, I'd like to fade out a caption much more slowly and have an image sit there for a few seconds before starting the animation. Not bad, though — I created the thing in about 3 hours all told.

By the way, Photodex had me on file after all these years. I last used the program in 2006. Their customer service line was available on a Sunday afternoon, a live person came on the line in a couple of minutes and spoke English natively (I think they're in Texas). They allowed me the upgrade price and gave me the iPad output module for free (haven't tried that yet!). Good people.

I tried NOT to use a lot of different transitions, unlike the last time. I think I put too much animation in the slides though. What do you think? Please comment below, or email me.

Bye for now!

Gales of November best images

Several years ago, I bought ProShow Gold and did a couple of presentations, the best of which was my trip to Newfoundland by motorcycle in 2006 (oh yeah. I guess it was then that I bought it). It's here, by the way. You'll be asked to download a viewer, which is safe. I've gone through a few computers since then and have no idea where the software is, so if I wanted to use it, I'd have to buy it again. I probably should, because I spent the day compiling my images into a Powerpoint presentation complete with audio and video clips. Then I discovered that it wasn’t easily exported because of embedded video and audio. I think I managed it, though I'm really not satisfied. What did work was timing it to fit the audio track!

I tried to find a utility to convert the .pptx file into something more shareable. The so-called "free" utilities either put a huge watermark in the middle until you pay their $99, or didn't handle the audio. I tried to save it as a .pps, which is Powerpoint 2003 compatible and can be viewed with the old Powerpoint viewer, but the file ended up at 180Mb. I gave up and saved it in PowerPoint 2007, which resulted in a 45Mb file. Maybe someone can point me towards a better solution. Or I'll bite the bullet and get ProShow. I should anyway.

If you have Powerpoint2007, you can directly view the show I made here:
www.faczen.com/video/galesslideshow.ppsx. Be patient, it's a healthy sized download. Not recommended if you're not on high speed.


Note: on my computer it looks like it's doing nothing while ht's downloading, then the window opens. Like I said, be patient.
Note: you have to click "slide show" in the menu at the top then the left-most icon "start slide show from beginning". Or the tiny icon at lower right that looks like a projection screen.

If you don’t have PowerPoint, you can download the Powerpoint Viewer from Microsoft for free at this Microsoft site.

Note: then go to the link above and download the show.

If you’re on a Mac, I’m not sure how it works. I get the slides only, no audio and no video on my iPad in Keynote, but I don’t know enough about it. Someone please clue me in. If you want to get the flavour of the embedded audio and the video clip, you can find them here:

www.faczen.com/video/14-TheWreckOfTheEdmundFitzgerald.mp3 and
www.faczen.com/video/GalesIntro_0003.wmv

Someone please email me and let me know how it worked. Were you able to see the video and hear the audio track? I had trouble testing it because both of my Windows computers have PowerPoint 2007 installed and defaulted to it. The old vintage Sony Vaio that runs my scanner doesn't have enought memory to run the presentation.

By the way, I edited the video by putting pieces of 3 clips together in Microsoft Movie Maker. Works pretty well. The clips were made on my Nikon Coolpix point-and-shoot camera. A videographer I'm not! The show starts with a minute or so of video introduction.

Here are a couple more images from the weekend


This one is becoming one of my favourites. Really minor enhancements to the saturation and sharpness, and a little crop to straighten it out. The biggest thing I did to it was to remove the red chair barely visible on the rocks in the distance. I never even opened Photoshop, it was all done in Lightroom. Quite a departure for me!


This image, on the other hand, is an HDR generated in Photoshop CS5 from 5 images. Not much was done to it other than toning and a shot of Topaz, and it was cropped out of a larger image (it's only about 1700x1500px).

I didn't take this up on Lake Superior, I took it the night I got home. It's the Red Umbrella Inn across the road from my house. I went out to do some night shots and played with this image using Topaz Adjust. I didn't do much: there are a bunch of presets I flipped through, this one is called "Night" (appropriate, don't you think?) and I don't think I did much after accepting the preset settings. This image looks best in a darkened room so you can see the stars. Click on the image to view a larger version.
Well, considering that it's 3:00am, I think I'll sign off for now. L8R...

Friday, November 12, 2010

Wawa Wow!

So much to say, so little time...

We had a fabulous weekend up in Wawa. Due in no small way to Rob Stimpson and the crew at Rock Island Lodge who not only organized all the logistics, but who ordered up superb weather conditions for our visit as well. Rob is a laid-back mentor. He gently pushed me out of my rut and I'm sure, made me a better photographer. I will be back next year, unless my body (especially my knees) gives up on me. Go to Rob's site or the Rock Island Lodge website to see what it's about.

There were a dozen talented photographers on this weekend. I learned something from each and every one of them. I can't tell you how many times I said to myself, "I wish I could shoot pictures like him (or her)". I feel humble.

Now as I told Dr. Ron, if this had been a comnmercial shoot, I'd have considered it a failure. I'm used to having more images that I like come out of my 1500 shutter clicks. As it stands as I write this, there are less than half a dozen images that I would consider "print material", another 30 or so that I considered selected keepers, and a total of less than 100 images that I would use in a slide show or other presentation. Maybe enough for a Blurb book...

Here's one:


The Michipicoten River Light at dawn. I slowed the shutter down by shooting before it got too bright. I have about 3 or 4 other images of the same light but this is arguably the one I like best. It's a 30 second exposure at f/8 with the wide angle lens, ISO 200. This is cropped only slightly, just to straighten it up, and believe it or not, kiddies, NO PHOTOSHOP.  
Speaking of Neutral Density Filters (we were, right?):
If you're going to shoot water, you need them. I had a 2x (one stop), a 4x (two stops) and an 8x (3 stops) and I stacked the latter two for several shots. It happens they're 72mm in diameter so I couldn't use them for this shot (my wide angle is a 77mm diameter). Adding a stack of neutral density filters on the front of the lens works but it's cumbersome and hard to focus through it. There are a couple of solutions.

Lee makes a filter holder you can mount on your lens. It comes with several diameters of mounting hardware and you slide in whatever filter you want. Dr. Ron had a Lee set with a graduated filter for skies and among others, a 500x filter that gave him 10 stops adustment. If your normal exposure would have been 1/4sec at f/8, you could open your shutter for 4 minutes for the same shot. However I found the Lee set clumsy, and watched Dr. Ron drop it on the rocks once... it's about $500 for the set..

There's another concept: made by SinghRay and also in that price range -- a screw-in filter that's variable! I think the way it works is that there are two polarizing filters and as you rotate them relative to one another, the ND attenuation changes: from 1 stop to 9 stops, continuously variable. I like that concept and I'll be keeping my eyes open for one of those. Downside is, it only works for whatever diameter you order (although you can probably use step-down rings for different lenses). Brian Barker, one of the other photographers on the weekend had one.


Harris Creek Waterfall. Here's an 8 second exposure taken in bright sunlight using the stacked ND filter method. Harris Creek is off Rte. 17 along the North Channel of Lake Huron. A local fellow I met there told me there used to be a grist mill about where the highway is now, used by the pioneers to grind their grain, and later a water powered logging mill driven by the same water. Amazing what you can learn by talking to people!
I'll share one more image with you from the trip (for now). Eventually, I'll get them up on my Smugmug Gallery, but you're going to have to wait for it!


Indian Beach Surf. This shot was taken on Saturday afternoon after the wind picked up, as arranged by Rob with the Man Upstairs. The power of Lake Gitchigumi (Lake Superior. We listened to Gord Lightfoot all weekend. The Wreck of the Edmund Fitzgerald has the phrase "The Gales of November" in it. Did you know that?). No Photoshop. Some minor editing in Lightroom, that's all.
Visit my Smugmug site in a few days to see more images. I haven't even put the November Gallery up yet, so take your time!

Monday, November 01, 2010

Another test

Hmmm. Research shows me that Blogger (Blogspot) and Apple don't like one another. There is an app called BlogPress for my iPad which I just bought -- let's see if I can make it work. That's what I'm typing on right now.

Formatting text This is a test of formatted text

This is a test of posting a picture:


I edited this image in Photoshop Express on the iPad. Converted it to black and white, changed some exposure values and created the border. Now I'm adding some HTML code to this paragraph to see if it works.


Wow. That's not easy. There may be some shortcuts I don't know about. Oh well, at least I can post from my iPad. Maybe you'll hear from me this week when I'm up in Wawa or enroute.

Bye!


Just a quick test

I've got a new toy! It's an iPad and I have Bob Fowler to blame. I played with his (iPad!) when we were at the Kelby seminar and had to have one. I bought the 16Gb version but this one came with 3G capability which I may or may not use down the road.

It also came with some installed media, mostly books and a few apps. I've been reading on it, the jury is out as to whether I prefer reading a real paper book or an electronic one. That said, I don't have to carry a bunch of books with me on trips if I have this.

I'm writing this blog entry on the iPad. The keyboard is quite useable, although I'm not suree I would write a novel on it! The way it handles photos is quite peculiar. I'm just starting to figure it out. Let's see how easy it is to upload a photo to the blog. Sorry I don't have anything exciting to put up, but this is just a test.

TestPhoto: (testing text formatting too!!)

Hmmm. That doesn't seem to work. I can't get into "compose" mode, so it won't let me upload a picture. I'll search for a solution and get back to you.

L8R...

Wednesday, October 27, 2010

Workshops, workshops, upgrades

Did you miss me? Believe it or not, I’ve been too busy with other photo stuff to blog. OK, and with work and life in general... anyway, I’m back.


So first, let me tell you about the Kelby workshop I attended last Friday.

Photoshop CS5 for Photographers, presented by Ben Willmore from NAPP (Kelby Training)

Negatives:

• it was at the Metro Toronto Convention Centre where parking is at a premium, it took almost 2 hours to drive there (and the same amount of time homeward bound).

• They ran out of coffee. THEY RAN OUT OF COFFEE. When we got there, all they had was de-caf. They brought in more coffee for the morning break and promptly ran out again, never to replenish it.

• No food facilities there. I knew that and brought my own lunch, but a lot of people didn’t.

• I think Ben was wearing the same hat he wore 2 years ago.
Positives:

• The seminar was really directed toward photographers as billed. Unlike the Corey Barker session last year which had limited application for anyone but graphic artists. That said, that’s what they said it was going to be.

• There’s lots of neat stuff in CS5 and Ben knows how to pass that info along.

• By the end of the session, I could already see how to improve my workflow

• There weren’t really any vendors there selling stuff, so I made it out with my wallet intact.

You need to be practiced in Photoshop to get something out of the seminar. There was an evaluation form we filled out, with a check box asking if you thought you were a novice, intermediate or expert at Photoshop. I selected "intermediate" but in hindsight, I've sold myself short. I've actually used and are familiar with pretty well all of the techniques Ben showed us, with the possible exception of "Puppet Warping". I left the seminar wondering how much I had really gotten out of it, but I realized that I did get two things: validation that I was on the right track, and some insights into ways to improve my workflow.

Ben did not spend any time on Photoshop basics. That's what I meant above: it's not a grass roots course, so if you're not comfortable in Photoshop, you'll be frustrated because you won't know how to achieve the results that Ben did. He did spend a lot of time on Adobe Camera Raw, which he uses from within Bridge but it's the same as the engine in Lightroom.

The focus was on the new stuff in CS5 — the HDR engine, content-aware fill, fine selection, lens correction and yes, puppet warping.

If you really want to get up to speed in Photoshop CS5, buy Scott Kelby's book. It's well worth it and as I said a hundred times already, so is a NAPP membership. Click the link at right.

Upgrading to Lightroom 3

That was time consuming. Why? Because I didn't listen to Jim in the first place. My images were scattered all over the place — on 4 different hard drives, in various places. Before I did the upgrade, I reorganized my images and this time I listened to Jim and did the shuffling all from within Lightroom. I now have my master photo archive on a 2Tb external drive (the drive letter is "M". I think I'll call it "Mother"). The LR catalog itself is on the internal drive in the desktop and there's a backup on Mother. Most of the photos themselves are backed up on my other external drive but I still need to reorganize that.

I'm not going to talk much about LR3 here and now: let me get used to it first. Import and Export are different and I had to rebuild things, there are a few neat and sneaky new things like lens corrections and one really really neat thing called tethered shooting which I'll save for another day.

Suffice it to say that the upgrade was lengthy and had to be thought out well, and it ain't over. I still have to figure out how to replicate the settings I've created on the laptop.

I’m off to another workshop

I decided that since I hadn't had a vacation this summer (there are those who may argue that my whole life up here in the Highlands is one big vacation...), I deserved one. So when Rob Stimpson sent a reminder out about the Gales of November workshop up in Wawa, I jumped at it. I’m going, next week. So is Dr. Ron – I convinced him to come too! Go to the website to check it out, and don’t be jealous...


I haven't taken a lot of pictures. So without further ado... these are 3 images from a rainy Sunday afternoon walk. One of these days I'm going to try to publish images just the way they came out of the camera. Well, maybe not today...

Pine Sentries
In some places, pine trees grow in straight lines. I had added some (white) post-crop vignetting to this image, but on second thought, didn't like it and removed it.
Saturation
The rain produces saturated colours. So does pixel processing in CS5, Topaz and LR3! I did an HDR of the same image and it's not as crisp as this one is.


Late Autumn field.
Across the road behind my house. Some painting effects.

I bought a new toy. It should be waiting for me at my mailbox when I get there tomorrow. I'm not going to tell you what it is, I'll save that for next time... stay tuned!

Wednesday, October 06, 2010

Fall Colours 2010 has come and gone!

And a great success it was! First thanks go to the creator of the fine weather we had: it was a little cool, but we had awesome sunrises and pretty good sunsets as well. I have to admit, though, that the sunset on Monday after everyone except me had left, was the best.

We were a "Group of 6". A good number because I was able to seat everyone at the table easily, we could look at our photos on my monitors without trouble, and everyone had a place to plug in their computers. Thanks for the great zucchini dish, Shannon (and the recipe), Kathy for the pies (which weren't baked, we didn't know that but caught it in time!), Bernie and Josie for their insights and Liz for a breath of fresh air!

I have some images from everyone to post on the photography.to site, as soon as we get the formalities out of the way. In the meantime, I see that Shannon put up a blog posting with a few of her images, here: http://shannonlafferty.blogspot.com/. I LOVE the first image she posted. I wrote that I wished that when I grow up, I could be like her!


A few of the venues I selected. I showed this map and some others like it on Friday night in a PowerPoint I created outlining what I was hoping to accomplish during the weekend. Although there was a teaching element to it, all of the participants were experienced and excellent photographers so I didn't want to create a rigid atmosphere. My intention was just to plant some seeds, and let the individuals make them grow in whatever direction they wanted.

My intent was to go out on Saturday and shoot images by following the "rules". Everyone did. Then on Sunday, I told people to go ahead and BREAK the rules. I don't know yet if anyone did and if they were successful. We'll see when they send me some images! I did, though:

Notice how your eye goes to the 'window' which is the brightest spot in the image, and which is centred left-to-right? But if you stay with the picture for a while, you look at the texture of the ceiling, which is really the focus of the picture. I broke the rules, just to see if it would work. Did it?

By the way, I'm enamoured with HDR and Topaz-enhanced images. This was also a hand-held multiple exposure (breaking another rule, about using a tripod!) and I set the edge glow quite high. The tree is centred in the window. How many other rules did I break?

In the same location (my neighbour's old barn), where Liz and I went to shoot for a bit on Sunday afternoon, I got what I consider my best "art" shot of the weekend:

This is cropped from a larger image. I call it "Chain, Chain, Chain". The motion blur is due to the slow shutter speed, and no tripod again. Breaking the rules!

I said we got some good sunrises ( see Shannon's blog for the best shots of the group, in my opinion). I did my crazy HDR thing...


...but I also got a few more conventional images which you can see on my Smugmug Gallery here. I took a couple of good 'people' pictures, especially of Liz, one of which is here:


I enhanced the eyes in Photoshop, and softened the image by reducing the clarity in Lightroom, that's about it. I deliberately didn't crop this one too tight because I wanted to show her as a photographer.
I mentioned the Monday night sunset. I was chainsawing down some rose bushes (hope they come back next year!) and turned around to see the most AWESOME sky I've seen in a while. I dropped the chainsaw (which cost me at least 45 minutes reinstalling the chain that came off the track!), grabbed the camera with whatever lens happened to be on it (the 12-24mm wide angle) and ran behind the Red Umbrella Inn to try to get a few shots before it went away.


I took this picture of the Inn as I was running out there. Not an HDR or anything, this is what it really looked like! "The Sky is on Fire!" .
Then I took a series of shots, all hand-held (no tripod: I told you, I RAN out to get there before the sky changed!). It's hard to choose my favourite, but this ranks up there:


All of the participants said they'd like to come back again. I'm still waiting for more feedback which will guide me in future workshops, and I'm planning to do more of them. Email me if you want me to send you details when I design the next one.

Friday, October 01, 2010

Fall Foliage 2010 is here!

People will start arriving in about an hour! Here's hoping for some decent weather.

I got up early this morning and made these images:


Both of these images are 5-shot HDR's but the first one was created in Photoshop CS5 and the second one with Photomatix Pro. Both were tweaked with Topaz Adjust. I was disappointed with the dawn light and drove away: then came back when I saw the sun on the hills in the distance!

Wednesday, September 22, 2010

Getting Ready for Fall Foliage 2010!

In about 10 days, we're having our Fall Foliage 2010 workshop! I'm having fun preparing for it, from logistics to curriculum. It's turned into a smaller group than I had hoped, but if the numbers hold, we can call ourselves "The Group of Seven". Catchy, no?

It's a well-known fact that the best way to learn something is to teach it to someone else. One of the exercises we're doing is "Follow the Rules". So I guess I have to know what the rules are! So when I went out to shoot a few pictures, I deliberately paid attention to them. Interesting results.

Oh, in case you think our workshop will be rigid and directed, another exercise is "Break the Rules". Should be fun. Check out the photography.to website.

Anyway, I went out and found some great venues, I got permission for us to shoot on several private properties, and to top it off, I found out there are a couple of events going on in Haliburton that weekend. The leaves should be peaking... even if you can only make it up for the day, come on up and get some killer shots! Email me if you're thinking of coming.

Stuck in a rut?

I am. I noticed that most of my images in the last weeks have one thing in common: they're extreme. Extreme colours, oversaturated, wild textures. HDR's. Topaz enhancements. Take this shot for example:


Afternoon Sun
Sunset on Horseshoe Lake. This is a 5-shot HDR with some Topaz enhancement. I masked the sky and the left hand chair and used a different adjustment. I painted on the mask to bring out the texture and colour of the wooden dock.

I looked at a regular exposure of the same scene, but it looked boring to me. I'm really hooked on the detail and textures possible using these techniques.

So I tried a couple of other things I haven't done for a while. For example, an abstract::


Autumn Patterns
Tight detail from a slow shutter speed zoom of some mixed fall foliage.
I was shooting the chair picture above and had changed to the big 70-200 lens for some sunset shots. Then I looked at the house behind me and wanted to record an architectural shot. Wrong lens: I couldn't back up enough to get it all in and was too lazy to change lenses. I remembered reading that Adobe had improved their photo stitching algorithms in CS5, so I thought I'd give it a try.


CS5 is amazing! I took 6 images, 3 left-to-right of the top of the house, then 3 right-to-left of the bottom. I clicked "create Panorama in CS5" and voila! I can't pick out where the seams are, can you?

This is the original merge, but I added a red background layer so
you can see what I did.

And here's the final image after cropping and straightening. I dodged some bright spots and warmed it up a bit, but that's all. Needs a bit more 'air' above the house, though. The finished image is over 11,000 pixels wide!


Non-Photography item

My sister put me onto a device/service called MagicJack. I've tried Voice-over-IP system before — with an adapter between the modem and the DSL line or cable connection. The old system caused all kinds of problems, sound quality was lousy and it was unreliable.

Looks like things have come a long way. This unit plugs into a USB port, you plug a phone into it (or a headset into the computer) and it works! I've only had it a couple of days, but already saved money because I can now phone the US for free.

It's supposed to be only $39.95 (apparently less if you buy it at an "As Seen on TV" store) but in the end, it cost me about $60 because I had to pay duty when it came in and because they want $10 for a Canadian phone number. It works, though. Check it out — Google MagicJack.

Next time, I should be able to comment on Lightroom 3 which I've been trying to find the time to install, and maybe I'll show you some "back to basics" type images, no HDR, no fancy stuff. We'll see...

Tuesday, September 14, 2010

October 2/3 Workshop update

News Flash! There's an event in Haliburton the weekend we're up there worth photographing!

Colourfest 2010 is happening in Haliburton Village on the Saturday. Here's what they have to say about it:

I plan to incorporate it into our program, for those who wish to go. We were intending to be in Haliburton Village (or Minden or Dorset) around mid-day anyway, so we can extend that a bit and delay the whitewater segment until later in the afternoon, or move it to the Sunday.
On Saturday, October 2nd the village of Haliburton comes alive with vibrantly coloured street displays -- scarecrows, pumpkins, corn stalks, mums -- continuous entertainment, a bigger-than-ever Vintage Car Display & Parade, "Spectacular Colours" bus ride to Skyline Park, Kids' Colour Splash create-a-mural presented by the Rails End Gallery's "Art Attack," clowns, buskers, contests, prizes, a corn roast and so much more! Plus, Colourfest's Pancake Breakfast...a delicious way to start your day at Haliburton United Church from 8 to 11. Colourfest 2010 Haliburton Village Saturday October 2nd 10:00 a.m. to 4:00 p.m.


Several people have already signed up for this Workshop, but there's room for more! Hurry if you want to find accommodations, though. Go here --> http://www.photography.to/ to sign up.

  • I have a question. Are there people who would just like to come up for the day, Saturday or Sunday, and join us shooting at some of the venues I've chosen? You'll likely miss the dawn and dusk shoots, etc; remember, it's a 2-hour plus drive from Toronto. If there's enough interest, I'll structure something for you. Send me an email if this interests you.
More on the HDR issue raised the other day:

Photomatix Pro and Photoshop CS5 are really different in the way they handle HDR merges. Some pictures are easier to do in CS5 -- but I haven't yet identified which ones they are! Things like contrasty metallic objects, I think. But landscapes and subtle skies -- forget it (unless I just haven't found the formula yet).

The following 2 images were shot at dawn off a 10th floor balcony facing North. Neither one is worth writing home about. I did a 5-shot bracketed series, with the nominal value being an exposure for the sky (probably a mistake, since there likely wasn't enough range to expose the buildings correctly). Then I processed the images by merging them into HDR's using CS5 and again using Photomatix. I used the same original 5 exposures.


The picture above was merged in Photoshop CS5
The picture below was done with Photomatix Pro


The CS5 one required a TON of fiddling and mussing around with curves, gamma, detail level, etc. Photomatix took 2 minutes. I was looking for some extreme effects: CS5 didn't give me any.

But as I said, I posted some vehicle pictures earlier that worked really well in CS5. The jury is still out.

Did you ever look up just after sunset at the deep blue indigo sky, with brilliant red saturated colours touching the earth and say, "I wish I could capture that"? But you can't. That's a sight you have to experience in person, something that film or a digital sensor can't reach.

You can't do it with HDR either, but you can try. When I look at this image I can almost imagine being there. A 5-shot bracketed set of exposures, rendered in HDR via Photomatix. I used a graduated screen to desaturate the building lights and marginally change their hue a bit. Post-crop vignetting adds to the rich feeling. I'm sure it's oversaturated, but it looks good on my laptop!

Saturday, September 11, 2010

"Fall Colours 2010" is a GO!

OK, we're on. October 2/3, 2010 at my place up on 12 mile lake. Come join us!

As I write this, I know there are at least 6 or 8 people coming up, and I know there'll be more. I'm billing it as a "workshop" but it's really an opportunity to shoot the awesome fall colours in the Ontario Highlands, in the company of, and under the guidance of, other photographers.


Here's one of the locations I found to shoot at sunset. By the way, if you're a fisher(man), the fish were jumping all around me while I shot this image! Smallmouth Bass, I think.
Hurry, hurry, hurry! Accommodations are going to be scarce if you wait too long!


Go here for more information: http://www.photography.to/

Photomatix or CS5 to create HDR's?

They each have their strengths. Photomatix Pro gives you much more range of adjustment of effects and colours; CS5 handles image alignment much better. I'll experiment more later, but in the meantime...


"By the Dawn's Early Light"

I took this image from the 10th floor of my mother's building, looking WESTWARD at the construction site next door at DAWN. Yes, you read that right: the sunrise was BEHIND me.  Photomatix did a great job enhancing the colours (and I added a little Topaz Adjust for the detail and other effects), but the alignment between the 5 handheld exposures was less than perfect.

I was actually intending a photo that shows the whole crane from top to bottom, but I like this crop much better because the full frame looks too cluttered to me.

Thursday, August 26, 2010

Shooting with a bunch of pro's is inspiring!

And at the same time, sobering. It makes you recognize your shortcomings and makes you wonder if you really do measure up! (there's room here for comments, folks. Leave a note telling me how talented and wonderful I am, and I'll be forever grateful to you for stroking my ego!)

  • I don't have the technical expertise that Jim Camelford has
  • My vision and creativity is nowhere near that of Ron Goodlin
  • Alex and Fern showed me that the viewpoint of people who are still relatively new and not afraid to explore concepts and try new things can be inspiring. It's fun to watch people grow!
  • John and Mary showed a diligent attention to detail
  • Kathy is incredibly tenacious and won't give up until she gets the shot she wants, and
  • The more I see Lance Gitter at work, the more I realize how I am a mere grasshopper. He has ALL of the qualities I listed for the other people above. Lance, lying on the tarmac at the airport to get that shot of the Harvard Trainer with a full reflection in a puddle was (a) an example of how far you have to go to get the best image, (b) a sign that sometimes you have to think outside the box and (c) inspiring, because I'm going to try to be less lazy and get some of those killer shots too!

Enough kudo's. Where I'm pretty good is at creating post-processed images, but you need good original shots to work from and that's what I'm going to work ON. The opportunity to go out and shoot with other people and learn from them is invaluable.

As you may have surmised from the above, I spent a few days on what I would loosely call a "workshop" ('Expedition' and 'Safari' don't do it. Is there a more appropriate word?) down along the North Shore of Lake Erie. Thanks to Kathy for her work arranging everything and to Jim for his incredible hospitality, even while worried about Jen in the hospital, and to everyone else, well just for being there!

Here are a few shots I took on the trip. There are some more on my Smugmug site (they start here), but these are the ones I like best for now (haven't had a chance to look at everything! There may be more...)


We met this guy sitting in a chair in a park in Dunnville. He claims to be a well known political activist through the '80s, that he's been arrested 10 times, that he's well known to agencies like CSIS, the CIA and the FBI... anyway, he's incredibly articulate and, some of us think, would make a great subject for a TV documentary. His name is Ken Hancock, but Google doesn't have much on him.


These two images illustrate the difference when you add an interesting person to a landscape shot. I find the second image, with Alex Ney in it (thanks for posing, Alex!) to be far more interesting than the ordinary landscape. I should have taken a little extra time to use a flash fill, but I managed to make do with Lightroom and Photoshop. Both photos were taken on the shore of Lake Erie at sunset, near Jim's cottage.


This image was taken at the Dunnville Airport, which houses the RCAF Museum that specializes in the Yale and the better know Harvard trainers. I daresay virtually all RCAF pilots from WWII onward trained in one of these. A couple of planes flew in from nearby Tillsonburg to wait out some bad weather. It's interesting that I happened to click on the first website after googling "Harvard Trainer" and came across this illustration. Plane #46 is mounted on a hard display stand at Dunnville. Plane #47 was one of the two that flew in! This is, of course, an HDR enhanced image, with further processing in Photoshop using Topaz Adjust.


We went to a place called "Cottonwood Estates" where people dressed up in 19th Century costume and the house was restored to the splendour of the mid-19th century. I was decidedly NOT inspired to photograph inside (not my thing. Too much clutter, I didn't see any way to isolate subjects). I did, however, shoot this exterior shot as an HDR, then I used Topaz to simplify and smooth it (as opposed to my usual enhancement of details). I shot with the 12mm wide angle lens, then used a perspective crop in Photoshop to square up the building.

Announcement: we're going to do something up in the Haliburton Highlands on the weekend of October 2, 2010. It should be about the best time to shoot leaves and autumn outdoor shots and we're going to make a workshop out of it. I'll send out more information soon, but if you are thinking you might like to attend, send me an email.

Monday, August 16, 2010

I Love Thunderstorms!

I said that before. About a month ago. At the time I said I remembered having a multiple-lightning-hit phot from years ago and that I'd post it here when I find it. I will: I just haven't found it yet.

But last night, there was a thunderstorm. There was a lot of lightning going on, but not right overhead. It was a really active storm, but the lightning was cloud-to-cloud, not cloud-to-ground. The storm centre had passed and it wasn't raining that hard. OK, I grabbed the camera, the tripod, an umbrella and headed out into the back yard.

Without further ado, here's what I got:


This is a 5-shot multiple exposure taken over the course of about 5 minutes. Any time the shutter was open for more than 15 seconds, I had to wait the same length of time for the noise-reduction process to complete. Frustrating, because I wanted to press the button again!

If you want to try this at home, here's what to do. This is for a nighttime shoot: all the numbers go out the window if you're shooting during the day. I think it's do-able, but you'll have to experiment to avoid light polluting your images.

The setup
  • You need a tripod. Ideally you should also have a shutter release cable (mine was in the house, but I wasn't going to leave the camera out in the rain without an umbrella to go get it!).
  • Find a spot where your camera isn't going to get rained on or take a chance and use an umbrella.
  • Use a relatively wide angle lens. You don't know where the lightning is going to be and it's good to include something other than sky in the shot. Find a way to focus on infinity then switch to manual focus. Don't forget to turn off the VR if you have it, when you're on a tripod. I forgot.
  • Set the ISO relatively low. I happened to use the minimum (ISO = 100) but that's not necessary. I also opened the lens all the way (f/3.5 in this case) but if I were doing it again, I'd use f/8 and an ISO around 250.
  • Set the shutter to "M" and use the 'bulb' setting so it stays open as long as you hold down the shutter.
Shooting the pictures

OK. What we're shooting for (pardon the pun) is a single frame with a bunch of lightning bolts in it, or at least one spectacular one. Since my session was a passing storm and there were no really good cloud-to-ground bursts, what I was planning to do was to shoot several frames and then sandwich them together. That only works if you take care not to move the camera between shots.

My typical exposure time was in the 15-30 second range. I was trying to stay under 15 seconds as I mentioned above, but generally that didn't work. Since there was about 5 seconds between lightning events, I waited for one, then pressed the shutter release a few seconds later and held it down until there was some activity. Not just one hit, several, if I could get them. I seldom actually saw the lightning bolt itself, just the flash in the sky, but the sensor picked it up!

Shoot, hold for some events, release, wait for the NR process (this may be a Nikon thing. I don't know about other brands). If I didn't think there was anything going on, i tried to beat the 15 seconds or I switched the camera off and back on again to defeat the NR delay and take another shot.

I was out for about 15 or 20 minutes, until the storm had moved off to the east, out of sight. Inside, upload the images to the computer, check them out and select good frames in Lightroom.

Sidebar: since there's a thunderstorm going on, you did shut down your computers, didn't you? I actually didn't, but mine are plugged into a UPS (uninterruptible power supply) with superb surge protection. Won't help if you get a direct lightning hit, but it's pretty good otherwise. Get one. They're inexpensive. They're heavy, though — all battery — so get one at the local computer store instead of trying to ship it from somewhere else.
Post Processing

If you're using Lightroom, you can select the images of interest, right-click, choose "Edit in Photoshop" and select "open as layers". Or you can do it manually, your choice. Now unless you do something, the only layer that will be visible will be the top one, but it's a simple task to select a blending mode that works. For me, that was "Lighten". I went through all the layers and set them to this mode which made all the lightning bolts visible!

Occasionally that didn't work, so I turned off a couple of layers, or played with them by adding a layer mask and painting on it. My main concern was that the clouds had moved between shots and I wanted to see the better formations. This took a bunch of fiddling. I discovered that using a soft brush with low opacity made things blend better.

Night shots are blue. Not that there's anything wrong with that, but I didn't think it conveyed the "heat" of a thunderstorm. After saving the image as a multi-layer .psd file, I flattened it, then converted it to greyscale (black and white). Just for fun, I ticked off the "tint" box and lo and behold, up came this rich golden orange colour. Save it, back to Lightroom to crop and tweak some exposure values, and we're done.

If most of what I just wrote is Greek to you, then you should join NAPP and learn a bit of Photoshop. Most of what I did would be considered "basic". If you have a good lightning bolt shot in your own portfolio, I'd love to see it, because
I Love Thunderstorms!

Sunday, August 15, 2010

For the Birds!

I had the privilege of shooting with legendary bird photographer Stu Freedman and with Ron Goodlin yesterday. I was invited along because Lance couldn't make it (thanks, Lance!) and had a chance to meet the man who founded the GTCCC and who's been shooting pictures since before I was born. Stu is 86 years old and going strong! I was tired out from the morning shoot, and I'm a mere child at 63!


You know you have to be secure in your abilities to post a blurry, out of focus shot and not worry about it. 1/3 second, handheld. What do you want at 6:00 am?
Stu showed us some bird photos he's taken. He shoots with a 400mm zoom, and hand-holds most of the time. So I snapped on my 2x extender and my 70-200mm f/2.8 and figured if he could do it, I could too. WRONG.

After 300 exposures, the best in-flight shot I could manage was this one:


and it absolutely SUCKS. I had to enhance it in Photoshop to see any detail at all. This is HARD!

I did manage to get this image, of a gull from close up.


On a tripod, without the telextender, at f/2.8, ISO 800.

Ron sent me an email a few minutes ago, bemoaning the fact that he too was unable to get any good in-flight shots, despite the fact that he was using substantially better lenses than I was:


Here's Ron with his little 600mm f/4.

My favourite image of the morning was this one:


Again without the telextender. 1/60 sec handheld at 200mm, f/8. "VR" does work! (vibration compensation in the lens).
or this one:


I call it "The Choir". They sure made a lot of noise! On the tripod, with the 400mm wide open.


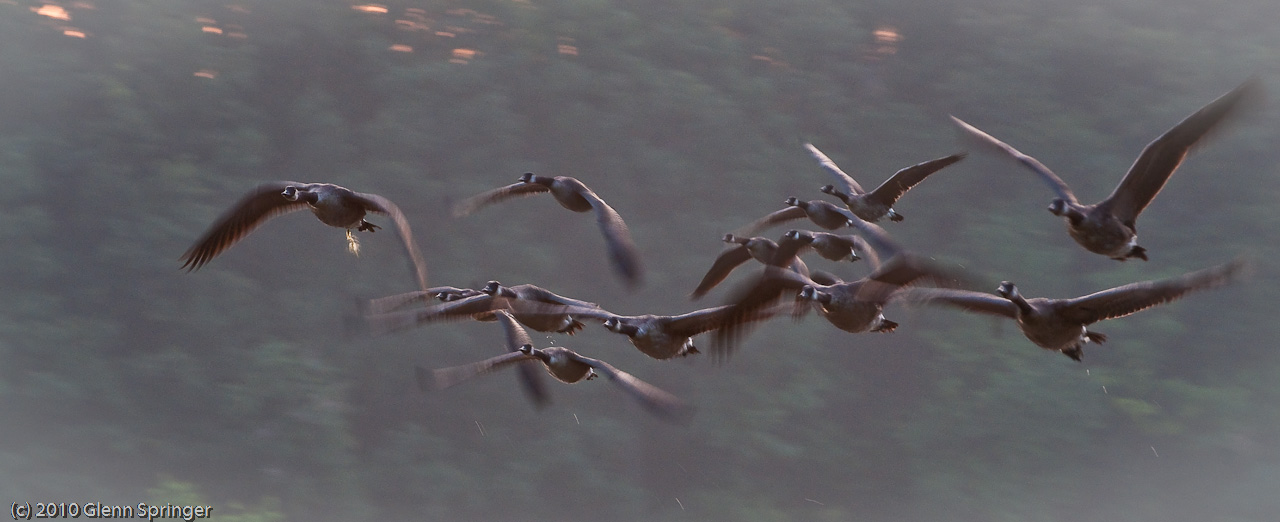
I'm sensing a pattern here. I was able to get some fairly good shots of birds sitting still, reasonably close, but nothing moving and far away (the flock of geese was a lucky accident). Maybe long lenses are not for reaching out and touching from a distance, maybe they're about filling the frame from closer up...

I put a couple of dozen shots up on my Smugmug page (click here). Some of them were Richard Martin-type shots of thistles and flowers, which I do better than birds! That's all I got out of 300 exposures...