
So if you want to help, you must know people who need really good First Aid kits because the ones we make are Outstanding. If you know someone who has a business, the law requires that they have one but anyone with a home or car or kids or dogs… What about a little kit for photographers? Fits in your camera bag and I’ll put extra sterile gauze pads inside to use wiping down your camera stuff! Go to the FAC First Aid website or email me and I’ll take care of you or your contacts!Photographically, it’s been an interesting few weeks. I have a bunch of pictures to show you, which might give you some ideas or send you exploring in some new directions. I did some stuff I'm not that used to.
What I tried was (a) using natural light, (b) HDR techniques and (c) shooting birds with the long lens.
I took some shots of my kids and grandkids the other day, using only natural light. I think the best light in the world is what comes through a North-facing window (OK, one shot was at an East-facing window and I don’t see much difference!)

Facing the window. My newest granddaughter Leah

Leah's mom, Maria. She's facing the window, but I'm off to the side. I love this lighting!

Kelly's quartering into the light. Now you don't need to soften the skin on a 6 year old but look how mellow it makes the image!

This picture of Ryan at a chess board made me think about a picture I DIDN’T take last week. I was out for coffee with a friend and noticed a young couple sitting in the coffee shop playing chess. There was such a feeling of intimacy between them and I really wanted to capture that picture but I didn’t because I didn’t want to intrude and because I’m generally shy about asking people if I can shoot them. For two days, I’ve been picturing that shot and regretting that I didn’t get it. So I resolve to try harder to step out of my comfort zone in future. That’s what I meant about exploring new directions. Am I making any sense?
A phone call from a journalist at Sun Media set me going in another direction. This had to do with marketing my First Aid products but in the end he asked me for a product shot which wasn’t in my archives. Well it is Spring, and it’s time to set up my studio which has been parked for the winter! The garage isn’t heated, you see… anyway it spurred me to set it up again to take a couple of product shots.

This is the finished shot.

I took it on the white light tent background but I created a background and added a twist: the helmet is an HDR image. OK, I need to explain that! HDR is a technique that allows a wider than normal range of light levels to be displayed in a photo. It stands for “High Dynamic Range”. You can do it with as little as 2 exposures, one light and one dark and combining them in an appropriate way.
You can even use one picture, if you shoot in RAW because you can adjust the exposure to show details in the shadows and use a second copy of the image where the details in the highlights are shown, then mix the two. There are a bunch of different software packages out there to achieve this, but the benchmark is Photomatix Pro.
Anyway, look at the motorcycle helmet in the picture. Go ahead, click on it to blow it up. Amazing how detailed it is, isn’t it? I didn’t want to do the whole picture that way, so I just stripped in the HDR expanded helmet on a new layer and left the rest of it the way it was exposed in the light tent. The helmet is a combination of 5 different exposures. So in this case I used HDR techniques on PART of a picture.
But even Photomatix doesn’t go far enough sometimes, so there are additional programs like Topaz Adjust 4 which can provide some interesting effects. Thanks to Lance for pointing me in that direction!

This is my outdoor/motorcycle First Aid kit. The helmet is in the shot to give it a sense of size. By the way, there is no table, no reflection: shot in the white tent and everything created! Click on it to blow it up.I really got interested in HDR’s and the more extreme effects in Topaz (which is a Photoshop plug-in, by the way). Here’s a variety of shots handled in different ways but all HDR.

Some people think this is what HDR is all about. Just look at the detail! The colour depth, the sharpness...

And this is completely different! Textures, motion... this is a false HDR, created from only one image, and two separate treatments on the car and the background in Topaz. Blow this one up. It looks best when viewed big.

...or this cartoon-like treatment with super saturated colours

This is more of a pure HDR expansion of the range of light at dawn. I chose not to expand the shadow areas, the cloud and the reflections in the water are the point of this shot. Here's a case where (I think) the horizon line should be in the centre of the image to give equal importance to the sky and the reflection.Except for the police car image, I used 5 exposures for each of these shots: ranging from 2 stops underexposed to two stops over. The D300 will do that automatically. The software will compensate for some of the variations when handholding but the best results come from tripod mounting the camera and shooting with precision.
So I'm really taken with the potential of HDR photography. It's going to be hard not to use it all the time!
When Dr. Ron was up here, we drove past an empty osprey nest. I know where there are several of them in the Balsam Lake area. Driving up the other day, I saw that the ospreys are back! I loaded the 400mm lens and learned how difficult it really is to shoot birds on the wing with a long lens. First of all, there’s trying to find it in the viewfinder. Then there’s focus, which is really critical! I ended up shooting about 150 frames and only got about 6 in focus! Autofocus is way too slow, and manual is, well, tough!
Here’s an out-of-focus or at least motion blurred shot of a Canada Goose which I kind of like the dynamic of anyway:

And here’s a picture of an Osprey in flight that actually worked:

I got one shot of it coming in to land at its nest but… out of focus! So I decided to unlimber my painting tools and give it a shot.

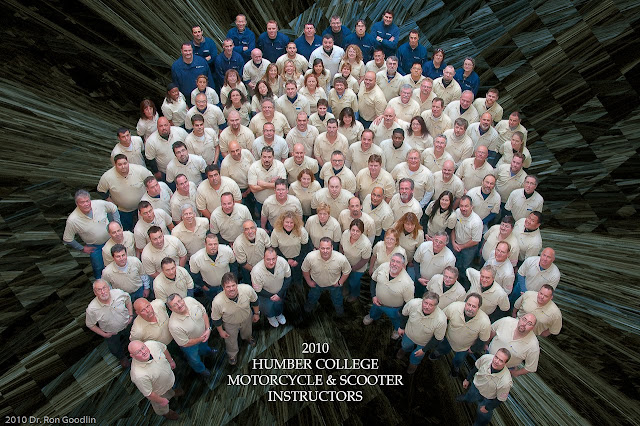
Everything you see is created. There is no original photo in this image. I sketched on new blank layers as if I laid tracing paper over the image, then discarded the original image (which was out of focus anyway!). Topaz provided some enhanced colours on the bird and the Photoshop Texturizer provided the canvas. This was done in Photoshop, not Painter 11.One more picture. This one isn’t mine, but I “art directed” it. Every year I shoot the instructor group picture at Humber College but this year I wanted to make it a bit different. So I invited Dr. Ron to come shoot it and we gave the picture to John Kerns to postprocess. He’s really creative with Photoshop effects. I gave both of them totally free rein: I only told Ron how I wanted to arrange the people in the shot, where to shoot from, what lens to use, what lighting, otherwise he was on his own! Same thing with John! Just kidding. What do you think? Did these guys do a great job, or what!
Well, tomorrow I get my new motorcycle, instructing season starts next week, I'm planning my vacation trip to Newfoundland, the sun is shining, the grass is turning green... trilliums are two weeks away, it's a new season, new beginnings. See y'all!