Thursday, August 26, 2010

Shooting with a bunch of pro's is inspiring!

And at the same time, sobering. It makes you recognize your shortcomings and makes you wonder if you really do measure up! (there's room here for comments, folks. Leave a note telling me how talented and wonderful I am, and I'll be forever grateful to you for stroking my ego!)

  • I don't have the technical expertise that Jim Camelford has
  • My vision and creativity is nowhere near that of Ron Goodlin
  • Alex and Fern showed me that the viewpoint of people who are still relatively new and not afraid to explore concepts and try new things can be inspiring. It's fun to watch people grow!
  • John and Mary showed a diligent attention to detail
  • Kathy is incredibly tenacious and won't give up until she gets the shot she wants, and
  • The more I see Lance Gitter at work, the more I realize how I am a mere grasshopper. He has ALL of the qualities I listed for the other people above. Lance, lying on the tarmac at the airport to get that shot of the Harvard Trainer with a full reflection in a puddle was (a) an example of how far you have to go to get the best image, (b) a sign that sometimes you have to think outside the box and (c) inspiring, because I'm going to try to be less lazy and get some of those killer shots too!

Enough kudo's. Where I'm pretty good is at creating post-processed images, but you need good original shots to work from and that's what I'm going to work ON. The opportunity to go out and shoot with other people and learn from them is invaluable.

As you may have surmised from the above, I spent a few days on what I would loosely call a "workshop" ('Expedition' and 'Safari' don't do it. Is there a more appropriate word?) down along the North Shore of Lake Erie. Thanks to Kathy for her work arranging everything and to Jim for his incredible hospitality, even while worried about Jen in the hospital, and to everyone else, well just for being there!

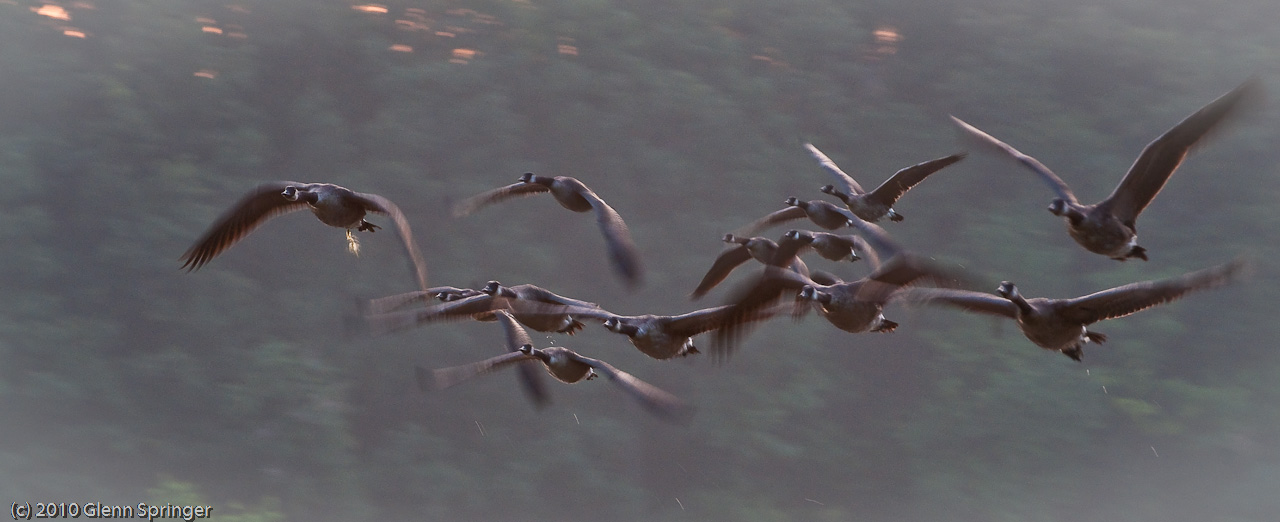
Here are a few shots I took on the trip. There are some more on my Smugmug site (they start here), but these are the ones I like best for now (haven't had a chance to look at everything! There may be more...)


We met this guy sitting in a chair in a park in Dunnville. He claims to be a well known political activist through the '80s, that he's been arrested 10 times, that he's well known to agencies like CSIS, the CIA and the FBI... anyway, he's incredibly articulate and, some of us think, would make a great subject for a TV documentary. His name is Ken Hancock, but Google doesn't have much on him.


These two images illustrate the difference when you add an interesting person to a landscape shot. I find the second image, with Alex Ney in it (thanks for posing, Alex!) to be far more interesting than the ordinary landscape. I should have taken a little extra time to use a flash fill, but I managed to make do with Lightroom and Photoshop. Both photos were taken on the shore of Lake Erie at sunset, near Jim's cottage.


This image was taken at the Dunnville Airport, which houses the RCAF Museum that specializes in the Yale and the better know Harvard trainers. I daresay virtually all RCAF pilots from WWII onward trained in one of these. A couple of planes flew in from nearby Tillsonburg to wait out some bad weather. It's interesting that I happened to click on the first website after googling "Harvard Trainer" and came across this illustration. Plane #46 is mounted on a hard display stand at Dunnville. Plane #47 was one of the two that flew in! This is, of course, an HDR enhanced image, with further processing in Photoshop using Topaz Adjust.


We went to a place called "Cottonwood Estates" where people dressed up in 19th Century costume and the house was restored to the splendour of the mid-19th century. I was decidedly NOT inspired to photograph inside (not my thing. Too much clutter, I didn't see any way to isolate subjects). I did, however, shoot this exterior shot as an HDR, then I used Topaz to simplify and smooth it (as opposed to my usual enhancement of details). I shot with the 12mm wide angle lens, then used a perspective crop in Photoshop to square up the building.

Announcement: we're going to do something up in the Haliburton Highlands on the weekend of October 2, 2010. It should be about the best time to shoot leaves and autumn outdoor shots and we're going to make a workshop out of it. I'll send out more information soon, but if you are thinking you might like to attend, send me an email.

Monday, August 16, 2010

I Love Thunderstorms!

I said that before. About a month ago. At the time I said I remembered having a multiple-lightning-hit phot from years ago and that I'd post it here when I find it. I will: I just haven't found it yet.

But last night, there was a thunderstorm. There was a lot of lightning going on, but not right overhead. It was a really active storm, but the lightning was cloud-to-cloud, not cloud-to-ground. The storm centre had passed and it wasn't raining that hard. OK, I grabbed the camera, the tripod, an umbrella and headed out into the back yard.

Without further ado, here's what I got:


This is a 5-shot multiple exposure taken over the course of about 5 minutes. Any time the shutter was open for more than 15 seconds, I had to wait the same length of time for the noise-reduction process to complete. Frustrating, because I wanted to press the button again!

If you want to try this at home, here's what to do. This is for a nighttime shoot: all the numbers go out the window if you're shooting during the day. I think it's do-able, but you'll have to experiment to avoid light polluting your images.

The setup
  • You need a tripod. Ideally you should also have a shutter release cable (mine was in the house, but I wasn't going to leave the camera out in the rain without an umbrella to go get it!).
  • Find a spot where your camera isn't going to get rained on or take a chance and use an umbrella.
  • Use a relatively wide angle lens. You don't know where the lightning is going to be and it's good to include something other than sky in the shot. Find a way to focus on infinity then switch to manual focus. Don't forget to turn off the VR if you have it, when you're on a tripod. I forgot.
  • Set the ISO relatively low. I happened to use the minimum (ISO = 100) but that's not necessary. I also opened the lens all the way (f/3.5 in this case) but if I were doing it again, I'd use f/8 and an ISO around 250.
  • Set the shutter to "M" and use the 'bulb' setting so it stays open as long as you hold down the shutter.
Shooting the pictures

OK. What we're shooting for (pardon the pun) is a single frame with a bunch of lightning bolts in it, or at least one spectacular one. Since my session was a passing storm and there were no really good cloud-to-ground bursts, what I was planning to do was to shoot several frames and then sandwich them together. That only works if you take care not to move the camera between shots.

My typical exposure time was in the 15-30 second range. I was trying to stay under 15 seconds as I mentioned above, but generally that didn't work. Since there was about 5 seconds between lightning events, I waited for one, then pressed the shutter release a few seconds later and held it down until there was some activity. Not just one hit, several, if I could get them. I seldom actually saw the lightning bolt itself, just the flash in the sky, but the sensor picked it up!

Shoot, hold for some events, release, wait for the NR process (this may be a Nikon thing. I don't know about other brands). If I didn't think there was anything going on, i tried to beat the 15 seconds or I switched the camera off and back on again to defeat the NR delay and take another shot.

I was out for about 15 or 20 minutes, until the storm had moved off to the east, out of sight. Inside, upload the images to the computer, check them out and select good frames in Lightroom.

Sidebar: since there's a thunderstorm going on, you did shut down your computers, didn't you? I actually didn't, but mine are plugged into a UPS (uninterruptible power supply) with superb surge protection. Won't help if you get a direct lightning hit, but it's pretty good otherwise. Get one. They're inexpensive. They're heavy, though — all battery — so get one at the local computer store instead of trying to ship it from somewhere else.
Post Processing

If you're using Lightroom, you can select the images of interest, right-click, choose "Edit in Photoshop" and select "open as layers". Or you can do it manually, your choice. Now unless you do something, the only layer that will be visible will be the top one, but it's a simple task to select a blending mode that works. For me, that was "Lighten". I went through all the layers and set them to this mode which made all the lightning bolts visible!

Occasionally that didn't work, so I turned off a couple of layers, or played with them by adding a layer mask and painting on it. My main concern was that the clouds had moved between shots and I wanted to see the better formations. This took a bunch of fiddling. I discovered that using a soft brush with low opacity made things blend better.

Night shots are blue. Not that there's anything wrong with that, but I didn't think it conveyed the "heat" of a thunderstorm. After saving the image as a multi-layer .psd file, I flattened it, then converted it to greyscale (black and white). Just for fun, I ticked off the "tint" box and lo and behold, up came this rich golden orange colour. Save it, back to Lightroom to crop and tweak some exposure values, and we're done.

If most of what I just wrote is Greek to you, then you should join NAPP and learn a bit of Photoshop. Most of what I did would be considered "basic". If you have a good lightning bolt shot in your own portfolio, I'd love to see it, because
I Love Thunderstorms!

Sunday, August 15, 2010

For the Birds!

I had the privilege of shooting with legendary bird photographer Stu Freedman and with Ron Goodlin yesterday. I was invited along because Lance couldn't make it (thanks, Lance!) and had a chance to meet the man who founded the GTCCC and who's been shooting pictures since before I was born. Stu is 86 years old and going strong! I was tired out from the morning shoot, and I'm a mere child at 63!


You know you have to be secure in your abilities to post a blurry, out of focus shot and not worry about it. 1/3 second, handheld. What do you want at 6:00 am?
Stu showed us some bird photos he's taken. He shoots with a 400mm zoom, and hand-holds most of the time. So I snapped on my 2x extender and my 70-200mm f/2.8 and figured if he could do it, I could too. WRONG.

After 300 exposures, the best in-flight shot I could manage was this one:


and it absolutely SUCKS. I had to enhance it in Photoshop to see any detail at all. This is HARD!

I did manage to get this image, of a gull from close up.


On a tripod, without the telextender, at f/2.8, ISO 800.

Ron sent me an email a few minutes ago, bemoaning the fact that he too was unable to get any good in-flight shots, despite the fact that he was using substantially better lenses than I was:


Here's Ron with his little 600mm f/4.

My favourite image of the morning was this one:


Again without the telextender. 1/60 sec handheld at 200mm, f/8. "VR" does work! (vibration compensation in the lens).
or this one:


I call it "The Choir". They sure made a lot of noise! On the tripod, with the 400mm wide open.


I'm sensing a pattern here. I was able to get some fairly good shots of birds sitting still, reasonably close, but nothing moving and far away (the flock of geese was a lucky accident). Maybe long lenses are not for reaching out and touching from a distance, maybe they're about filling the frame from closer up...

I put a couple of dozen shots up on my Smugmug page (click here). Some of them were Richard Martin-type shots of thistles and flowers, which I do better than birds! That's all I got out of 300 exposures...