Wednesday, October 28, 2009

Memory. Wouldn't it be nice to still have some? And some portrait tricks

The older I get, the more I realize I'm losing it. I suppose that's not a bad thing -- when I start not realizing that I'm not remembering stuff, I'll be on that slippery downward slope. My father has an expression: "Everything hurts. Except the stuff that doesn't work". He's pretty well with it for a guy in his 90th year.

Back to me (this is all about me, after all!) and the subject at hand. Sometimes I can't remember what I did 5 minutes ago, never mind last month. Today I'm going to talk about two things: trying to keep track and remembering stuff, and my beginning experimentation with portraits.

Remembering stuff.
Photoshop is such a wonderful program. I think if I keep playing with it for another 20 years (I have been at it that long: I started in 1990. How I wish I had taken some formal training!), I might start to be able to use it in more than a perfunctory manner. I skim the surface. I jump from one tool, one method to another, trying whatever happens to catch my eye or my imagination, then moving on to something else.

The problem is, I might do something once or twice, then not use it again for 6 months, or whenever the mood might strike me. I come across an image and say to myself, "Gee I remember using a similar technique a while ago, I'll bet it'll work well on this image too..." and then for the life of me, I can't remember how I did it. An example? Orton effect. Or doing HDR's. Well I never really mastered that one, but it's still a good example. Here's another one — a big one for me: painting in Painter 11. I spent a whole weekend on a course with Hilarie learning how to use the program and how to paint. I had great visions of becoming a pixel artist. I did a couple of great images (if I do say so myself!), then I didn't use it for 5 or 6 months. I honestly don't remember how.

Or all the great stuff I picked up at the Ben Willmore  Photoshop workshop I attended last year. Or the tips I read about in Photoshop User magazine, try once and say, "that's neat! I'll have to remember that!".

I need to find a way to remember how I did stuff, that I lose if I don't use it regularly. Especially those things that worked well.

Some stuff sticks with you.but only if you keep using it. Like now I remember that hitting alt-backspace will paste the foreground colour into the selection of an image. Or the "X" key switches between foreground and background colours. Or the Ruler Tool is now hiding under the eyedropper. But a lot of the time, I just can't remember what I did to achieve a certain effect. For example, the picture of the Empire State building which I posted a couple of weeks ago: I would have liked to have the base and the background of the building shrouded in fog. I remember that last year, I created a fog effect on an image by using a layer mask, and I think I used a gradient to make it happen, but damned if I can remember how.

Get to the point. Make a long story short (too late!). I'm going to start writing down what I've done to images when it works out well. That way I can go back and use the technique again months later. Photoshop has a tool which helps you do that: the "History Log" (access it under General Preferences). It will tell you, stroke by stroke, what you did on an image and you can either create a separate text file or store it in the metadata for an image. How useful is it? So-so. It's very detailed. Here's an quick example:

2009-10-28T10:08:39-04:00 File soft kelly-72.jpg opened
Open C:\Users\faczen\Pictures\Blog 1000\soft kelly-72.jpg

Hue/Saturation 1 Layer
Make adjustment layer Using: adjustment layer
Type: hue/saturation
Preset Kind: Default
Without Colorize

Modify Hue/Saturation Layer
Set current adjustment layer To: hue/saturation
Preset Kind: Custom
Adjustment: hue/saturation adjustment list
hue/saturation adjustment
Hue: 0
Saturation: 32
Lightness: 0

Merge Visible
2009-10-28T10:18:09-04:00 File C:\Users\faczen\Pictures\Blog 1000\soft kelly-72.jpg saved
Save
 OK, it helps, but it's not good enough to remind me "how" I did something, just "what". So what I decided to do is to create some text files to describe what I've done when I want to remember a technique. Not in incredible detail like the above, but follow the comments I'm making on the following image. I'm doing this on the fly: writing it as I create this Blog post.:


You need to blow this up to see the detail of the changes between the before and after of this portrait. Click on the image. I'll wait right here until you come back.
A little background: I shoot headshots of students in a certain safety course every month. I've mentioned this before. I need to print a 2"x3" photo for them to submit to the Government for their ID. I shoot about 30 or 40 pictures in half an hour, then I spend an hour or so outputting them. I do the same thing all the time, so I created an "action" in Photoshop to accelerate the workflow: It opens the image, then opens a levels dialogue so I can adjust the brightness, etc. Then it opens a cropping dialogue so I can crop the image to the exact size I want. It sharpens it and saves the file. All 30 or 40 pictures are done the same way. Then I place them 15-up on a sheet and print them on a Canon inkjet printer and trim them out. I need to remember to turn the saturation down about 10% and move the hue up about 5 points because my printer still doesn't match my computer screen no matter how hard I try. The images aren't very flattering, but they're not half-bad. Sometimes I'll clean up some blemishes before starting the action, and sometimes I'll stop it before the sharpening, especially for women whose images should be a bit softer than guys. The left-hand picture is exactly what comes out after the action is completed, except for size.
 A sidebar. These pictures are taken with the D300 and the 24-120mm lens, usually zoomed to about 100mm. I use the SB-600 flash with the Gary Fong diffuser attached, the exposure is on Manual at 1/100 sec at f/11, ISO 400, although I'll open up a bit if the subject has dark skin. The resulting photo is about 1 stop underexposed so no hilites are blown out. I get the students to sit in a chair facing about 30° to the left, then turn their heads over their left shoulders and look at the camera (I need both ears in these shots).
 I opened the image, but in Camera Raw, not immediately in Photoshop. In a conversation with Dr. Ron I had learned that a technique for creating smooth, glowing skin in portraits was to reduce the clarity (move the slider to the left) and I wanted to try it. I actually reduced it quite a bit, to -65%. Then I opened it in Photoshop and at the same time, I opened the original image as well. I dragged the smoothed version (low clarity) into the original image to put it on a new layer. Why? Well because I wanted to retain the detail in the hair and eyes, etc so I was planning to overlay the two versions.

Next, I removed blemishes, using the Healing Brush. I worked on both layers. It was easier on the smooth layer because a lot of the blemishes were gone anyway. I created a layer mask  on the smooth layer and started painting out the things I wanted to retain from the original image: the hair, the eyes, the mouth. I like adding soft hilites in the eyes, so I duplicated the background layer and painted hilites at the bottoms of the irises using a soft chalk brush at about 25% opacity. I reduced the opacity of this layer to about 60% before merging it down so that the hilites would blend in better.There was a strand of hair over the left eye which I cloned out carefully on both layers. The hair was a little too bright, so I used the Burn tool to bring it down a little. I saved the image as a .psd file, then flattened it and saved it as a .jpg. Done, except for resizing it up slightly for this Blog, and putting the before and after on one file.

So this was a pretty simple technique (if you're a Photoshopper, you'll know what I mean. If not, you'll think this was crazy overkill!). But unless I do some more portraits in the next months, I'll forget what I did so I'm going to copy what I just wrote, from the picture on down, and save it in a Word file to retrieve when I want to remember. Back in a sec... ok, done. The filename is "Soft portraits using the Clarity slider".

OK. The lesson here is, it's never too late to start recording things so that you'll remember them later. Start today. If someone asks "how did you do that?", you can tell them. If you want to do it again, you can look it up and see what you did. I plan to start today, recording successful activities. I'll come back in 6 months and tell you how it went.

Two more images before I leave you today. I was working on a picture I took of my 6-year old granddaughter Kelly a couple of days ago (just getting a feel for the same technique) and I had created a layer mask. In order to refine it, after painting on it, I alt-clicked on the mask so I could see it directly and this is what I saw:


Does that look like the sketch of a 6-year old? Bizarre. Is that what she's going to look like when she's 20? Hope I'm around to see the beautiful young lady I just portrayed!

And finally here's a fall shot I just happen to like. Hope you like it too!


This looks really different on a white background.
Click the picture to enlarge it and view it on white.
You can see more of my stuff, of course, by going to my Smugmug gallery. Everything is organized by month, although I have to do some work on the site to move some things around and hilite the images that I happen to like best!

TTFN!

Wednesday, October 14, 2009

Retouching Tutorial

Today's Blog is about retouching photos in Photoshop.

First, if you're not a NAPP member, you should be. Not only do you get a subscription to Photoshop User magazine, but you also get access to the member's area on the NAPP site, an opportunity to post a small portfolio there and have other knowledgeable photographers comment on your work. And you get a discount on NAPP/Kelby-sponsored courses and products.

NAPP is the "National Association of Photoshop Professionals" and their website is at http://www.photoshopuser.com/. Membership information is here.


Zooming In:
If you're using Internet Explorer, did you know you can easily zoom in to the page? I find it a lot easier to read when it's a bit bigger. In the lower right corner of your screen, you'll see a little "+" sign and it probably says "100%". Click there. It goes to 125%. Click again. Now it's 150%. A third click and you're back to 100%. Try it. You'll like it!

I got the idea for how to do this retouch by watching a tutorial by Scott Kelby on the NAPP site yesterday. I didn't do everything his way: for one thing, I missed how to do some stuff and found my own way (I plan to go back and watch it again: there are some things with masks I still don't know how to do and he made it look so easy!). Also, I wanted to put my own spin on some things.
After watching the tutorial, I looked for an image to play with and found one that I had shot last week. Here it is:


Not a terribly exciting picture but the element I was looking for, to practice with, was the water. Like the image in Scott's tutorial, it's not very interesting. What I wanted to do was to put a reflection of the trees in the water, but I also wanted to retain some of the texture, rather than just having a mirror-like reflection.

I'm sort of going to take you step-by-step through the exercise. I'll give you the basics, that way you can experiment on your own and find your own way of doing things like I did.

The first thing I did was to make a selection of the water. I used the Quick Selection tool and then cleaned it up using the lasso and other tools. I used the rocks sticking out on the right as the limit of the selection. What I wanted to do was paste a reflection of the trees into the water area only. Scott said to "save selection" but I must have done it wrong because I couldn't retrieve it later so I had to go back and do something else. What I did was to proceed to the next step: I selected inverse, in other words, everything else, then pasted it into a new layer and copied that new layer to a fresh file. But before I did that, I used the Transform tool to flip the image upside down.

Now I went back in the history to where I had selected the water. I selected the other document, and used a little trick to select only the active area -- I did a "select all" then used an arrow key to nudge the selection -- it automatically changes the selection to active pixels only -- try it -- then the reverse arrow key to negate the nudge and put it back where it was. OK now Ctrl-C to copy, return to the original document, and select "paste inside" from the menu. That put the inverted picture of the trees in the water only. Now I could move it around to where I wanted it.

But that made a mirror-like reflection with sharp edges. So the first thing I did was to reduce the opacity of the new layer to about 65%, so a little of the texture of the original water showed through. Not enough for me, though, so I had a brainstorm and went into the Filter Gallery and found the "ocean ripple" filter. Bingo! I changed some of the parameters until it looked right to me then applied. the filter.

I didn't like the hard edges along the shoreline, so I created a layer mask, then I got a soft, rough brush (I like the chalk brush), changed the opacity to about 30% and started painting ON THE MASK along the edges. If you look at the mask (alt-click it) you can see that you're painting grey on it. Remember, the mask blocks when it's black and is transparent when it's white.

Starting to look good. Now I repeated the process, but with a lot less detail on the water in the distance. Here the selection was just the hillside and I actually pasted the inverted reflection right into the background layer (well on a new layer, of course). I reduced the opacity again, transformed the image by scaling it up so that it overlapped the trees in the foreground and the edge of the frame, then changed the blending mode to "darken" so it would only affect the water.

Finally, I wanted to increase the contrast of the image, and the saturation, so I duplicated the background layer, set the duplicate layer to "Multiply" and then played with the levels until I was happy.

The whole process took me about 15 minutes. It took longer to write this! And here's the result:


Blow it up to see what it really looks like. Finally, I decided to try to crop the image better, so the finished product looks like this:


It's a keeper! I wish the sky were nicer, but that's a job for another day.

So what did you think? Was it a worthwhile topic? Did I give you enough detail, or too much? Did you get some ideas by reading this? Please give me some feedback and let me know if I should continue to do this kind of tutorials. Either click "comments" below, or just send me an email!

Monday, October 12, 2009

It's all about Vision

Continuing the theme from last week, photography is all about vision. Oh sure, great hardware helps to 'render' your vision, but do you really need it?

Here's a photo of the much-photographed Empire State Building in New York City:


It is, of course, located at 34th Street and 5th Avenue in Manhattan. I was in New York visiting my brand new granddaughter (oh yeah, and my son and daughter-in-law, and my sister and her husband, but the baby was the real reason!) and I took half a day to go into Manhattan specifically to visit B&H Photo. More on that later.

I bought a little point-and-shoot camera at B&H — not state-of-the-art, just something to kick around with. It's a Nikon (of course!) Coolpix S560. I threw in the battery and an SD-card and tried it. This is probably the 4th frame I shot with it (the first three being, "oh THAT's how that works"). Wasn't the lighting great?

About an hour later, I came back and shot this picture from exactly the same spot.


I had lost the light — the sun went behind some clouds, but this was shot with my D300 and my 12-24mm lens. Both shots were at the 35mm equivalent of 36mm. I was trying for the same picture.

Which one is better? The first one, because of the lighting.

I was interested in the comparison, so I cropped both shots in tight and converted them to monochrome. Except for the obvious lighting difference, which one is better (click the image to blow it up)?


The $2500 camera/lens combination on the left is contrastier and does have an edge in pixel sharpness but the $100 point-and-shoot isn't bad! It wasn't really a fair test because they were shot under different conditions, so it will be interesting to repeat the experiment under controlled conditions some time.

Does the equipment really make a difference? Sometimes. This picture was captured using the "C" (continuous) focus mode on the D300, relying on the high speed Silent Wave Autofocus motor in the Nikkor 70-200 f/2.8 lens. I shot at high repetition rate, about 6 frames/second. Blow it up and check out the tack-sharp focus. I did basically nothing to this shot in Photoshop, other than to rotate it for better framing.


This beast is a "turkey vulture", hanging around the dump in Minden.
Ugly, but majestic in flight.


...and sometimes not. This was done with the little Coolpix (by the way it's time to start thinking about getting ready for winter!).

 
It's all in your vision. Don't be afraid to get out and shoot no matter what kind of equipment you have. There is one caveat, though: be familiar with your camera. Know how to adapt to different lighting situations. Know how to use the tools you're using so that your mind can be focused on the image you're trying to create, not the hardware.

Here's one more image taken with the Coolpix. I went for a bicycle ride and couldn't have carried the big SLR with me. That's what I bought the little guy for!


I did create the clouds and sky in Photoshop. Much better than the featureless sky that was there. It was easy to do using the "Magic Wand" tool to select the bright sky then "Select Similar" and "Render Clouds" after choosing the blue and the white colours.

B&H Photo
I said I'd comment more about B&H Photo in New York. The place is overwhelming. I had only 2 hours but wish I had had the whole day to spend there. It's located at 34th St. and 9th Ave. in Manhattan and the best way to get there is by subway (take the "A" Train: I feel a song coming on!). They do have a parking lot, but I think you'd be nuts to try to drive into the city.

The store is the size of a typical department store. But it's just cameras! When I came in, I told the 'greeter' that I wanted to talk to someone about a technical issue with my D300, and I wanted to look for a point-and-shoot. He asked me what brand, and I said I didn't know, I was hoping for some advice. They have kiosks set up for each brand. One for Nikon. One for Canon. One for Sony. One for Panasonic. etc. You get the picture. At each kiosk they have EVERY CAMERA that maker has to offer on the market: set up so you can pick it up, play with it, shoot some pictures, and talk to an expert in that brand. You see why I said I needed more than two hours?

There were at least 80 cameras in the price range I wanted to spend ($200: I told you, I just wanted a little backup camera, not a fancy beast). I tried most of them. I couldn't decide — people told me to go for a Canon but I didn't like it as much as the Nikon (I'm biased, but the image looked better on the LCD. That said, it's not about what it looks like on the LCD but what it's like on the computer!). There was a Kodak camera with better features, but more than one person told me to stay away from that brand. So here I am, waffling back and forth, and completely out of time. I was supposed to meet my sister at 42nd & 5th in 5 minutes (I was late). I gave up. I decided I would order something online another day. On the way to the exit, there was a big sign: "Used Equipment". I wanted to look for a TC-17e teleconverter for my 70-200, so I stopped to ask. Nothing. "Do you happen to have any used Point-and-Shoot cameras?" Yep. The S560 came with everything, including a 2Gb SD-card and case, for $120. How could I NOT buy it?

So here's how it works: you agree to buy it. They throw it in a bin that looks like a typical blue box and put it on a conveyor belt. You go down to the central cashier, pay, then walk to the pickup counter where, as if by magic, your camera is already bagged and ready to go. What a system!

I know I'm going on and on, but it's an incredible place. If you're into photography, you HAVE TO go there, just to see it. I talked to a Nikon expert about my D300 issue: You stand in line (for a second, I was next!) for the "next available tech support person" who sits at a station behind a counter. The guy I talked to was very knowledgeable. I wanted to know about the micro focus adjustment function and he explained it to me in detail. Yes, you may need to create more than one preset for multiple focal lengths on a zoom lens, and no, it's not unusual that a given lens/camera combination might benefit by doing so. He dismounted my lens and commented on how dirty it was in the camera, told me to buy a blower brush and cleaned it for me while we were talking. He recommended a different brand of teleconverter which was less than half the price of the Nikkor TC-17e, but I think I'll stick with Nikon product.

Oh, if you want Canon advice, it's not the same guy. These people are dedicated to the brands they're assigned to and they all shoot those brands themselves. This guy had a D700 and much the same lenses I do. By the way, I played with a D3 at the Nikon kiosk. I want one! Only $5000...

PS: Check their hours of operation before you go. They're a bit unusual  since they're closed on any Jewish holiday and of course on the Sabbath. http://www.bhphoto.com/

As I said, I met my sister and brother-in-law. As we were walking past Macy's again, they had a string of "Santa Clauses in training". I handed my sister the Coolpix and she took this shot of me:


One more picture. This is what I went to New York to see:


This is the first time that I've put anyone else's pictures on my Blog. The following two images were made by Shannon Lafferty last weekend and they are superb. She gave me permission to post them here. No words are necessary. Click to blow them up as usual.


Shannon, I adore your work.

Monday, October 05, 2009

Great Autumn weekend "Workshop"

I spent this weekend shooting pictures with friends up here in the Haliburton Highlands. It was an educational as well as a fun weekend so I labelled this post, "workshop". Read on, to learn a few things about making pictures.

I don't get out shooting with other people enough. Everybody is different and I learned a whole lot of photography stuff because of them. You have to watch others shooting and, perhaps more importantly, view their images to understand that there are other ways of doing things. It's not about COPYING their techniques. Oh, there are some technical things to copy, but it's about understanding other approaches.

If there's a single message here it's this: OPEN YOUR EYES. GET OUT OF YOUR COMFORT ZONE AND LOOK AT THINGS DIFFERENTLY.

By the way I was really uncomfortable with my apparent skill level as compared to theirs. I put it down to "some days you have it, others you don't", but I found myself walking around with them, not seeing scenes to shoot, while they're clicking away. I put it down to two things: one, I've shot up here for two years and what seems new and exciting to them is humdrum and boring to me; and two, there's no question, as Iris and others know, I can't multitask well. The distraction of them being there and the pressure to perform put me off quite a bit. I need to clear my mind more. A little Zen goes a long way.

I'd like to show some of their images here but not everyone is as quick as I am to get their stuff edited, and besides, obviously I'd need their permission. In a future Blog posting, I'll either put up some examples or links to their own galleries.

In the meantime, here are a few things I learned or observations from the weekend.
  • Shannon sees things I wish I could see. Until now, I never thought of using a reflection in water as the PRIMARY subject of a picture. She took pictures in exactly the same place that I did and while I took a picture of a fall scene reflecting in the water, she photographed the colour and lines in the water. I looked at my images and yes, there was something there, but it was incidental. In fact, I had discarded the following picture because Ron was in the frame. But crop it a bit, and here's what I got (be sure to click on the image to blow it up: you can get a better feel for it if you do):


Hers had some spectacular reflected colour as well, which I couldn't capture. By the way, Lance saw Shannon's images right in the camera at the time she took them, and ended up with some very similar shots. "Imitation is the sincerest form of flattery"! Now here's a shot I took the following day on my own:


I would never have shot this before I saw Shannon's pictures.

  • Jim saw things I didn't as well. We were up at the top of the fire tower in Dorset (quite a climb, and kudos to Shannon who doesn't do well with heights, who climbed up with us as well). In all of my photos from up there, I assiduously (look it up!) avoided including any element of the tower in the shot. Not Jim. He took a picture of the 'cage' we were in at the top, showing the wire mesh, while I tried to get my lens hood through the mesh so it wouldn't interfere with my shots. He also took a shot of the latticework of the tower itself against the fall backdrop. My shots were so boring that I had to pump up the saturation to make them a little exciting. Here's one:


Jim also suggested going to a vivid setting in the camera. The shot above and the reflection shot are at vivid. I haven't figured out yet how to match my Camera Raw output to what I see in the camera, but I was able to emulate it manually (yes, Jim, I know Lightroom does it... soon!). Pastels are nice too: this is from my own comfort zone:


And this is as a result of listening to Jim:


  • Every time I looked at Lance, he had his camera pointing down at something on the ground between his feet. "Been there, done that", I thought and besides, pictures of dead leaves on the ground all look alike. NOT! Lance's pictures are characterized by
    • being tack sharp
    • subject isolated against the background
    • perfectly exposed and lit.
    I don't have anything close to that to show you.

  • Ron shoots 10 frames for every one I shoot. I'm somewhere in the middle — Shannon shoots much less than me. I can't imagine sorting through so many images but I get that each frame is subtly different from the others and my pictures might be better if I took the trouble. For now, I'm going to keep that technique for sports photography. At the Wolf centre, I took about 50 frames. Shannon took 9. Ron took about 300. Of course his new 600mm f/4 lens needed a workout! Here's my best image from there:

 
Iris and Fern were with us too. I didn't see their images, really, because I was working on mine when theirs were projected. I take that back: I did see some of Iris's and everything she shot was purely the way it came out of the camera because she didn't have Photoshop on the laptop she had with her. She has a great sense of composition and makes an effort to get a different perspective in her shots.

One more teaching point, this one from me.
  • I try to isolate my subject. There are many ways of doing that, in camera or on the desktop. One of those ways is through the selective use of depth of field. So I deliberately shot this fisherman at f/2.8 to isolate him from the background.


But check out this image taken a few seconds later at f/16.


Although it has lots of depth of field, the slower shutter speed imparted a different kind of blur to the background water, which worked too. The hint of motion in the fishing rod adds an action feel to the shot, although if you look closely, it's not as sharp overall as the other one. Not surprising: shooting handheld with a 200mm lens at 1/15 second! VR helps.
So now what? I'm going to use this weekend as a learning experience. I'm going to look at my image making a different way and try to get out of the groove I'm stuck in. For I am a mere grasshopper...

PS: Check out my Smugmug gallery for more images from this weekend.

Tuesday, September 22, 2009

Fall is in the air!

Yes, folks, the leaves are starting to turn. As I write this, colours are at about 10% around here (in the Minden/Haliburton area) but I just read that Algonquin Park is around 40-49%, the dominant colour is Yellow/Orange and they're even reporting some leaf falls already. Check out the Ontario Parks Fall Colours Report for more information.

Last week I commented on a Bridge technique if you have multiple monitors. I took a picture of the monitors so you could see what I meant. The large monitor on the left is a synchronized window with everything minimized except the preview frame. So I can navigate on the laptop screen and see the detailed images on the other monitor with no sweat. Here's the picture:


Now some notes about missed shots... I can't show you the pictures, I missed them!


Open your Eyes
I stopped enroute up North the other day, for some pictures of a causeway running along the water's edge. I've often meant to stop there but never did before. Too bad, because I've seen boats navigating the waterway and the juxtaposition of a boat and a car would be interesting.

Anyway, I took some pictures from different vantage points, and shot a couple of pictures from the roadway, including this not-very-interesting shot of some flowers.


Now take a closer look at the top of the hydro pole in the photo. Yes, a large hawk or eagle's nest. I flat out didn't see it. And I was standing about 30' away from it a few minutes later, and never looked up. Open your eyes! (Fortunately, I know exactly where this is. I'll be baaaaak...)


Don't leave home without it!
I was in Toronto, enroute to dinner with my folks, and had left the camera at home. I had an excuse: I was driving a loaner car while mine was in the shop and didn't want to leave the camera with my car so I left it at home. I missed the greatest picture: there's an old graveyard at Bathurst and King Road, and there was some construction so cars and trucks were creating a dust cloud. The setting sun lit the dust in the air so you can imagine the sunbeam effect behind an old graveyard... I missed it.

Up North, I always take the camera. Often, I'll mount the 200mm lens and leave it on the seat beside me in case I have a chance at some wildlife. I had a deer sighting a couple of months ago on the way to my cousin's place in Haliburton, and all I had to shoot with was my Blackberry. Take your camera. You never know...

Speaking of my cousin...
I had an enjoyable dinner and evening at his place in Haliburton this weekend. After dinner, the guitars came out, accompanying his daughter Lindsay (who will be married in a couple of weeks!), who has an awesome singing voice. Another cousin, from the other side of the family, though, is a professional musician: he's a bassist and also a composer and arranger and has some impressive shows under his belt. Anyway, he didn't have an instrument with him... or did he? Yes indeed. An i-Phone. Which he plugged into some speakers. First he played it as a piano keyboard, then he switched to a bass. Fantastic! Here's a shot of them doing their thing, with a couple of insets so you can see Lindsay and the i-Phone.


Steve is in the middle, and Ari, the groom-to-be is on the right. Lighting is with the Gary Fong Diffuser on the flash, f/8 @ 1/60, ISO 400 to capture some of the warm tungsten light from the lamp. But the warmth in that house was not from the fireplace that night, it was the people and the music and... it was a great evening.

Since I can't sing (my voice problems are still plaguing me. So much for my professional singing career), I took pictures. I captured this image of Steve, which I really like:


Interesting, for you Photoshoppers, how I created that. I close-cut Steve out of another image (similar to the one above but zoomed in a bit). Then I opened a shot that I took the next morning, by deliberately moving the camera sideways while the shutter was open, shooting some early fall foliage in the sunlight. I imported Steve on a new layer, then used a graduated screen from black to transparent on the layer mask. I touched up the mask further by erasing it to white over his face. I painted, again on the mask, with a small chalk textured brush around the edges of his hair to blend it in.

One more image to leave you with: I was in "Richard Martin move the camera while the shutter is open" mode. This shot was made by rotating the camera while the shutter was open. Just trying to give you some ideas!


"Tunnel Vision"

TTFN...

Wednesday, September 16, 2009

Leah Elsa Torres Springer


Born September 15, 2009 at 11:59pm in New York.
Proud parents: Jamie and Maria Torres Springer
Proud grandfather: me!

Quick sketch done from the really terrible no-flash cellphone photo Jamie took moments after her birth.

Sunday, September 13, 2009

Some camera and monitor tips

Today's Blog is about fixing a camera/lens problem, and about a tip for making life easier for you multiple monitor types.

Micro-adjusting your focus

For the past little while, I’ve been dissatisfied with the sharpness of some of my images, especially with the wonderful, professional, Nikkor AF-S VR 70-200mm f/2.8 lens. You would think that with this almost-$2000 lens, this would be the last issue you would expect. I’ve had the uneasy feeling that something is wrong.

I experimented. The autofocus, or even manual focusing was off. The image would look sharp through the viewfinder, but not on the finished image. Somehow, the big Nikon zoom and my D-300 were not getting along. My guess is that normal wear and tear changes the alignment of the lens in the mount. I never dropped or banged the lens or camera, so there was no abuse. I figured it was inevitable that I'd have to send my equipment in to Nikon for adjustment. Not under warranty, either — I bought the lens from B&H in New York.

My first clue of a solution was when I read a review of a piece of software called “LensAlign Pro” in the latest issue of Photoshop User magazine.

This is a software package that comes with some focusing targets and a ruler. In the article, and on their website, http://www.lensalign.com/, they mentioned that some of the current higher end DSLR’s have a menu-driven micro adjust of AF-tuning built in. Sure enough, the D300 has it. So do a lot of other DSLR’s — here’s a list that I found through that site:
  • Canon
    • 1DsMkIII
    • 1DMkIII
    • 5DMkII
    • 7D
    • 50D
  • Nikon
    • D3x
    • D3
    • D300
    • D300s
    • D700
  • Sony
    • A900
    • A850
  • Olympus
    • E-30
    • E-620
  • Pentax
    • K20D
    • K7D

If your camera does not have this feature, it may have to go back to the manufacturer for adjustment, which I know is time consuming and expensive. You would have to ship the body and any lenses that need alignment to them.

Now with all due respect to the makers of this “LensAlign” product, I’m not sure why you actually need it. Here’s what I did without spending dime one.

I took a tape measure and tied it to the tripod then let it run outward along the ground, straight away from the camera at about a 30° down angle. I focused on the red 7’ mark, took a shot and here’s what I got (click the image to blow it up):


Now I went into the menu and after about 10 trial-and-error adjustments (I ended up at +7 on a scale of -20 to +20, here’s the same shot. Enough said?


And it obviously worked: check this out!

This is cropped out of an image captured from about 8' to 10' away, at
200mm, f/2.8. If I hadn't cropped it, you would be able to see focus fall-off at
the edges of the leaf because it wasn't exactly at right angles to the focal
plane. In other words, the top of the leaf was further away, so it was out of
focus.
Oh by the way: September 13. Fall is imminent in Northern Ontario.

In the D300 (I don’t know about other cameras), the AF-tuning is specific to the lens. Change lenses, and set an adjustment for that lens. It knows which lens you have mounted and will microadjust automatically for that lens. Also the camera will save up to 99 different adjustments for each lens – so I’m guessing it might be different at minimum focus distance (like I used) or at other distances, so you might need more than one setting. I’ll experiment when I have time – but the most critical adjustment is when you’re focusing close and wide open. In this case, 7’ and f/2.8. But I get that when you shoot portraits, for instance, the near eye has to be tack sharp. The next lens I'm going to do is the 50mm f/1.8.

Dual Monitor Bridge Trick

Another trick I picked up in the same magazine is for Bridge users who have dual monitors. I clicked on Window --> New Synchronized Window, then dragged the new window to the big monitor. By dragging the boundaries of the file list, the thumbnails and the metadata, you’re left with one huge preview window. Now if you click on an image on the other monitor, it comes up full size on the big one. Even better (this wasn’t in the article): click on the big image then hit the spacebar. That puts a full-screen image on the big monitor and the scroll wheel on your mouse will let you zoom in up to 800%. Scroll through your images with the arrow keys. That’s how I selected the sharp leaf image.


Just before I go away, here are a couple of images I took from my dock a couple of evenings ago. This blue heron was fun to watch. Have you ever watched a cat hunting? Same thing: the bird spots a fish and moves into position in ultra slow motion and then strikes. I got him just as he caught a little minnow. Later I tossed a pebble to make him fly off so I could get a photo in flight.


Friday, September 04, 2009

Action Shooting tips

Today's Blog is about multitasking. Sorry about the title! You'll see where the "action" part fits into the topic in a minute.

I'm the worlds worst multitasker. Walking and chewing gum are mutually exclusive exercises. Ask Iris, she's great at it and always made fun of me. By the way if you are a multitasker, those of us who are not, find it quite rude when you're talking to us and doing something else at the same time. Ever notice how good it makes you feel when the person you're talking to is looking right at you, giving you all his or her attention? Think about it.

Anyway, my last post, about texting and driving, is a good example. I don't know about you, but it really helps when I focus on the task at hand. "So what's this all about", you may ask. I'll tell you.

On Monday, I took my grandson Ryan up to Clinton's "Canadian Motorcycle Training Services" for his first taste of offroad riding. It was his 10th birthday and I finally convinced his mom (my daughter) to let him go. Ryan had a fantastic experience and I posted a bunch of pictures in my August gallery here. Richard, Ryan's dad was also there: he didn't ride, he watched Ryan like I did, but I could see him itching to get on a bike. Next time. I was there to watch Ryan enjoying himself, to take care of the arrangements (it was his birthday present from me) and oh, by the way, to take pictures.

More than one purpose. Ah, you're starting to get my point. If I had been there just to take pictures, my results would have been substantially different. I can't multitask! Half the time I was out there, what was going through my mind was, "is he having fun? Is he learning? Look how well he's doing that!" Some of the time, I was watching and listening to Clinton because he's a superb instructor, relates wonderfully with the kids, and I'd like to be more like him (as an instructor) when I grow up.

I wasn't concentrating on taking pictures. Oh, I got some images, all right. But I ignored what was going on around me for the most part, and focused on Ryan alone. Shots when he was doing things technically correctly, showing the concentration on his face, trying to capture him having fun. This day was about him, not me.

Because I'm pretty comfortable with my camera equipment, because I can shoot pretty well without thinking about it, and use some of the advanced features of the D300, I was able to get some shots, but imagine if I had focused on the shooting! Here's one shot that I liked that came out of the day -- one of very few that wasn't all about Ryan:


After an hour or so learning how to work the bike, they took the kids to the "Farm" which is an open field with riding paths meandering through the wildflowers. It's more challenging than it looks. The 200mm lens
with medium depth of field was perfect for this image.

You know what? I wouldn't have taken that picture if Richard hadn't said something about how nice a shot that might be. We had also parked the car nearby and had walked into the field. I had the 200mm lens mounted on the camera, and didn't bother to bring anything else with me. Here's another shot taken from the same vantage point:


I had the luxury of being able to crop reasonably tightly because of the resolution of the D300 and the quality of the lens (I keep saying 200mm: it's a Nikkor 70-200VR f/2.8, great optics) and still maintain sharpness and contrast. The exposure was 1/320 sec at f/7.1. Even with VR, I strive for those kinds of shutter speeds for that extra sharpness.


Normally, when shooting action, you want to try different things, to achieve varying effects. And to me, somehow having motion in the shot makes the difference between a straight static capture and one which tells a story. The first image above tells a story, doesn't it? But not through motion. The second one, although I love the image, doesn't really say anything other than, this is a cool scene.


Here's another image that tells a great story: Clinton (that's him on the left: too bad I zoomed in a bit too tightly, it would have been a better image with more of him in it) is applauding Ryan's form and effort, going over the little jump standing up. But it looks like he's not moving (trials riders, eat your hearts out!) where he's actually riding at speed. The 1/500 sec shutter speed stopped the action completely. So while this makes a great poster, there's no sense of action here.


This shot, on the other hand, was taken at 1/100 sec and I panned the camera with the bike to create a motion blur. The other thing that adds to the action feeling is the composition: remember the "Rule of Thirds"? Look where Ryan is on that imaginary Tic-Tac-Toe grid. Notice the space in front and below the bike which gives the sense that he has somewhere to go in the picture.


So I spent half a day and about 150 exposures, and this was just about the only one with any motion in it. Those of you who have seen my other work know that I'm a big proponent of slow shutter speed and panning. Why didn't I do more shots like this? Because I was having too much fun watching Ryan having fun. I was multitasking.

OK. If I had been at Clinton's on assignment, documenting "A Day of Offroading", I would have done several things differently.
  • Consider what the desired final output was supposed to be:
    • A multimedia slide show
    • A printed brochure
    • Photos for a website, etc.
  • I would have prepared by storyboarding what I wanted to shoot.
    • What the facility looks like
    • Signing in
    • Getting dressed (I did take a shot or two)
    • Preparatory 'classroom' session
    • Sitting on the bike
    • First lap on the novice track, etc.
  • I would have prepared the equipment I needed and made sure I had it with me at all times
    • Inside shot and classroom needs the wide angle lens and perhaps the flash/diffuser for lighting
    • I was able to get close to the novice track so a normal lens (my 24-120) with VR was the right choice.
    • In the field or at the big track, the long lens was the primary choice, but imagine the drama of a low angle wide angle shot of a bike going by.
  • I would have made sure I got a wide variety of angles and effects
    • Low-to-the-ground close up wide angle shots
    • Telephoto shots
    • Multiple riders
    • Faces in sharp focus
    • Panning motion
    • Lens zoom motion
    • Low and high depth-of-field shots
    • Posed shots before and after riding
    • Get riders to go through the mud to get that splattered image and more action/motion.

I did get most of these (check out my August 2009 gallery here), but not with care and planning, with luck. But I wasn't there on assignment, I was documenting Ryan having fun at his first off-road experience. All of these steps and techniques would have made for better pictures, but then I wouldn't have been able to enjoy Ryan's experience as much as I did, and that was my goal for the day.


So the concepts touched on in this Blog post were:


  • Know what your goals are.
  • Multitasking is great for casual shooting but if you want to get some serious pictures, especially with action shots, you have to be focused on what you're trying to accomplish.
  • Plan ahead. Even if you're just out shooting for fun, you'll get better pictures if you spend a few minutes thinking about the possibilities
  • Your equipment is important: make sure you have what you need, that it all works (my first battery wasn't fully charged and died so I missed Ryan's first lap). And if you leave it behind in the car, then you're limiting your possibilities.
  • Know how to use it so that you can concentrate on the shot, not the mechanics. Practice, practice, practice.
  • Try a variety of techniques when shooting action. Freeze motion, pan, backlight, close-up, wide angle and telephoto. Your results may surprise you.

So let me leave you with one more image from that day: Ryan, on the left, took the other rider on that curve on the track. I'm pretty sure the other kid has ridden before. By the way, Ryan was registered for a half-day, dirt riding course, so the name tag they put on him said, "RYAN - HALF DIRT". I smell a new nickname coming!


Saturday, August 29, 2009

Texting while Driving

No pictures today.

I just watched this graphic video – it is graphic – and I think you should too.

Texting while Driving Video -- click to watch.

I have been guilty of responding to emails while driving. I will never do that again.

I also won’t READ emails on my Blackberry while driving. I think it’s equally distracting.

A promise I will not make, because I don’t think I can keep it, is not to use the cellphone while driving either. But I’m definitely going to cut back. The issue is not hands-free, the issue is where your mind is. How many of us can admit to missing that exit, or not noticing things because you’re in the middle of a phone conversation?

I have a two hour drive from Minden to Toronto. I usually leave myself, oh, two hours and five minutes to get to that appointment. So if the phone rings, I don’t want to take the time to pull over, I’m on a deadline. I’m going to change that. I’m going to leave more time, or I’m just going to be late for that meeting. I’m going to try to pull off the road if I need to take that call. At the very least, I’ll take the call and tell the caller that either I’ll call back or to wait while I pull over to talk to them.

I watched some followup videos but in my heart, I didn’t need anyone to tell me how unwise it is to use the cellphone or Blackberry while driving. Please follow suit and spread the word to anyone you care about.

Thank you, Matt (Zever) for posting this link in the VROC forum.

Glenn.

Sunday, August 23, 2009

The Orton Effect

Oh, all right. I already know what I want to write and it's Sunday and I have a few minutes, so I thought I'm just carry on.

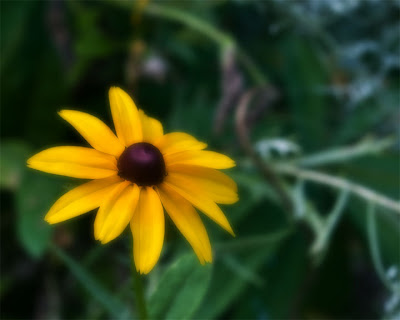
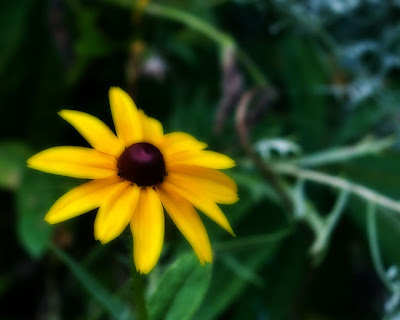
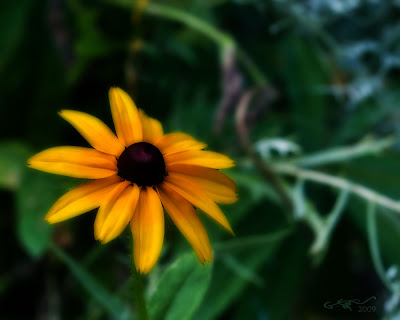
I was looking at the NAPP Portfolio (mentioned it before) for inspiration, and I spotted a picture of a black eyed susan. I thought, that would look great as an Orton, then I remembered that I had shot some of the same kind of flower last week, so I opened one in Photoshop and got down to work.

Here is the original image:


Nice, but not outstanding, right?

Now I know the theory of the Orton Effect (which I'm about to share with you) and I've done some before, but I can never remember exactly how, so I looked it up and tried a few techniques. Here's one:


...but this technique is simplistic and doesn't offer the range of
control that I'd like.


So here's a second image that I did a different way:


and yet another one where I added a little twist of my own.


Click on the image to blow it up and look at it big. Go ahead, I'll wait right here.


Now let's get into some details.

The "Orton Effect" is named after Michael Orton, the photographer who invented the technique, way back in the days of film! What he did was to take two exposures of the same subject, one in focus and one out of focus, both overexposed, then he sandwiched the two transparencies together. The result was an image that had little sharp bits floating in a sea of soft, out of focus colours; and at the same time, colour saturations were 'way up. Very effective, to add a dream-like effect to an image, and it works well with scenic landscapes, punchy detailed colour shots like flowers, and even with people. It's much easier to accomplish this in the digital darkroom today. All you need is one properly exposed image.

Bearing in mind what you're trying to achieve, you need two versions of the same shot -- one in focus and one not. Both have to be over exposed because they get darker when you add them together. Here's what to do.


  • Open your image and make a duplicate layer (CTRL-J on the PC, CMD-J on the MAC). Change the blend mode of this layer to "Screen".

  • Name your duplicate layer "Sharp Layer" so you don't forget, then duplicate it again and name the second one "Blurred Layer".

  • Apply a Gaussian blur to this layer. Pretty heavy duty -- I like somewhere around 25 px radius, but you will have to experiment. Change the blend mode of this layer to "Multiply".


You're probably already liking what you see. Now try something. Go back to the "Sharp" layer and sharpen it. Big time. Since the layer is screened on top of the background layer, you won't see a lot of the artifacts you normally would, but there will be some, so select "Fade Sharpen" on the image menu and look at a closeup while you adjust it to what you like. I did one at a radius of 6px, amount 350%! Unbelievable! Play with it, but don't be afraid to go 'way up there. You can also reduce the opacity of the sharp layer to soften the effect.

You can do that with the blurred layer too -- adjust the opacity. That will also lighten and darken the image since it's in multiply mode.

Now try another experiment. What I did on the third image was to make a selection on the original image (just the flower) using the quick selection tool in CS4, then I shift-dragged the selection into the Orton'ed image (shift to keep it aligned). With that layer on top and the blend mode set to Multiply again, it added richness and detail to the flower itself and left the background untouched.

Save your image, then flatten it (in that order. If you flatten it first, you'll lose all your layers if you try to open it again). Use curves or levels to adjust the brightness and you're done.

Orton adds a wonderful dream-like effect to your image and minimizes imperfections (for instance, the flower is not in tack-sharp focus from front to back. So what?). Try it, it's fun!

PS: Here's a link to another image I did with Orton Effect last year. I like it a lot better than the one I've used as an example here, don't you? Click here.