Monday, February 15, 2010

Lightroom Article Part 3: the Develop Module: Editing Your Images

Today is part 3 of the Lightroom article, dealing with the “Develop” module, where you edit your photos. But before we get started, let me deal with a near disaster, and then talk about the preparation for the Dogsled shots I took yesterday.

Oops, I screwed up!

On Friday, I shot some headshots for some business colleagues who needed some pictures on our LeTip Networking website. New members get a page to briefly tell what they do, a little bio and a photo. For reference, the site is here. and it’s interesting what a range of services are available through this group.

On Saturday, I went to the PetFunFair. I had intended to introduce my Doggie First Aid kits (your dog’s a person too. He or she deserves to be safe, don’t you think?) Click here to see what’s available and if you mention this Blog in the comment field when ordering from the FAC First Aid website, I’ll give you a 20% discount off any regular priced item on the site. Anyway, I thought I’d shoot some pictures of dogs at the show but I was not in the right ‘place’ and my results were mediocre.

Sunday, I was up North and heard that the Sled Dog Derby was running at Pinestone in Haliburton, and I bundled up warmly and headed out to shoot some pictures. I was there last year and got some very cool images then as well, so I thought I’d try again. I shot over 250 frames, some of which were quite interesting, in my humble opinion.

I had 3 days of pictures on the compact flash card in my camera. When I started to upload them to the computer, I decided I wanted to see the sled dog images first (I'm into instant gratification!), and I wanted to keyword them separately so I switched off the other groups and uploaded the February 14th pictures. I completely forgot about the other ones.

You know what’s coming, right? I forgot. Later, I put the card back in the camera and hit “Format”. Bye bye headshots and funfair pictures. Why did I format it? Well I wanted to shoot a few shots of a bread I actually baked myself (pre-made dough, though, and frozen. Still it came out great!)


No, that's not on my diet. Unless I don't swallow. Hot and fresh, how can I not eat it! Thanks to Alison for telling me about these breads!
Also, it’s better to reformat these flash cards rather than just deleting the files. Less problems with the cards. Anyway, I posted a note about my screwup on the RHCC newsgroup and I got a couple of answers and suggestions.

Generally when you reformat computer memory, you’re not actually erasing files. Normally, you are erasing the index that tells the computer where to find the files, and telling it that the space where the files are is not occupied, it’s available to be reused. Using fancy software and sometimes expensive techniques, you can often recover some or maybe all of the files you thought were gone. That’s a good lesson if you have stuff on a hard drive you don’t want anyone to be able to see.

Anyway, both Jim and Harvey pointed me at recovery software. I used the one Harvey suggested: it’s designed to work with SanDisk CF cards. There are some limitations on the free version, but it works. I was able to recover all but the first few images (which I had overwritten with pictures of bread). Thank you, Harvey. Here’s the download site for that software: http://www.lc-tech.com/rescuepro/

So almost a big “oops”. Hope you don’t need to do the same thing!

Be Prepared

When you’re going out to shoot an event, you should do at least a little pre-planning. Otherwise when that perfect shot opportunity comes up, you may miss it. Or even worse, get home to discover that you blew it because the camera was set wrong.

For example, I was shooting on the tripod the other day and had turned off the VR (lens stabilization) because it actually messes up the focus when you’re shooting longer exposures. If you’re shooting marginal shots – and everything is marginal when you have the 400mm lens on – the VR is almost essential. So I don’t want to forget to turn it back on again.

The same thing is true of many of the other controls on the camera. I wouldn’t have to think about this if I were using a point-and-shoot but I have a DSLR so that I can adjust things. Other controls that I frequently change are metering method, ISO, exposure compensation and autofocus control. A mistake I’ve made is to have bracketing set on. I think I’m shooting proper exposures but only one out of 3 or 5 is correct.

So the message is, have a “default” setting for all your camera controls. Then be sure to set everything back to normal at the end of every shoot. That way you know exactly where you’re starting from next time out.

Set all your controls back to their normal settings after every shoot.

Plan Ahead

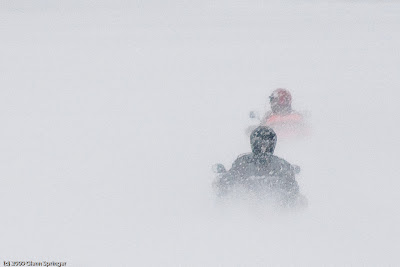
So I’m going out to shoot the Haliburton Dog Sled Derby at the Pinestone Inn. I’d been there last year and got some good shots, so when I heard it was on this weekend, I headed over. Now I’m shooting outdoors, against the snow, in (luckily) overcast conditions (shooting in bright sunlight sucks). Your camera meter wants to make everything 18% grey, not white so generally your shots are going to be underexposed. So I set my exposure compensation to +1 stop knowing that I could compensate to a certain extent in Lightroom if I did happen to blow out some highlights.


I just uploaded an edited version of this image. When I looked at the Blog, I thought the blacks weren't strong enough, so I went back into Lightroom, changed it, and uploaded the new version. Took me 30 seconds. That's the beauty of Lightroom, which I'm going to address in my next article on outputting images.

By the way, I wish there were more space – some space – at the front of the sled. I saw this guy kick his leg up like that and swung the camera up just in time to see him do it again, just once. I was shooting with the 400mm lens and I had no time to zoom out or try to reframe the image. There's extra negative space behind the sled, but none in front.
  
It’s pretty bright out. I like to shoot at f/11 if I can since it gives me the sharpest images. With my normal lens on (24-120), ISO 200 gives me around 1/250 second or faster. Not bad, since I have VR in that lens and have been known to handhold even down to 1/10 second. But what if I want to use my 200mm, with the telextender for a net of 400mm? The rule of thumb is to shoot faster than 1/the focal length, in this case, 1/400 second. Even that is marginal with that lens. How do we achieve that at f/11? By setting the ISO higher. A little experimentation and I settled on an ISO of 640.

With dog sleds coming right at me, I needed to set my autofocus to ‘continuous’. But I discovered that with the normal lens, set up about 10m from the start line, my autofocus couldn’t keep up with my 6 frame per second high speed burst mode. Only one shot in three was in focus. So I moved back and put the 70-200mm lens on. It has a faster focusing motor anyway. That worked. And with the longer perspective, focusing was nowhere near as critical (stopped down. Even at that distance, shooting at f/2.8 gives you very little depth of field).

Here are a few more images from yesterday. To see more, go to my February Smugmug gallery on line here.


Lightroom Article part 3: Editing your images in the Develop module

Introduction

What we’re doing here is documenting my conversion to LR, with a focus on “WHY” one would make certain choices, not “WHAT” or “HOW”. For how to use the program correctly, pick up Scott Kelby’s book “The Adobe Photoshop Lightroom 2 book for Digital Photographers” which is available at http://www.photoshopuser.com/. You don’t have to be a NAPP member to buy the book, but if you do join NAPP, you’ll get a discount and all kinds of other benefits, including a subscription to Photoshop User magazine which is worth its weight in gold. If you decide to join NAPP, use this link so I get my brownie points!

You might also consider contacting Jim Camelford at jim@photography.to. Jim is the local LR guru and not only does he teach LR courses but he imparts a great deal of wisdom about the right way of doing things.

This series of articles looks at three of LR’s strengths: “Organizing your pictures”, “Editing your Images” and “Creating Output Files”. LR does many things well, but these three were the factors that convinced me to convert to LR. Combined with Photoshop (PS) LR provides an elegant way to handle your workflow, whether you’re a high volume user or just starting to delve into the world of Digital Photography.

These articles are intended for those who have converted to LR or are considering doing so and want to start it the right way from the beginning. Or those who might need a little convincing!

/introduction

Summary of Part 2: Importing your images

Last time I talked about the concept of LR as it relates to importing your images. Here’s a summary:

  • Automate your import procedures by setting LR as the default program whenever you plug a flash card or camera into the computer
  • By setting up the import dialogue correctly, you can virtually eliminate any manual intervention during importing if you wish. However you may want to direct your images to a particular folder or add some master keywords at this point.
  • Wherever possible, create a backup automatically
  • Get rid of rejected images right away.
  • Create a scheme for flagging, labelling and rating images. By following it immediately after import, you can save a lot of time.
  • Save the “keepers” in a Collection, and keyword them logically right away.
 Part 3: Editing your images

This article presents an overview of the photoediting strengths and capabilities of LR.

Newsflash: Lightroom is not Photoshop.

LR will not replace PS as a high end photoediting program. That said, it will replace most of the other programs you might be using. I was astounded to realize how much less frequently I use PS now that I’m a LR convert.

A little history here. If you read my introduction, you know that I’m not a formally trained anything. I’ve dabbled with PS ever since it first came out in the early 90’s, but I really have no clue what I’m doing! OK, well maybe a little… I understand the concepts, I can work out how to apply them to images and achieve what I want (correct or otherwise) and I spend a Hell of a lot of time working on images in PS. I’ve been criticized for that: and rightly so. Instead of being diligent about what is or is not in a picture, or making sure of the exposure or composition (not much you can do about focus – yet!), I take pictures with the idea, “oh, I can fix it later in PS”. When I come in from a day’s casual shooting, I’ll probably spend 6 or 8 hours in PS on images I like and I may spend that long on one single image if I really like it and I get anal about doing the best I can.


The extensive background editing in this image is obvious. This kind of work cannot be done in Lightroom. There was also some dodging done on the student's face and the instructor and student were slightly enlarged to increase their presence in the image. If you want to learn to ride a motorcycle or scooter, there's no better place in the world to take the course than Humber College in Toronto. Click here to link to their website.
LR has changed my mindset. Now what I do is classify my images (read the previous article), then I work on the ones I like the best or that bubble to the top as being the most important. One of the things that LR does really well is to let you work in batches – on more than one image at a time.

Here’s an example: you shot a whole bunch of pictures out in the snow and everything is dingy and gray because you forgot to set your exposure compensation (come on, you know what I’m talking about. Your camera meter wants to set everything to 18% gray, not white). So you can pick one typical shot in the bunch, change the exposure values (and other stuff, we’ll see soon), and then apply those changes to ALL the pictures in the group with what, 3 keystrokes?

“But”, you say, “They’re not all exactly the same. What if I blow out some highlights? What if I WANT that image to be high key?”

That, dear reader, is the beauty of LR. You’re not actually changing your image files: you’re changing an instruction set of changes attached to your image. And you could easily throw out or just as easily change those instructions after the fact. You knew that. I told you that before. More than once. Weren’t you listening?

So not only does LR let you make changes to a single image or a whole batch of images, but it does it NON-DESTRUCTIVELY. Let me repeat myself: NON-DESTRUCTIVELY. Everything you do in LR is reversible. You can’t make a misteak. You can always fix it (did you catch the humour? Sure you did).

Nice segue, huh? I went from, “you can work on batches of images” to “NON-DESTRUCTIVE EDITING”. Here’s an example of DESTRUCTIVE Editing. You’re working on a picture in PS or some other editing program and you decide it would be cropped a certain way. Say as a portrait orientation 8x12. You crop it (actually you’re “Reframing” it, which is why the shortcut for that function in LR is “R” not “C”, something Jim Camelford pointed out to me the other day!). You spend HOURS retouching it. You go into PS, you create layer after layer, you paint, you burn and dodge, you clone, you heal, you create layer masks, you make a whole new sky or redraw eyes completely. You love it. You put the picture up somewhere on your gallery or on the NAPP members site and it gets chosen as the “Image of the Week”. Two weeks later you get a phone call from the editor of National Geographic who says, “I love your image, we’d like to use it for a two page spread pano pullout for an upcoming issue. But we need it in Landscape format”.

Uh-oh. You have to go back to the original image to re-reframe it. And you lose ALL those changes and artistic hours you put in. Can you even remember what you did? Can you recreate it at all?


Suppose this was your final image, but you wanted to go back to the one on the bottom and still keep all your edits, changes, etc. You can do it in LR, even 6 months after the fact. Closing the program does not lose the history!
OK, that was the best spur-of-the-moment example I could think of. Oh, and National Geographic? My contact info is at http://www.faczen.com/. Call any time.

A bit of a weak example because we all know (we do, don’t we?) that cropping is one of the LAST things we should ever do to an image, but maybe I got my point across anyway. What is the actual LAST thing, by the way? Output sharpening. To find out why, you’ll have to wait for my next article. Or you could research it on your own!

Anyway, here’s my point: EVEN CROPPING IS NONDESTRUCTIVE IN LR! You can change it at any time. And the stuff you cropped out ARE STILL THERE! (I use caps when I’m excited).


Again: You did a lot of work on this image. You cropped the one on the top out but now you want to go back to the one on the bottom. One click of the mouse in LR.
Okay. I’m not going to tell you HOW to edit your images in LR. Kelby, or Camelford, or someone else can tell you about that. I’m not the greatest at it anyway, but I’m pretty good on the concepts. So let’s talk concepts.

Up to version 2 of LR, everything you could do to an image affected the whole image. Exposure, contrast, black levels, white balancing, all that stuff, was “Global”. In Version 2, LR introduced the adjustment brush and a couple of other tools that worked on a portion of your image. Now we have some “Local” adjustment capabilities in LR. They’re pretty damned good. As I said at the beginning, I go into PS much less frequently now.

What I like about LR’s tools is that they’re much more subtle than the ones in PS. You can go nuts in PS. You can change that red ‘vette to a chrome yellow one. The best I could do in LR was to make it more of an orange colour. I guess the operative word in my mind, describing the controls in LR, is “soft”. Somehow the resulting image is a little more believable than the one you went crazy with in PS.


You can do both, of course. Using the same example as the picture above, I wanted to get rid of some of the stuff that took away from the image, like the sign on the pole, the post just left of centre, some stuff on the ground, the branch at the left edge… so I opened the image in PS (through the LR menu), created a new layer, did all that editing on the new layer, while I was at it, I used the burn tool to darken the wood of the pole and bring out the dark foreground branches and greenery.

Now if you simply save the edited image as a .psd file, and you return to LR, you would see both the original and the new version there. Opening the .psd in PS again, you’d see all the layers, although the history is gone. That’s why I work on layers in PS – I could just delete the layer and I’d be back to the original image. LR will, by the way, offer you options about which version of the image to open when you go to PS.

This was an example of using both programs to edit an image, choosing the best tools from each one. I got away from concepts, didn’t I? Well yes and no. The concept is, edit first in LR, then go to PS for the niggly little stuff and the off-the-wall creative, then take it back into LR to finish it.

One caveat: when you bring an image back into LR from PS, it creates a separate file. That new file does NOT contain all the LR history, it's a fresh copy imported from PS. So here's where the concept breaks down. You can get back to the original LR file with all it's changes, you can get back to the PS file as it was when you imported it to PS and of course if you worked in layers, you can roll back by deleting layers, but you do not have a continuous reversible history.

If you're very sneaky, suppose you wanted to backtrack to some point in LR and change or remove some sort of adjustment, then do the same edits in PS. The only way would be to open BOTH documents in PS (the new snapshot from LR and the original with all the PS edits), and then drag layers from one to the other. That doesn't always work unless you were really careful.

If you’ve used Adobe Camera RAW, the tools in LR will seem familiar. Actually, they’re the same. LR uses the same engine as ACR. Non-destructive editing is also available in ACR, but there’s no history. No way to go back part way – if you don’t like what you’ve saved, you can simply throw out the sidecar file – the .xmp file – and you’re back to the original.

Let’s look at some of the editing tools in LR. This is by no means an exhaustive or detailed look, just a few highlights.

Starting at the top in the Develop module, there’s the “Basic” tool set. These sliders determine the overall look of the image – exposure, contrast, black and white recovery levels and white balance. There’s a “Presence” section which you should not overlook: these three sliders can have a huge effect on your image. Look what happens when you pull the clarity slider to the left:

Seriously. That's all I did. Just the clarity slider.


Below that is the “Tone Curve”. Like curves in PS, you can control different areas. The steeper the curve is, the higher the contrast. But this one is soft and you can’t adjust stuff as much as PS. By the way, the “Targeted Adjustment Tool” – the little doohickey at top left beside the curve – allows you to adjust the curve by dragging in the image itself. Try it – it’s cool!

You can make subtle (and maybe not so subtle) colour adjustments in the “HSL” and “Split Toning” areas. Sharpening, Noise Reduction and Chromatic Aberration are dealt with in the “Detail” area. You can create vignettes in the next section – two different ways: for the image as a whole or applied dynamically to whatever your crop area looks like. This is a real breakthrough because in the past you had to come back to do this after you reframe your image (crop). Then there’s a “Camera Calibration” section so you can make the edited image you’re looking at match what you see on the back of your higher end camera.

All of the adjustment tools I just mentioned work Globally. On the whole image. In practice, if I were editing a picture, first I would adjust the colour balance and exposure, then tweak the curves, add some colour adjustment, sharpen it and then do the other stuff. All exactly in the order that LR presents it to you. Now I’m ready to work on individual spots in the image. The toolbar just below the histogram shows you a handful of tools. The one on the right is the “Adjustment Brush”. What you do is paint an area (use the “O” key to see what you’re painting) then you can apply a bunch of different adjustments to the area you just painted. The graduated screen’s good for skies and the like, although I had great luck using it as a “fill” light in a portrait. The spot removal took is effective too. Click it, don’t drag it. Check it out, or R.T.F.M. (read the F’in manual!).

You can selectively adjust clarity. Think “portraits”. Think about smooth skin without blemishes, but retaining the sharp pinpoint focus on the eyes and the detail in the hair. Like this:


You need to blow these up to see the difference. And I wouldn't output an image like the one on the right, I was just using it to illustrate the effect of the tool.

By the way, if you don’t like the “O” thing (everyone likes the “O” thing. A little humour...), just pull the exposure slider to the left when painting and you can see the areas you select darken as you paint. Then set it back to zero when you’re done.

World’s greatest portrait? Nah. But that’s just me. How long did it take? 30 seconds. Did I have to create fancy PS layers and change blending modes and use Gaussian blurs and select fancy brush sets? Nope. Adjustment brush. Press “O” to see where you’re painting. Paint the areas I wanted to soften. Hold down “Alt” to un-paint the areas I shouldn’t have painted. Pull the clarity slider to the left. Click the adjustment brush or press “Enter” to finish. If I can do it, think how great you would be!

We come to the crop tool. I love how it works, but it’s different from the one in PS so you have to get used to it. You’re cropping to an aspect ratio, not to an actual size or pixel count. You choose the actual size later, when you export your images. Oh, and if you can’t figure out how to change from a portrait to a landscape orientation, you’re not alone! Drag along the longer dimension and it’ll flip the other way for you. I found it disconcerting that you drag the image around behind the cropping borders rather than dragging the cropped area around the image, but that took only a few minutes to get used to. The little angle tool and slider lets you rotate the image to straighten it up, or you can choose a vertical or horizontal surface in the image itself.

So. Convinced yet? Here’s the thing. You can do probably 90% of your photo editing without ever leaving LR. Everything reversible. Everything done live, without ever looking at the histogram (well… you really should. Especially look for those two little triangles at upper left and right. If they’re lit up, you’re either blowing out some whites, or filling in some blacks and losing detail. Use the “recovery” and the “blacks” sliders to fix it).

What do I do now? I hit “8” on the keyboard to mark the image “ready to export” and go on to the next one. When I’m done, I gather all the pictures I want to output and, well, you’ll have to wait until next time!

Next: Creating Output Files. 

Sunday, February 07, 2010

Lightroom article part 2: Importing your Images

Some feedback…
Several people have given me some feedback about my Blog. I love feedback, it makes me feel like I’m not writing into a vacuum. I’ll mention 3 in particular:
One person told me that she does drop by whenever I send an update notice. She’s non-technical and not a photographer but she says she enjoys looking at my pictures and reading about what’s going on (you know who you are! I’d love to get you on the other side of the lens some time!). Anyway, I try to include some non-technical stuff in every posting and as a reminder, most of the pictures I take are up on the monthly galleries if you want to see more than just the few I comment on in the Blog.
I had a response on the lens sharpness issue I mentioned last time. Thanks, Darren. I had forgotten about a great photography resource: the Ken Rockwell site. Ken evokes either love or hate, some people are really not impressed, but I think he does a lot of worthwhile research and is one of the first places to go when you’re thinking about buying new equipment or just want some hardware analysis. Here’s his page on how diffraction affects sharpness when you vary the aperture on a lens: http://www.kenrockwell.com/tech/diffraction.htm.
Another person wrote and asked when I’d be continuing the LR articles. I knew he was an active photographer, but I know him from another discipline so it never occurred to me that he is the ideal candidate for a switchover to LR, and was waiting to read what I had to say before committing. Coming up! The next chapter is below.
There’s lots of ways you can give me feedback: a place to comment at the bottom of each blog post, you could send me an email, tell me in person, call me… if you’re getting my updates and don’t really want them, let me know too! For what it’s worth, I’m seeing about 100 visits every time I put up a new posting.

How about getting together to shoot some pictures?. I have loose plans for a photo trip this summer (I don’t want to call it a “photosafari” or “photoexpedition”. The former is reserved for when and if I can get to Africa! The latter is kind of pretentious). I have no interest in doing weddings, but I know someone who loves to, so drop me a note and I’ll hook you up. If someone said, “would you like to go back to Newfoundland and spend a couple of weeks touring around shooting pictures”, I’d say “WHEN?”. I’m thinking probably the North Shore of Lake Superior this year; or if it works out, a trip to Ireland and/or Scotland. I don't know why — just a place I'd like to go. We’ll see. Get in touch if anyone wants to hook up and do some stuff.

I have a list of photo destinations I'd like to visit — do you? I'd love to hear from people and have a chance to compare lists. eMail me, and I'll compile something I can post here (I won't publish names).

By the way, the whole story of my 2006 motorcycle trip to Newfoundland is at the beginning of this blog, way back here. The other thing you might enjoy, if you haven't seen it, is the ProShow A/V presentation that I created. You can download it here (it's not that big in today's terms: about 35Mb if I recall, and it's safe). You will be asked to install the viewer software which is also safe and non-invasive. Turn your speakers on to enjoy the background music, and have a look! I'd go back there again in a heartbeat.


Here's an older image, dating back a couple of years that I finally got around to editing. It was taken somewhere along the Blue Ridge Parkway on a motorcycle holiday trip Iris and I took a couple of years ago.


There’s not an awful lot going on, the past few weeks. I spent a couple of days in Toronto, my usual business meeting and a great dinner with friends, as well as a visit with the kids in Uxbridge.

Computer Stuff
While I was in TO, I made arrangements for my father’s computer replacement to be delivered, which is the point of this paragraph. As I mentioned last week (oh, wait: I think I wrote it in the LR article that follows this!), his computer died. I think it was a motherboard thing which caused the power supply to blow, and the tech (a plug for Bob, “the Greek Geek” here: not only does he know what he’s doing, but he’s responsive, friendly, quick and inexpensive. If you need PC help, call Bob at AlphaONE Technologies (416) 528-3231 or email him at bobs@alphaonetec.com. Be sure to tell him I sent you.

Anyway, my parents were lucky: the hard drive had not crashed so Bob was able to recover everything without too much hassle and get them back to where they were. Even a small change in layout or procedure is a problem for my folks (I hope I’m as sharp as them when I’m approaching 90, but you know, they’re kind of overwhelmed by the technology). But suppose the hard drive had crashed? They would have been totally lost. They’ve come to rely on the computer, not only for communications and recreation but also for keeping their financial records, correspondence, etc.

Here’s my point: I had backed up their data onto a flash drive a few weeks ago. Sure, a HD crash would have been a hassle, but not a total loss. YOU HAVE TO HAVE BACKUPS. I know, I know, I sound like a broken record, but damn it, it’s important.

In my LR articles, I deal with photo backups. I have some pretty good strategies (Jim, be quiet. No comments from the peanut gallery! Jim is much more diligent than I about backups!). I finally got around to buying another external drive on Friday: The WD MyBook drive has gone down in price again and I bought a 2Tb (that’s 2000 Gb, or 2,000,000 Mb!) drive for only $188 at Costco. The 1Tb version was $109. I figured that while I was at it, why not spring for the big guy.

I’m going to use it as my rotating second backup for my data and systems, and as my primary backup for my archived photos. I have 15,000 images already archived and another similar amount to go. It’ll take me a while to copy them in there, and get them keyworded and organized.

Great resource for business and personal services
I thought I’d take a second to talk about a business networking group I’m involved with, called “LeTip”. We get together every Friday morning (at an ungodly hour!) to exchange business referrals and to network. It’s a great social group as well. I mention them because whenever you do business with someone in that group, you know you’re getting professional and personal attention. It's  a great resource. If you’re involved in any kind of business, you should think about joining. There are chapters all over North America if you're not in the area. Even if you’re not, you’d be amazed at the range of services that my fellow LeTip members can provide. There’s a list here, but I have to tell you I use the services of at least a dozen of these people and it’s always been a great experience. Bob, the “Greek Geek” is one of them: the lawyer that prepared my wills and stuff is another, a printer, a courier… take a second to click the link and see what they can do for you! Let me know so I can get the referral credit. If you want to attend a meeting, you’re very welcome. Drop me a note and I’ll arrange it.

Photo wise, I haven’t really shot anything in a couple of weeks. It’s cold: I don’t really feel like going out and shooting pictures and I have a lot of computer seat time while I’m writing my LR articles, etc. Here are a few casual shots I took. There were a couple of others that I might use – one in particular that has an interesting sky I can use for dramatic effect in a composition some time. I went out in a snowstorm but there was too much water on the lens so the images didn’t work out. There’s one I’ve earmarked as a basis for a painting next time I feel like getting back into doing some.


"Closed for the winter". Wonder when I'll be swimming off this dock again! I'm thinking of entering this as a black-and-white photo in the upcoming club competition.

"Highway 35". I shot this when I went for a walk a few days ago. The loop down to the end of the road I'm on, then back along the highway is about 3 km. The dramatic lighting was enhanced by a graduated filter over the sky (I may have overdone it a bit... depends on the monitor). It was quite cold, the wet road was due to salting, so I was careful to keep the camera out of the spray.
I'm sure I can use the sky portion of this shot elsewhere. I accumulate shots like this, or great textures, for future use creating composite images.
OK. On to the next chapter in the Lightroom saga.

Lightroom article part 2: Importing your Images


Introduction
What we’re doing here is documenting my conversion to LR, with a focus on “WHY” one would make certain choices, not “WHAT” or “HOW”. For how to use the program correctly, pick up Scott Kelby’s book “The Adobe Photoshop Lightroom 2 book for Digital Photographers” which is available at http://www.photoshopuser.com/. You don’t have to be a NAPP member to buy the book, but if you do join NAPP, you’ll get a discount and all kinds of other benefits, including a subscription to Photoshop User magazine which is worth its weight in gold. If you decide to join NAPP, use this link so I get my brownie points!

You might also consider contacting Jim Camelford at jim@photography.to. Jim is the local LR guru and not only does he teach LR courses but he imparts a great deal of wisdom about the right way of doing things.

This series of articles looks at three of LR’s strengths: “Organizing your pictures”, “Editing your Images” and “Creating Output Files”. LR does many things well, but these three were the factors that convinced me to convert to LR. Combined with Photoshop (PS) LR provides an elegant way to handle your workflow, whether you’re a high volume user or just starting to delve into the world of Digital Photography.

These articles are intended for those who have converted to LR or are considering doing so and want to start it the right way from the beginning. Or those who might need a little convincing!

/introduction

Summary of Part 1: Organizing your images

Last time I talked about the concept of LR as it relates to organizing your images. Here’s a summary:


  • LR is like those boxes of slides, negatives and prints you have in storage except it’s digital.
  • LR does not contain your images: it only contains database links to your images and a record of any changes you might have made to them within LR (or PS). You have to take care to store the images themselves in a logical and safe place.
  • LR can handle a huge database of images if you want it to, or you can break down your file into several catalogs.
  • To do a backup, you need to keep copies not only of your images but also of the .lrcat LR catalog file. To make it easier, you should keep your pictures within a master folder. Your backups MUST be on a different drive, hopefully in a different location, and you should have more than one of them.
  • You can search the LR database a variety of ways and should classify your images in as many different ways as you can think of. This includes assigning keywords, rating them with stars and colour keys and storing links to them in a variety of ‘collections’, so you can instantly find the picture or group of pictures you’re looking for.
 Part 2: Importing your images

This article is about what you need to think about when you’re importing your images into LR.

STEP 1: GETTING THE IMAGES INTO THE COMPUTER

When I plug the CF card from my D300 into the card reader (or the SD card from my point-and-shoot, or the camera itself into a USB port on the laptop), I’ve set it so that LR opens and it’s set up to import the images.


You’re doing two things at once here: you’re actually copying the images to your computer, and you’re creating the listings for them within LR. AND, if you’re smart, you’re also creating a backup on another drive at the same time. Why not do it right away so you don’t have to think about it later?


Screen capture of Lightroom's import dialogue

 LR has presets that tell it what to do with the images – convert them to .dng files, copy them to a specific folder on the hard drive, and/or make a backup onto the external drive. I even have a smaller (40Gb) backup drive for the laptop. I automatically create two copies of all the images when I import them.

Converting files to another format is optional
The “.dng” file thing is again your call. I’m converting my RAW images (it doesn’t apply to jpegs), here’s why. I shoot almost everything in RAW format, except on the P&S camera which doesn’t support it. When you make changes to a RAW file (for instance a Nikon .NEF file), the changes are stored in an external file, known as a ‘sidecar’ file, typically named ‘the_same_filename.xmp’. LR may or may not generate this file right away depending how you’ve set it up.


So if you changed the model’s blouse to red from green, or whitened her teeth or removed that zit or cropped the image – any change – those changes are stored in the LR catalog and in the .xmp file if you’ve created one, but not in the original image. Now if you want to send that image to someone else, or keep another copy of the edited file somewhere, you have to keep a copy of the .xmp file too. This is the beauty of LR. You can always go back to the original image as it came out of the camera without any modification. With .dng files (“Digital Negative”, independent of camera brand), the information about the changes is kept in the same file. Technically, a .dng file is also supposed to be about 20% smaller than an original RAW file. So that’s why I’ve decided to convert all my .NEF files to .dng when I import them.


In the interest of keeping things organized, I create a new folder every month (‘2010-02’). Then I tell LR to import the pictures to a sub-folder within that month, which I usually name with the actual day (‘February 18’). Once a month I create a new folder and set LR to put the images there. I do exactly the same thing with the backup file, automatically writing it to the external drive. I use the same folder names.

I rename my images. I don’t use the sequence number generated by the camera because it’s meaningless, and because 9999 images from now, they’ll repeat! I usually incorporate the date in the filename. Some people add a description as well, LR will allow it but it means handling each picture individually. A typical filename would be 20100203-009.dng. Or if it was from a specific assignment, maybe 20100123FAC-063.dng (actually, the FAC ID shoots are an exception for me – I shoot them all as .jpg files because I run a PS action on them and I don’t need the RAW data. That may change).


This is also a good time to apply some preliminary keywords to the group of pictures. What do they have in common? Are they all winter shots at 12 Mile Lake? Give them keywords like “winter”, “12 Mile Lake”, etc. If only some of them contain snowmobiles, don’t add that yet. Were they all taken at the BAD Ride (motorcycle charity ride)? Key word “BAD Ride” but not motorcycle unless they were all shots of bikes. By the way, you can select only some of the images from your card or camera, if you want to give them common keywords, then go back and do it again for another batch with a different set of criteria. Or if you want to store them in a separate folder. Changing keywords later in LR is easy, so you can do it now or later.


Okay, click “import” and watch it go to work. When it’s done, all of your images have been copied to the appropriate place(s) and their listings have been generated in LR. AND you’ve already created a backup.


When you import .jpg files (like this batch which comes from my point-and-shoot camera) you can't convert them to .dng format
If you were just adding existing images to your LR catalog, it’s the same import dialog, but you would tell it not to copy or move the images.

STEP 2: THROWING OUT THE GARBAGE
Why do you want to keep your garbage? My 90-year old dad hasn’t figured this out yet – when he deletes an email or a file, he keeps them in the recycle bin. I don’t get it. Does he think this is a good place to store stuff? I finally convinced him to clean it out (somewhat) and I deleted over 6Gb of old garbage. His computer died this week and we’re replacing it, and I’m anticipating a call from him asking where some file or other that was in the trash on the old machine is! If it’s garbage, it’s garbage. THROW IT OUT. If it’s not garbage, for God’s sake, don’t put it in the trash! I don’t know why I have to tell you that, but for some reason, I do!
Sometimes my camera is on high speed – 6 frames/sec. By mistake, I shoot 3 pictures where I only wanted one. WHY KEEP THE OTHER 2? Or I shoot 12 shots of a subject, different exposures, different expression. Choose the best one (or ones) and TURF THE REST. Or that image is hopelessly under- or over-exposed, or you moved the camera, or it was out of focus. CHUCK IT OUT! You are NEVER, EVER going to want to see that picture again. DUMP IT.
Here’s another workflow hint. When I want to keep a temporary copy of something that I need for this session but will never need again, I name the file “temp” (or I include ‘temp’ at the beginning of the filename). For example, I’m creating a composite image in PS and I want to save an overlay separately while I work on the main file, but once it’s done I don’t need it any more. Or I want to store someone’s phone number so I can call them back after I’m done with the call I’m on. Or I’m grabbing some text somewhere to paste into the document I’m working on.

Later, when I’m cleaning out the computer and I come across a file named ‘temp_something’, I don’t have to give it a single thought. Garbage. I don’t have to open it to look at it, or remember what it was. Out.
Once I’ve imported them, I go through the images in LR. As I look through them, I hit “X” to mark them for deletion, “P” (picks) if I really like them, or I do nothing if I’m not sure. You can go through 300 pictures in about 3 minutes doing that. Then go back and select “delete rejected images” and be done with it. Use the “delete from disk” option. It only hurts for a second, you’ll feel better later. Come on, do it. TAKE OUT THE GARBAGE.


(PS: if you were listening, and you had your left brain engaged, you’d realize that when you did your import and created a backup, ALL the images are still there. You didn’t delete them when you took out the trash! But that’s like keeping stuff in the recycle bin…)


STEP 3: SAVING THE “KEEPERS” IN A QUICK COLLECTION
You could skip this step. But doing this makes it much easier to come back later. Sometimes I’m looking at my newly imported images and I get sidetracked. I need to go out of the program, or I want to look at another image somewhere. How do I get back to just the new images I was just working on? Select all the “picks” then save them to a Quick Collection. I can convert the Quick Collection to a permanent one later. By the way, you can drag images into other collections as well, without affecting anything else. Suppose you think one of those images might make a dandy art print. You can drag the image into a collection called ‘possible dandy art prints’ or even into a sub collection called, ‘I really like these!’. You can do this any time, and don’t forget, you’re not actually copying the image, you’re only creating a reference to it in the collection.

STEP 4: RATING THE IMAGES
At this point, I go through the picks again, and look at quality. I’ll assign 1 to 5 stars to each image depending on its quality. Pictures that are part of a group also get a colour rating, usually red. For instance, I may have taken a sequence of 3 or 5 shots intending to merge them as an HDR image, or stitch them together for a panorama.


You may have a different set of criteria for the stars or the colour codes. You can even rename your colour codes so you know what they’re for without having to remember.


I use the following ratings:

  • Star Ratings


    • No star: ‘ho, hum’. This image wasn’t bad enough to warrant throwing it out, but I’ll probably never want to see it again.
    • One star: let me think about this one. I might want to look at it again. I’ll get back to you later.
    • Two stars: this is part of a set. A bunch of images that I might combine into a pano or HDR.
    • Three stars: I kinda like this image. It has potential, but I’ll have to do a bunch of work to use it for anything. I don’t feel like doing it now.
    • Four stars: Nice picture, I’m going to work on this one soon.
    • Five stars: I LOVE IT! I’m going to make $1000 selling this picture.

  • Colour codes:


    • Red: this one is hot. I’m going to come back to this one as soon as I’m finished my import workflow.
    • Yellow: I want to work on this one but after I’ve done all the red ones
    • Green: I finished editing this one and it’s ready to be exported or added to some collections
    • Blue: all done! This is a keeper and it’s all finished.
    • Purple: I don’t use this very much because there’s no keyboard shortcut to it. The 5 star ratings and the 4 colours above are created by hitting 1 – 9 on the keyboard. ‘0’ is reserved for removing the star rating (you need to go to the photo’ menu to remove the colour rating).
    So if I have a picture that I really, really like and I want to start working on editing it right away, I’ll give it a “5-6” rating (5 stars and red). Make sense?


    I just fell in the trap of writing about a “WHAT” instead of a “WHY”. OK, I wanted to share what I do, to get your brain cells churning and thinking about what classifications YOU might want to use. See? It really was a “WHY”!

    STEP 5: KEYWORDING
    Now I go back and keyword the images. I could – sometimes I do – all of this in one pass, but I find it easier to focus on one function at a time. The keyword list can get very long – I heard of someone with literally thousands of keywords. I try to keep it tight. But I think about what criteria I might ever want to search by and when in doubt, add a keyword. For instance “snowmobile”. Or “ice fishing”. I don’t think I’ll ever need to find “Yellow Helmet”, but if you do, then go for it. It doesn’t cost anything except your time.


    You can select one or a group of images and add new keywords. If you start to type them in the circled field, LR will look for matches in your existing keyword list and finish them for you. It's a good idea to do it that way so you don't have close or mis-spelled keywords, for instance using "VW" sometimes and "Volkswagen" other times. You could also type them in the white box, or select them from your existing list or a list of recent suggestions.
    As I came back to re-read and edit this, an example came to mind. I took a picture of a red corvette in my driveway several years ago (not mine. I covet that car. A rebuilt ’75 with a 427 under the hood. One day…). I wanted to look at it again. If you were listening, I hadn’t imported it to LR yet because it pre-dates my 2008 cutoff. Or had I… it was in my group of “favourites”. OK, search keywords for “corvette”…


    AHA! There it is! And another shot, close-ups of the water drops beading on the waxed finish. See? You never know when you might want to search for a specific keyword. Here’s the ‘vette, by the way.


    Recap. Where are we?
    We’ve stored two copies of every picture in separate places. Information about them is in the master LR catalog. We named the images so we could track them chronologically. We deleted all the garbage. We flagged the ‘selects’ and we rated them. We colour coded them for further action. We added keywords to each picture so we can find them again.


    How long did it take? Call it 15-30 minutes for a day’s shooting. Or less if you stop part way through and decide to keyword later.


    So if I want to find all the fall colour pictures taken up in the Haliburton Highlands in the past two years that are sufficiently high quality to be considered for publication in my next book, I can! Easily.


    NEXT CHAPTER: EDITING YOUR IMAGES

    Tuesday, February 02, 2010

    Lightroom Article, Part 1. Organizing your Images

    Before I get started with the Lightroom stuff, I have a couple of small topics for those not into LR.

    What to do when it's really, really cold:


    Bundle up and keep warm! Note the sheepskin coat, ski pants, funny hat and warm gloves. I use my snow scoop as a sledge to bring firewood into the house.


    Take neat pictures. I shot this one from my front porch, about 10' from the door. Obviously in the middle of a snow storm, I thought this high key image came out pretty well.

    I also went for a walk out on the hard water, to the ice fishing huts. I took a few pictures while I was out there, but no real keepers in the bunch.

    What is the best aperture to use?
    The next day, I brought the camera with the 200mm lens and the 2x converter out and shot some photos of the ice fishing huts from the road. The far shore is about 1 km away, so we're looking at some real long reach-out-and-touch pictures here. I had the tripod with me. It was snowing and I wanted to try different shutter speeds to see what the best image would be. These two images were cropped out of sequential frames, with the settings as shown:


    Now that's interesting... the wide open shot is MUCH sharper than the one with the lens closed down tight. The snow, of course, had something to do with it, but not everything. Oh, and it was on the tripod and I used the self-timer so there was no camera shake involved. So I know now, stopped right down with the telextender mounted is NOT how I should be shooting pictures. When I get a chance, I'm going to take a series of shots (in better weather conditions) at different aperture combinations to find the sweet spot for this lens combination. I'm guessing it'll be around f/11 or f/16 (remember that includes the two stop penalty imposed by the telextender).

    Converting to Lightroom

    Introduction


    I don’t know if I should call this “part 1” or “part 2” of the Lightroom (LR) articles. I think I’ll stick with “part 1” since the post last time was really just an introduction.

     What we’re doing here is documenting my conversion to LR, with a focus on “WHY” one would make certain choices, not “WHAT” or “HOW”. For how to use the program correctly, pick up Scott Kelby’s book “The Adobe Photoshop Lightroom 2 book for Digital Photographers” which is available at http://www.photoshopuser.com/. You don’t have to be a NAPP member to buy the book, but if you do join NAPP, you’ll get a discount and all kinds of other benefits, including a subscription to Photoshop User magazine which is worth its weight in gold. If you decide to join NAPP, use this link so I get my brownie points!

     You might also consider contacting Jim Camelford at jim@photography.to. Jim is the local LR guru and not only does he teach LR courses but he imparts a great deal of wisdom about the right way of doing things.

     This series of articles looks at three of LR’s strengths: “Organizing your pictures”, “Editing your Images” and “Creating Output Files”. LR does many things well, but these three were the factors that convinced me to convert to LR. Combined with Photoshop (PS) LR provides an elegant way to handle your workflow, whether you’re a high volume user or just starting to delve into the world of Digital Photography.

     These articles are intended for those who have converted to LR or are considering doing so and want to start it the right way from the beginning. Or those who might need a little convincing!

     /introduction

     Part 1: Organizing your Work

     This article is about why you should get started organizing your photos and some strategies on how to do it. This is about setting LR up so you can find them again when you want to.

     I’ve been shooting pictures and doing graphics for 50 years. When I look back at some of the old stuff, I think, “Wow, what an amateur!” I suppose I’ll look back in 5 years at what I’m shooting now with the same jaded eye.  
    • My images from the old days were
      • 35mm slides. I have boxes and boxes of these in the garage. I haven’t looked at them in years. 
      • 35mm negatives. I had these in binders in plastic sheets, with a contact sheet filed next to them. I don’t even know where these are any more.
      • Large format negatives and transparencies. I have absolutely no idea where they are. I think there’s a box somewhere.
      • Boxes of old prints. Some framed, some not. Some in albums, some not.
    • When I started doing digital graphics in the ‘80s and ‘90s I had a mixture of MAC and PC equipment and used whatever media were available at the time for backup and storage. There were tape drives, I remember a 100Mb cartridge drive (called a ZIP disk, if I recall), and of course 5¼” floppy disks. Not only don’t I know where these are, but I don’t have any way to look at them anymore, anyway.
    • My early digital photographs were relatively small files stored in the “My Pictures” folder on a hard drive. I backed them up from time to time and there’s still a folder of old stuff on my backup drive.
    • Starting about 10 years ago, I copied data to CD for backup purposes. The first dedicated photo backups started in 2004 and I have at least one CD (now DVD) for each month since then. Finding anything earlier than 2008 requires looking through these disks one at a time.
    • All of my photos since January 2008 are stored on my 1Tb external drive, with DVD backups. They are imported into LR and I can find anything virtually instantly.
     What I’m afraid of is that if I rewrite this article 10 years from now, I’m going to lament how I can’t get at the pictures I’m doing now. Who knows.

     But what I’m trying to say is, I’ve archived a ton of “CRAP”. Pictures I never, ever will look at or use again. Why? Because it was easier to throw it all in a box than it was to go through it and toss the bad stuff out.

     Seems to me there are two reasons to keep a picture:

    • You want to keep a record of something.
      • You did a commercial shoot. You need to keep the original shots, even the bad ones, just in case the client wants something one day.
      • Pictures of your kids growing up, your grandparents when they were the age you are now, trips you’ve taken, things you’ve experienced and want to remember.
      • Photos of people before they became rich and famous. Hopefully your kids.
    • You want to use it for something
      • Great pictures that you’re going to print and exhibit in a gallery some day, with 4- and 5-figure price tags on them
      • Pictures you’re going to sell to the news media or to National Geographic
      • Pictures you want to use in a slide show or video presentation
      • Pictures you’re going to publish in a book when you get around to it
      • Stuff you might want to share online in the hope that someone might think, “what a great talent this guy has!” and write you a cheque with lots of zero’s in it or provide you with other benefits (use your imagination).
    I’m sure you can think of other reasons to keep your images. We all have our own personal reasons. But why keep the garbage? As I said a minute ago, it was easier to keep it than to go through it and weed out the bad stuff and it didn’t cost you anything other than some storage space. The down side is, it makes it harder to find the good stuff when you have to weed through all that junk to find it!

     As I said, in my garage, I have several large cartons containing boxes and boxes of 35mm slides. In the 1960’s and 1970’s I was a prolific amateur photographer. I took thousands of images at home and during my travels (mostly in North America and Europe) and I never threw out anything. I haven’t looked in these boxes in years. At one point, a long time ago, I went through my slides and chose the ones I liked best: there were about 100 of them and I kept them in a single Ektagraphic Carousel tray, which I still have. I’ve scanned most of these, I still have a batch to do.

     In that tray are a few slides that I took in the Painted Desert in Arizona in 1971 when my (ex) wife and I did a road trip across North America in a VW beetle. Great pictures. But now suppose we wanted to go through the slides from that trip on a stroll down memory lane (unfortunately, I don’t have a working slide projector right now). I have the 400 other slides in little yellow Kodak boxes, but the good ones – those I just mentioned and a couple from Kansas, and some from Wyoming – they’re not in those boxes. So looking through the trip we’d miss the good ones!

     Here’s where LR is so much better than any of those old methods of storing images: you can virtually instantaneously find any image you have made, provided you took the time to categorize it properly at the beginning.  And you can keep a link to that one image in a virtually unlimited number of collections.

    Take this image as an example


    • This is one of my favourite images. It’s in my collection of my best shots, my “Dirty Dozen”.
    • I roll through a slide show of about 200 images as a screen saver on my desktop. It’s in that group.
    • I’m planning to include it in my next Blurb book
    • I’m using it in this article.
    • I’ve entered it in the GTCCC competition this year and in the RHCC competition last year (where it was voted best print in the show, thank y’all verra verra much).
    • I might create a slideshow of images that I’ve entered into various competitions.
    • Hilarie taught me how to create this using Painter 11. I’ve done other paintings and I might want to look at my development as a pixel artist one day.
    • I’ve sold a couple of prints of this picture and I hope I can sell some more.
    OK, I’ve listed 8 different reasons why I might want to find this image. LR allows me to store ONE COPY of this image on my computer (we’re not talking about backups here) and categorize it in a variety of ways so I can use it or find it for any of these purposes. You can use any or all of the following, in any combination.

    • I’ve flagged the image with 5 stars. It’s definitely one of my best.
    • I’ve set a “blue” colour flag to indicate that it’s been completed.
    • I’ve added a link to it in a whole bunch of collections that relate to the above list
    • I’ve marked it with a bunch of keywords so I can find it again: “mountain man; painting; portrait; george; high falls gorge; july 2008 road trip…” etc.
    This is where LR excels. It’s like having a gigantic virtual filing system where you can instantly find anything you’re looking for.

    Technology changes {sarcasm}you’re kidding, right?{/sarcasm}. So how you store your images today is different from how you used to store them (in little yellow boxes in the garage) and it will be different tomorrow. I’m going to leave the “HOW” up to others. Contact Jim Camelford. He’s got a better grasp on this than I do. As I write this, the state of the art is DROBO and RAID systems of individual high capacity hard drives, but for those of us who are not so technologically driven, a few (not just one!) portable hard drives in the 500Gb to 1Tb range will do. If the average digital file is 10Mb in size, a 1Tb drive can store 100,000 images.

    Hopefully you’ve gotten the message: you want to keep your digital images so you can look at them some time in the indeterminate future, because it costs nothing to shoot digital images you have thousands of them, and how are you going to find the ones you want anyway? This is WHY you need to organize your pictures, whether you have a huge archive already or you’re just starting out. This is WHY you want to keep them in such a way that you can transfer them to whatever the latest technology is down the road. To that 1000 TeraByte pocket drive using subatomic technology based on detecting the strangeness of bottom quarks during weak interactions that’s going to be invented next year that will make all your CDs and DVDs obsolete. That will work whether you’re in the MAC or PC environment, doesn’t matter.

    LR is designed to handle big databases. Its search engine is based on SQL and it can index and handle thousands of records with ease. My own database is about 15,000 images so far and LR doesn’t exhibit the slightest hesitancy searching those files. So it can be argued that for now, you can store all of your images in one place (backup, backup, backup!) and you can keep the links to them in one big database or ‘catalog’. LR will do the latter for you.

     You can keep them separately in multiple catalogs if you want. There are many arguments in both directions, but it doesn’t matter. A professional photographer may want to keep the weddings he’s shot in different catalogs, because he sees no reason that he would want to view or use different brides or grooms in the same presentation. Even if he did, he could bring them together by creating a combined catalog in LR. No sweat, just a few keystrokes. And he might want to keep his travel shots, his trips to South Africa and New Zealand in another catalog. Fine. You choose. But if you’re doing an article on “Mountains” you may want all of those travel shots in one catalog.

    So I’m torn. There are those who suggest all your images should be represented in one massive master catalog, and others who think you should separate them into logical groups. Doesn’t matter – just do it! Whatever works for you. LR can handle big databases, if you think that’s the way you want to go.

    Choose a manageable starting point. You could make tomorrow the first day of your new LR digital life, or you could go back to the day you got your first digital camera. Or anywhere in between. I chose to go back 2 years and I can add old stuff slowly to it when I have the time. I currently have about 15,000 images imported into LR and categorized. Remember, I only needed to categorize the “keepers”, so it wasn’t as daunting a task as you might imagine.

    Let’s talk about backups for a second. Clearly you need to back up your images somehow. My backup strategy is weak. OK, the strategy isn’t but the tactics are! Right now, new images are transferred to my desktop hard drive, and a backup goes to an external 1Tb WD MyBook drive. Every month I also burn these to DVD. I’d like to say these are stored in another location, but, well, I don’t have another location right now. If my house burned down, I’m toast. If someone broke in and stole my computer and external drive, I’m almost toast. So I try to keep them separate. There are schemes where you can store your data online at a remote server, and other ideas, but this is “HOW” and not “WHY” so I promised I wouldn’t get into it. You figure it out.

    It’s important that you understand that LR contains information about your images, not the images themselves. That’s what an LR catalog is. If you open the folder where it’s located, you’ll find two kinds of files: an “lrcat” file and something else called “Previews.lrdata”. The former is the information about your images: the latter is a record of the high resolution preview of your images which is generated by LR. You can force LR to generate these previews again, although it might take a while. But there’s no compelling reason to back these up. Good thing, too, because this file is BIG. Not as big as the images themselves, but BIG. In my case, with 15,000 images, my previews.lrdata folder is about 9Gb in size, while the .lrcat file is only about 200Mb.

    So when you’re doing backups, what do you need to keep copies of? Certainly the images themselves, and also the .lrcat file. The latter contains everything you’ve done in LR with your images. Remember, it’s not “IF” your hard drive will fail, it’s a question of “WHEN”. It will. Be diligent about backups.

    So do you see WHY you might want to start using LR? Even if you never edit a picture, or print one, or sell a picture to a client or to the media, just being able to store your pictures in an organized way and being able to instantly find the one or ones you’re looking for is reason enough!

    Next: Getting your pictures into Lightroom.