Showing posts with label dogsled. Show all posts

Friday, March 31, 2017

'tis the season

'tis the season

This is one of my least favourite times of the year. I've really had enough pictures with white stuff in it. And when the white goes away, we're left with ugly brown mud. I don't know about you, but I just want to stay indoors and hibernate a bit. Still, the Doc says I have to walk (I'll start any day, now Jeff!) and, well, I am the picture-taking-man. It occurred to me last night that it will be less than a month now, and I'll be looking for birds at Carden Plain, watching trees and flowers bud... "come on, spring!"

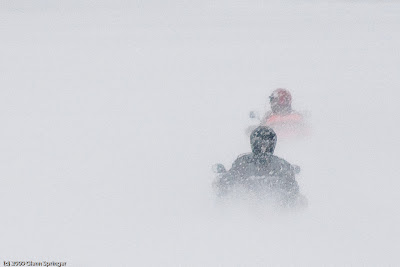
Last week there were some dogsled races: just enough snow to make it happen.


That said, I did make it up to Algonquin Park twice in the last two weeks. Here's an image from the first of those visits. I put a lot of thought and effort into the making of this image. I get most of my concepts from seeing other people's work and most of my techniques by researching then trying them myself. But I think one needs to understand not only what the maker did to create an image, but also why he made the choices he did.

You may dismiss it as "just another landscape shot" but from the toning of the sky to deliberately leaving the distant hills slightly soft to provide a sense of depth and carefully balancing the colours to match my vision, this shot came out just the way I wanted it and the uncropped version will make an excellent large scale print.


I could easily have removed the road sign: should I have? Where does your eye go first? Then where? How does it get there? Does it want to leave the image or explore other things? 

I cropped this image as the banner header for this blog (reproduced here for when I change it next time):


It's hard to find an image that works well as a 3:1 or wider pano. This does, and carries the same ambiance as the original without the story.


I added a new hit counter to this site. Not that I don't trust the stats from Blogger... and I removed the revolving globe that doesn't tell me anything new. If you could zero it, it would be more useful, but a full map of hundreds of pins that cover North America and other countries isn't too informative.

Since Blogger told me I'm over 100,000 hits (105k today) I decided to start the counter at 100,000. So let's see what's really happening.

By the way, I used https://www.freecounterstat.com/.


That's what I figured. The big 7K and 10K hits a couple of months ago were an anomaly. Not even 300 hits in the last week. Of course, I haven't posted anything new...


...while we're talking about internet stuff...

In a conversation with someone the other day, she told me where her website is hosted and how she "could count on one hand the times she had a problem or her site was down over many years". It got me thinking about where I'm hosted, at a big international ISP called "1and1.com" and I've been with them for close to 20 years and I've talked to their support maybe 6 times over that period of time. Usually to make a change I couldn't figure out but I remember the one time when my site went down for a few hours — it turned out the computer in their server farm that hosted my site went down. Fixed with one phone call. So problem-free.

So if I bored you while skimming that paragraph, let's get to the bottom line:
  • if you need a web presence of your own, 1and1's a great place to go [by the way that's "one-and-one" not "L-and-L"!). It's amazingly cheap, they have all the tools to let you build your site or they can do it and a live person answers your call if you phone their support.
  • If you still use Hotmail or even Gmail or, God forbid, AOL as your email address, it's time to join the 21st century. Let me tell you how easy it is to get your own email address. Still want to keep the old address so you don't have to tell people it's still valid? NO PROBLEM. Let me walk you through it.
Step 1 is to create a new domain. You might want to use your name, like "FredFarkle.com". Cost? $0.99 for the first year, somewhere around $10 per year after that (depends if you want .com, .ca, .biz, etc). OK, now you own your own domain! But it needs to be hosted somewhere.

Step 2 is to set up a hosting contract. 1and1 has it set up so you can do all of that in one swell foop. Get the domain name and a basic web hosting package for $1.99 per month for the first year, $10/month after that. That's pretty well all you need: as many email addresses as you can eat (one for you, one for your spouse, one for each of the kids, the dog, the cats, the fish...), several domain names and your very own website that you can build for free! Even if you don't want the website, you have those email addresses! Here's the link and just scroll down to where it says "Create your own website" and click the yellow "find out more" button.


Step 3 is to set up email address(es). You have two choices: you can set up a whole new address, which you can access via webmail online or send and receive via your email package (if you use Outlook, or Mail or...). Or you can set up the new address to forward to your existing one! So if someone sends a message to your new address, fred@farkle.com, it will automatically appear wherever you get your mail now! You do that all at the 1and1 site, no charge.

I just set up a new address as a forward, to test it. Took me less than a minute.

So it's time. If you still think having an email address like "kittycats.are.cute@AOL.com" is for you, then ignore this. If you think it's more professional to be "fred@farkle.com" or "henrietta@my-own-company-name.com" then follow this link.

Is 1and1 paying me to say this? Sort of... I get a small referral fee for new accounts, but I wrote this because I think people should get away from those hackable email addresses and join the 21st century. (I just got a virus spam email from my own doctor, who uses an AOL address. I didn't actually get it: I had a message from 1and1 that said, "virus detected" and they blocked it. Another advantage!)
I've also terminated my SmugMug account because I only used it sporadically and I don't sell images from there: it's a wasted expense for me. That said, I need to find another vehicle. Working on it.


Too Many Images.

I'm going to make a conscious effort to reduce the quantity and increase the quality of the images here. As I said to someone recently, I've been posting images that would score 7-8-9-10 out of 10 and I'm going to try to only post the 9's and 10's from now on (I don't have a lot of what I consider "10's" but beauty is in the eye of the beholder!).

So I'm going to cut back and post only images I'm really proud of (or that add to the story I'm telling). First step is culling the images that I'm archiving.


(OK, starting next time! It's hard to quit cold turkey.)


If you think the illiterate orange clown currently occupying the White House is God's gift to USA Incorporated, then you're probably reading the wrong blog. He's good for one thing, though: source material for comedy writers.

Here's a recent FaceBook post of mine for your enjoyment.
Someone told me that culling their photos after a shoot is a tedious chore.
But culling is a great activity. I mean, it's really fantastic. People who thing culling is bad are total scumbags. Total scumbags. It's great, it's really, really great. It's the best thing you can do. I've got all the best pictures, really the best. Some of them are tiny but they're great, really really great. And more people in the world have seen my great pictures than any other pictures in the world. I'm telling you. All the other photographers are worse than me. They're bad, so bad. Ansel Adams? A total disaster. Henri Cartier-Bresson, he's a fake. So fake, he has to have a hyphen in his name. Youssef Karsh? He copies my style. He knows my style because he tapped my phones. Someone told me he died in 2002. Fake news. So fake. He was an immigrant. Shouldn't have let him in the country, our country, the best country in the world.
So we sent him to Canada. Where we're going to build a great wall. It's going to be the best wall in the world, the best ever. And we're going to make them pay for it. Our photographers are the best photographers in the world. The best. You can hire them, you can pay them with opportunities for exposure, the best way to pay. And you can grab them by the lens. We're going to do that by banning all digital sensors, so we can go back to film and make Kodak great again. They're going to be so great and they're going to hire hundreds of thousands of people. Millions. It's time to make photography great again.
Feel free to share. If you share, more people in the world will read your posts. More than any other posts in the world. I'm telling you. It'll be fantastic. Think of all the exposure you'll get. Nobody shares posts better than you do. Nobody. It will be so big, it will kill the internet. Kill it. And we're going to make Mark Zuckerberg pay for it.


Update on Newfoundland

It's happening. I'm going for the month of July. And I've found a travelling companion so we'll be able to share both experiences and costs. It's not cheap – just getting there, by air or by car is expensive (if you fly, you have to rent a car there. That's a fortune!) – and you have accommodations and food and... to pay for, but it's going to be worth it.

The original concept has changed a little. Instead of finding a single place to stay for the month, we're looking at 3 or 4 place where we'll stay for a week.

We're working on our itinerary as we speak, and I'll share some of that here later. If you live in Newfoundland and you're reading this, I'd love to visit with you when we're there if we can. email me. Ditto if anyone is planning a visit during that time: let's hook up somewhere!

Something I really want to do for this trip is to make a list of my photographic goals. A "shot list" or "storyboard" kind of approach. When I review my images after a trip, I always feel as though I've missed important things. And I haven't captured the story. It's the old "work the scene" thing, applied to the whole trip, not just a photo-op.

I also need to work on some things. Here's an example:


Just an iPhone snap of the fishing huts from the Red Umbrella Inn in the parking lot
next to my house. Every little town in Newfoundland has weathered fishing stages,
old buildings, landscapes like this. I need to figure out how to give them that "wow" factor.
I also have terrible results shooting in bright sunlight (my last visit to Algonquin Park was a disaster in that sense). I'm trying too hard. I need to work on that Who knows, the sun might come out while we're on the Rock!


To my faithful readers: if anyone has always had their heart set on a specific image from there – a specific little outport, a puffin with a mouthful of capelin, waves crashing over a lighthouse, the milky way over the rocky coastline... a 6 foot pano or a 4 foot canvas for your living room or office wall – and you would like to commission me to seek out and make that picture for you, please contact me


What would one of my blog posts be without pictures? 


Visiting Algonquin Park in mid-March, we came upon this icefall on Highway 60. I was with John Reed and Amin Shivji and we were all taken by the intense colour of this ice.  

looking straight up! 

The Visitor's Centre never disappoints. Although we didn't see a lot of wildlife except there, we were presented with some variety:


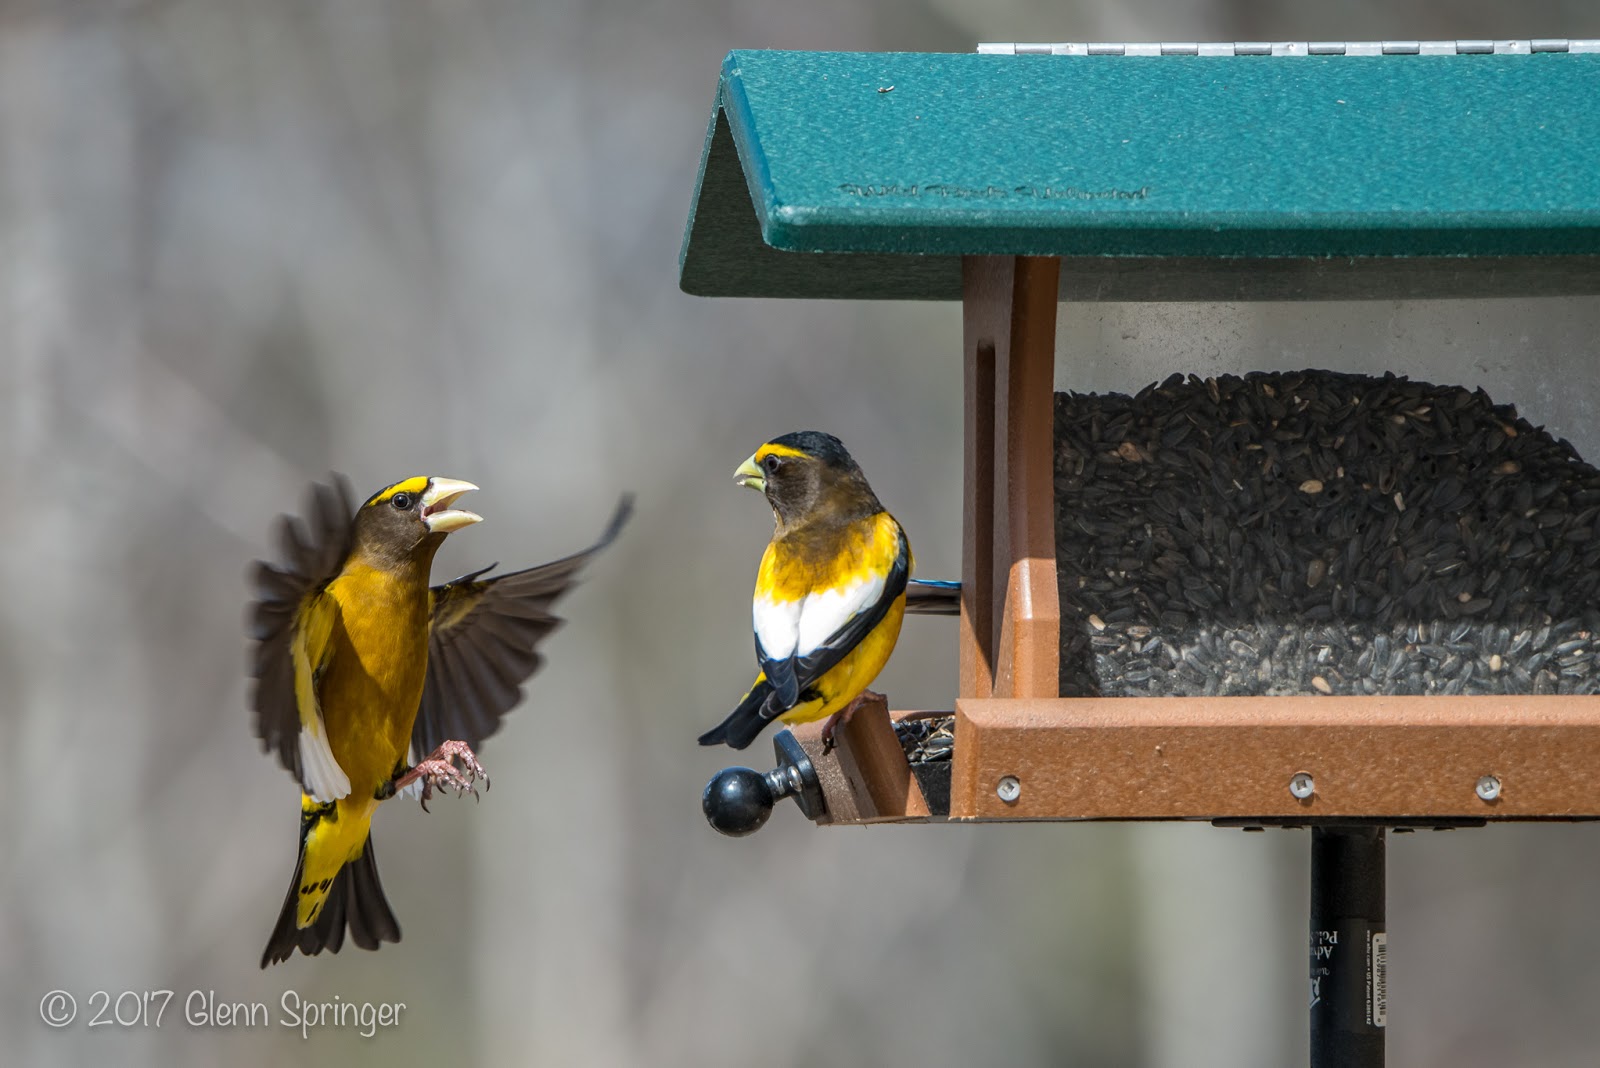
Evening Grosbeaks fighting over a landing spot at the feeder


The ubiquitous and aggressive blue jays loudly proclaimed their possession


It took some time to spot this Ruffed Grouse hunkered down in the discarded seed husks in perfect camouflage. John spotted it and spent a lot of time saying, "look along my arm at where I'm pointing..." before I could see it. Some photoshop work was needed to make it stand out.


Then look who popped out of the brush and posed for a photo! First time I've seen a pine marten here.  

While John was here, we toured some of my favourite sites. As we drove along Bethel Church Road on the way to Wintergreen, we saw at least 20 deer on and off the road. Good thing we were going slowly. I was driving so no pictures...


I captured a natural-light candid of the young lady who brought us our brekkie. OK, maybe not totally natural light and Lightroom had a little to do with the lighting! (Tom & Diane, is that your daughter?) 

We stopped at the white water on the way home, then I showed John the "Screaming Tree". 


I shot a huge pano merge, totalling over 80 Mp; then proceeded to throw most of it away to create this impressionistic image.  

The following weekend I ended up at most of the same spots, this time with Karen Young.  This is a tough time of year to find creative subjects (but not my guests!).


— 30 —

Tuesday, March 15, 2016

Odds & Ends

...just rambling...

I'm sitting here today just catching up and organizing things. I'm going to be out of circulation for a few weeks for a medical procedure so there's a lot of small stuff to take care of.
I'm a cancer survivor. I had a couple of previous surgeries to remove my thyroid and many affected lymph nodes to which it had spread. I'm having some more surgery next week to remove some malignant nodes in my neck that have returned. They can't get it all but I've lived with it for 12 years, so no reason to think I can't continue to do so. According to the docs, although it's not a minor procedure, I'll be out of hospital in a couple of days and should recuperate quite quickly. 
Yesterday I had the pre-admission appointments at Toronto General prior to the surgery. I wanted to share what an interesting experience it was. For those who have gone through this, usually you go 'here' for paperwork, then 'there' for bloodwork, then 'there' for an EKG, then to the anaesthesiologist's office for a consult, etc. This time they put me in a little exam room and all of the necessary people came to see me instead, one after another! It certainly was much more user-friendly and they had their act together: I didn't have to wait more than a couple of minutes between appointments!
And of course this digital world we live in is conducive to virtually instantaneous sharing of information, so everyone had access to all of my history (what year did you say you had that gall bladder surgery? Our records show it was in 1973...) This could be a good or bad thing, depending how you look at it. Now Princess Margaret Hospital has given me direct online access to both my upcoming schedule of appointments and also to test results. So instead of having to wait two weeks, then trek all the way downtown to sit with the oncologist to find out the results of a CT scan or MRI, I was able to see the actual radiologist's report online about two days after the test. That waiting was always the worst part (of course if they found something bad, I would imagine they would phone me).
So last night, I got email notification that there were new results available and I was actually able to see the results of my CBC blood tests, just like the doctors do:


A screen grab of just a small portion of the test results. FWIW, everything they checked was in the Normal range.  Well, except for one thing, but they didn't give me a hard time about it. I'm just a wee bit short for my weight. In fact, my BMI is off the end of their chart. Have to do something about that when this is over.
By the way, I had the test just before 2 pm. When I got home just before 8, the results were already there.
So I should be back blogging in a week or two, but I won't have taken too many new pictures. In fact, I've decided to send my camera and some selected lenses in for inspection, cleaning and service while I'm in. I'll let you know how that turns out when I get back!


SPEAKING OF CANCER

On April 16th, I'm participating in the Cops for Cancer event at the Yorkdale Shopping Centre. I've teamed up with my friend Sean Shapiro and will be having my copious curly locks shorn publicly to express my support for cancer research. Not only my support, but YOURS! The whole idea is to raise donations for the Canadian Cancer Society. 

I didn't know what to put down for a goal so I think I set it too low. Don't let that daunt you: please take the opportunity to donate to this critical cause. Here's a link to my personal page on the Cops for Cancer site. Please visit it and make a donation, every dollar counts.

And yes, I'll post bald pictures after the fact!


It's  been an easy winter and although we shouldn't count our chickens (you KNOW there's going to be more of it before real spring sets in), it's +11°C out there today and although there's still snow on the ground and ice on the lake, it'll be gone soon. I'm not taking the chains and plow off the ATV yet, though!

I only had one day of dripping water in my entry (did the roof last year. Can't figure out where it's still coming from!) and although the sump pump line froze up again I have it under control (Note to self: you really have to address that this summer!). Everywhere you walk is muddy right now, it's not my favourite time of year.


I'm stepping down as president of the Haliburton Highlands Camera Club next week, just because I think that other people should guide it now. When the club was founded two years ago, we assembled a talented and selfless team of people to run the operations and judging by the enthusiasm and activity of the membership, they've done a great job. Some of us are stepping back and some new people are coming in. It's good to see. I'm sure that the goals of the club – a friendly learning and sharing environment – will be well catered to.

The growing skill and artistic vision of the club members is portrayed in a rotating slide show on the website greeting page: (link) take a minute to view it, you'll enjoy it. It's gratifying, when I wear my teaching hat!
By the way, watch this space for an announcement of what we're planning as a show and sale of some fine images from the club members, as well as a lecture by a renowned wildlife photographer. Tentatively scheduled for May 2016


Speaking of artistic endeavours, I'm gaining a little more confidence in my painting. For the first time, I tried painting something other than rocks and trees, and it didn't come out too bad!


This is a portrait of a Pine Marten based on a photo taken in Algonquin Park a few months ago. It needs a bit more work and more back story but it tells me that maybe I can draw, just a little bit, so I'm looking forward to trying more things. Right now it's about learning techniques that I can call upon when I need them. 

And yes, that's what a Pine Marten actually looks like! Someone on the Algonquin group in Facebook gave me a compliment: "hey, I know that animal! He's the one at Mew Lake"! Think I should try people now?

I wish I had started painting 20 years ago. It's a bit of a late start at my age.


Gales of November

Lots of chatter, lots of interest, still waiting for people to book the second weekend! It's possible the October 27-31 weekend will be geared more to intermediate shooters... but that depends on who books.

The booking page was down for a while but it's back up. For more information on this awesome workshop opportunity, go to www.photography.to/gales.


OOh, a secret!

I'm not allowed to say who, yet. One of my pictures has been selected for a very prestigious organization's promotional brochure. Although I won't get paid for it (yeah, what else is new? LOL), I will get VIP access to one or more of their events. I can't say more until they give me the go-ahead, so watch this space!


Dog Sled Derby

The Haliburton dog sled derby was last weekend. I was out both days and, as a camera club colleague said, "I near to wore out my delete button" when editing my pictures! I shot about 500... and while there were a large number of technically acceptable images, they all tended to look alike and were consistently boring! More and more, I feel the need to tell a story in my pictures.


I think this shot does that. If you want a picture of dog sledding to put in the dictionary, this would do it! I spent some time working on the background to make sure the trail was there to show where they came from and I softened some of the detail to give it a more painterly look. I'm being critical, I know. Now I'm wondering if I would have the skill to paint this! 

However of all the pictures I took that weekend, here's my favourite:


A variety of 'cute' captions come to mind: "Let Me Out!", or "The Evil Eye" but none of them tell the truth.

I did three versions of this shot. The most dramatic was this one:


...which I like but it's only about the 'evil eye'. The wider picture above tell the story better. By the way, if you're feeling bad for the dog, don't. First of all, dogs love their 'crates', it's where they want to be to feel safe and secure. And people who feel concern for sled dogs don't understand: do you think an Olympic marathon runner needs your pity when s/he is exhausted nearing the end of a race? Same thing.

I said three versions. The third one, a crop between these two, was preferred by the majority of my Facebook readers and I get why. I prefer the story of the top one. But here's the third one, with a 'story' added:


Be afraid. 


Some wildlife pictures to close out the blog this week.


I've seen, and even taken, better bald eagle pictures. Especially at the Canadian Raptor Centre. But this is in the wild (well, sort of: it's overlooking the Scotch Line Landfill, just north of Minden). Again, it's that story telling side of me that makes me like this one better. The bird is dead centre, I know. He's small in the picture. The lines are static and horizontal. But this says to me that an eagle stands proudly alone and is the monarch of everything s/he can see. 


About a minute later. Going out for lunch! 


Ruffed Grouse. On the way home from the dogsled races. The lesson is, always have a camera ready, because I only got a few seconds to shoot this guy, from the car window! A few minutes later I came across a wild turkey and a couple of deer, both of which I got shots of but this one is my favourite of the three. 
OK, see you on the flip side, folks!


— 30 —


Tuesday, December 09, 2014

What Inspires Me?

What Inspires Me?

I'm intrigued by this quotation: Pablo Picasso said, "good artists copy; great artists steal" (the attribution is unclear; go here). I'm not sure I fully understand or agree with the meaning of this aphorism as written. The intent is pretty clear, though. An artist will take those things that inspire him and incorporate them in his own work. How well he does that defines his place in the art world.

You might disagree. but everyone has been influenced by others. The best example I can think of is Oscar Peterson, who was influenced by the likes of Art Tatum and Nat "King" Cole (jump to 1:35 in the link for the solo) and who far surpassed them as arguably the best jazz pianist ever (here's a link to one of my favourites, I actually learned to play this. Want to hear the master for an hour like I did? Go here.) OK, back on topic, I got sidetracked...

By no means should an artist directly copy anyone. To me, being an artist is to create, not to duplicate. That said, if I could play one song like Peterson, I'd be in heaven, but I'd be a mechanic, not an artist. Make sense? But allowing someone else's style to influence your work is a given – that's how art evolves. Think about the Impressionist movement, a genre that evolved from the work of Claude Monet.

So what inspires me? The work of Yousuf Karsh, to start with, although I don't shoot portraits. Ansel Adams, of course. The writings and teachings of Bruce Barnbaum. A tip of the hat to Freeman Patterson, Richard Martin and other lesser knowns like Lance Gitter and Ron Goodlin. Hilarie Mcneil-Smith. Bharat Mistry. An eclectic mix. If I could take a little from each and make it my own...
...and lately, Vincent van Gogh, J.M.W. Turner, Claude Monet, Pablo Picasso, A.Y. Jackson, Lawren Harris...

I'm fascinated by the graphics work that went into the making of the title sequence of the HBO Mini-series, "The Pacific". This link is to a video showing the sequence, and scroll down for an interview with Art Director Steve Fuller. This is outstanding and inspiring to me, so I thought I'd share it with you here.


This image is from the Art of the Title page, here. It's a composite of processed drawings by Steve Fuller. In the title sequence, they morph brilliantly into video footage. It's the look and feel of the charcoal renderings that I find outstanding. Image published here with permission.

It's frustrating as a photographer to see what professional cinematographers and art directors can do. Sometimes I get the feeling that the rest of us are just playing. Read the backstory below the image on the linked page.

I think of myself as a "craftsman". Maybe one day, a history book will describe me as an artist. That's what I'm striving for. I'm not there yet.

Another new program from Topaz!

This one's called "Topaz Glow". You need to watch their video to see best what it does, here's the link..

Here's the first image I edited with it


It's on sale for the month of December at the introductory price of $49.99 (that's a $20 savings) at this link: http://goo.gl/aQvTVd. Enter INTROGLOW in the coupon code at checkout. By the way, it shares a lot of things with Impression. Including the hardware requirements, so if you're not sure, do the 30 day free trial before you buy. 


Here's another image. I posted a charcoal version last week but the Glow version is exciting!


This is a vertical version of the same trees. Can't decide which one I like better. You? Please comment 

A complex Photoshop Action

After writing the opening story for this blog, I posted a question on the Topaz Impression group on Facebook about whether anyone knew how to achieve the charcoal effect I talked about. Lo and behold...

A fellow named John Stevenson in England has written an Action that works in Photoshop CC and is making it available for free. It's really complicated under the hood, but a dummy like me was able to figure out how to use it (although I did have to fiddle with the last step). Anyway, here's the link to where you can download it. John, my hat's off to you.
You need Photoshop CC or CC2014 plus Topaz Impression for this Action to work. 


Here's an image I tested it on, from the dogsled races last winter.  

This is the original image:


So you can see I'm spending a lot of time in front of the computer, not out taking pictures. I was a little under the weather last week, plus the other kind of weather wasn't great! 


— 30 —

Monday, March 03, 2014

Busy, Busy weekend!

New Header Photo

Every couple of months I like to change the header picture on the blog to reflect the season. Today's new header is wishful thinking, I think! Last night it was almost 30°C below and we have a ton of snow on the ground. The theory is, "if you think it, it will happen". Think warm thoughts!

The new header is actually an old photo that I took with my D70 back in 2006 on the Cabot Trail, Cape Breton, Nova Scotia. It's amazing what quality a 6Mp camera delivers, even in today's terms. I enhanced it within Lightroom and Photoshop, then I applied the excellent "Paper Textures" extension in Photoshop CC. It's free, and if you install it, note that there are TWO versions, "Paper Textures" and  "Pro". Install both.

When I replace the header photo, I put the old one here for reference or it's gone! So here's the header picture that was up to the end of February.


The ongoing New Laptop saga

Strictly speaking, not a new laptop, just a new boot drive. The old one gave up the ghost, so I had a new drive installed. We put in a 256Gb SSD drive and loaded the operating system and programs on it. Data resides as it always had, on a second internal drive, backed up to various plugged in external drives.

By the way when I say "we" I mean I paid for it, and James Keller did it. He really knows what he's doing and is starting a fresh computer services business in Haliburton. He has my vote.

So my data was safe but I have to reinstall all of my programs. There are probably 20 of them that I use regularly, and a bunch of others that are more sporadically required and lots of support stuff. Today I discovered that I didn't have a PDF reader installed, for instance, or Dropbox. I've got the critical ones done but there are 7 or 8 of the main programs left to do and who knows how many of the utilities. What a pain.

I also discovered that I was missing some important pieces of the puzzle. For example, my Lightroom and Photoshop preferences and presets! So if I were you, I'd go look for those and make sure you have a backup somewhere. Also your Outlook file if you use that client. It's usually in some obscure location!

FWIW, the laptop sure boots up quick now! And since the swap files are on the SSD, I imagine Photoshop will fly much faster when working on some of those huge D800 files!

How's this for an HDR location?

I came across this old building last week. The sign on it says "Ontario's Coolest Building".What an awesome HDR site, especially if we can get inside (which we might be able to do after the winter). And across the road is a larger structure that had collapsed, so there's just some brick walls and framework left. Ill try to set up a shoot there!


This is a 5-shot HDR, then I added a Topaz Simplify layer.  


This is the yellow sign on the building (click to blow it up if you can't read it), shot through my car window. Hey, it was cold, OK? 

It was a busy weekend

It started with Ron Goodlin's wildlife presentation on Friday night, attended by almost 50 people. A wonderful program, turns on the 'envy' genes, both about his skills as a photographer and speaker, and his ability to travel and his great equipment.


Forgive the lousy iPhone photo! 


We went to the dogsled races on Saturday. It was a snowy, flat day, that got even worse later on. Sunday was clear but Saturday was a long day and I didn't get there the next day until much too late (someone told me the 8-dog race STARTED at 3pm. In fact it ENDED at 3pm. {sad face}.


It took a bunch of editing to make a useable shot out of this one. Really flat lighting and snow falling made it a difficult capture, especially since it was with my 400 mm lens. By the way, that looks like a GoPro camera on her chest: they're really ubiquitous. This was the 6-dog race on Saturday afternoon. 


This is an 11-week-old puppy. I tried to steal her to take her home, but couldn't get away with it. This has to be one of the cutest puppies I've ever seen. Her name is Nyx, after (Νύξ), the Greek primeval goddess of night. Apparently she will be bred in 18 months, so I gave her my card and said to call me in 18 months and 8 weeks! Do you think she bought the jacket to match the dog's eyes?

Dr. Ron, lying down on the job as usual! Ron, your camo isn't working! I SEE YOU!
I tried getting down on the ground too. It took 3 people to help me get up. {sigh}. 


The lighting was MUCH better on Sunday. This shot is only lightly edited. Could have used a touch more depth of field... 

But that's not all. I decided to drive home via Bethel Church Road, which leads to the white water venue on Horseshoe Lake Road. First thing that made me put on the brakes and grab the camera was this seasonal home.


It's a log building, boarded up for the winter, with a fastidiously applied coat of pastel blue and green paint. I thought it lends itself well to this painterly treatment. I had to climb up a snowbank to get this vantage point. Then one more step and I was in up to my hips. I didn't expect that, and didn't bother to take gloves with me, and couldn't use my healing right hand to help get up... you should have seen me floundering around!

That's still not all! As I got to Horseshoe Lake Road, I saw a herd of deer at a house on the right. I quietly got out, changed lenses, walked over to the driveway... and they ran off. I went to the white water, scouted around a bit, nothing doing, headed back. The deer were back again. This time I managed to get some shots. Even better, this one youngster was too curious to be frightened and I got to within about 15 feet!


Love his expression and the pink tongue sticking out! Notice his ears aren't even up! He's going to have to learn some caution or he won't make it through hunting season next year! He was trying to wind me, but I was cross-wind to him. 


An eyeball shot.Told you I was close! 400mm and cropped, but hey... 

...and you thought I was done for the day! When I got home, I saw these great clouds, the sun was about to set... I thought I'd get that colourful sunset I had missed last week. Again it didn't materialize. By the time the sun went down, it was cloudless. I spend two hours waiting for it out on the ice, to no avail. I sat in a fishing hut (no heat, but out of the wind) for an hour or so. Anyway, I took this burst while setting up the camera for later.


7-shot HDR and I painted in the lights. Then I added the stars. If those clouds had hung around for another hour it would have been more spectacular! I'll get one yet! 

So I figure that's enough for one weekend. Until next time!

— 30 —

Monday, February 15, 2010

Lightroom Article Part 3: the Develop Module: Editing Your Images

Today is part 3 of the Lightroom article, dealing with the “Develop” module, where you edit your photos. But before we get started, let me deal with a near disaster, and then talk about the preparation for the Dogsled shots I took yesterday.

Oops, I screwed up!

On Friday, I shot some headshots for some business colleagues who needed some pictures on our LeTip Networking website. New members get a page to briefly tell what they do, a little bio and a photo. For reference, the site is here. and it’s interesting what a range of services are available through this group.

On Saturday, I went to the PetFunFair. I had intended to introduce my Doggie First Aid kits (your dog’s a person too. He or she deserves to be safe, don’t you think?) Click here to see what’s available and if you mention this Blog in the comment field when ordering from the FAC First Aid website, I’ll give you a 20% discount off any regular priced item on the site. Anyway, I thought I’d shoot some pictures of dogs at the show but I was not in the right ‘place’ and my results were mediocre.

Sunday, I was up North and heard that the Sled Dog Derby was running at Pinestone in Haliburton, and I bundled up warmly and headed out to shoot some pictures. I was there last year and got some very cool images then as well, so I thought I’d try again. I shot over 250 frames, some of which were quite interesting, in my humble opinion.

I had 3 days of pictures on the compact flash card in my camera. When I started to upload them to the computer, I decided I wanted to see the sled dog images first (I'm into instant gratification!), and I wanted to keyword them separately so I switched off the other groups and uploaded the February 14th pictures. I completely forgot about the other ones.

You know what’s coming, right? I forgot. Later, I put the card back in the camera and hit “Format”. Bye bye headshots and funfair pictures. Why did I format it? Well I wanted to shoot a few shots of a bread I actually baked myself (pre-made dough, though, and frozen. Still it came out great!)


No, that's not on my diet. Unless I don't swallow. Hot and fresh, how can I not eat it! Thanks to Alison for telling me about these breads!
Also, it’s better to reformat these flash cards rather than just deleting the files. Less problems with the cards. Anyway, I posted a note about my screwup on the RHCC newsgroup and I got a couple of answers and suggestions.

Generally when you reformat computer memory, you’re not actually erasing files. Normally, you are erasing the index that tells the computer where to find the files, and telling it that the space where the files are is not occupied, it’s available to be reused. Using fancy software and sometimes expensive techniques, you can often recover some or maybe all of the files you thought were gone. That’s a good lesson if you have stuff on a hard drive you don’t want anyone to be able to see.

Anyway, both Jim and Harvey pointed me at recovery software. I used the one Harvey suggested: it’s designed to work with SanDisk CF cards. There are some limitations on the free version, but it works. I was able to recover all but the first few images (which I had overwritten with pictures of bread). Thank you, Harvey. Here’s the download site for that software: http://www.lc-tech.com/rescuepro/

So almost a big “oops”. Hope you don’t need to do the same thing!

Be Prepared

When you’re going out to shoot an event, you should do at least a little pre-planning. Otherwise when that perfect shot opportunity comes up, you may miss it. Or even worse, get home to discover that you blew it because the camera was set wrong.

For example, I was shooting on the tripod the other day and had turned off the VR (lens stabilization) because it actually messes up the focus when you’re shooting longer exposures. If you’re shooting marginal shots – and everything is marginal when you have the 400mm lens on – the VR is almost essential. So I don’t want to forget to turn it back on again.

The same thing is true of many of the other controls on the camera. I wouldn’t have to think about this if I were using a point-and-shoot but I have a DSLR so that I can adjust things. Other controls that I frequently change are metering method, ISO, exposure compensation and autofocus control. A mistake I’ve made is to have bracketing set on. I think I’m shooting proper exposures but only one out of 3 or 5 is correct.

So the message is, have a “default” setting for all your camera controls. Then be sure to set everything back to normal at the end of every shoot. That way you know exactly where you’re starting from next time out.

Set all your controls back to their normal settings after every shoot.

Plan Ahead

So I’m going out to shoot the Haliburton Dog Sled Derby at the Pinestone Inn. I’d been there last year and got some good shots, so when I heard it was on this weekend, I headed over. Now I’m shooting outdoors, against the snow, in (luckily) overcast conditions (shooting in bright sunlight sucks). Your camera meter wants to make everything 18% grey, not white so generally your shots are going to be underexposed. So I set my exposure compensation to +1 stop knowing that I could compensate to a certain extent in Lightroom if I did happen to blow out some highlights.


I just uploaded an edited version of this image. When I looked at the Blog, I thought the blacks weren't strong enough, so I went back into Lightroom, changed it, and uploaded the new version. Took me 30 seconds. That's the beauty of Lightroom, which I'm going to address in my next article on outputting images.

By the way, I wish there were more space – some space – at the front of the sled. I saw this guy kick his leg up like that and swung the camera up just in time to see him do it again, just once. I was shooting with the 400mm lens and I had no time to zoom out or try to reframe the image. There's extra negative space behind the sled, but none in front.
  
It’s pretty bright out. I like to shoot at f/11 if I can since it gives me the sharpest images. With my normal lens on (24-120), ISO 200 gives me around 1/250 second or faster. Not bad, since I have VR in that lens and have been known to handhold even down to 1/10 second. But what if I want to use my 200mm, with the telextender for a net of 400mm? The rule of thumb is to shoot faster than 1/the focal length, in this case, 1/400 second. Even that is marginal with that lens. How do we achieve that at f/11? By setting the ISO higher. A little experimentation and I settled on an ISO of 640.

With dog sleds coming right at me, I needed to set my autofocus to ‘continuous’. But I discovered that with the normal lens, set up about 10m from the start line, my autofocus couldn’t keep up with my 6 frame per second high speed burst mode. Only one shot in three was in focus. So I moved back and put the 70-200mm lens on. It has a faster focusing motor anyway. That worked. And with the longer perspective, focusing was nowhere near as critical (stopped down. Even at that distance, shooting at f/2.8 gives you very little depth of field).

Here are a few more images from yesterday. To see more, go to my February Smugmug gallery on line here.


Lightroom Article part 3: Editing your images in the Develop module

Introduction

What we’re doing here is documenting my conversion to LR, with a focus on “WHY” one would make certain choices, not “WHAT” or “HOW”. For how to use the program correctly, pick up Scott Kelby’s book “The Adobe Photoshop Lightroom 2 book for Digital Photographers” which is available at http://www.photoshopuser.com/. You don’t have to be a NAPP member to buy the book, but if you do join NAPP, you’ll get a discount and all kinds of other benefits, including a subscription to Photoshop User magazine which is worth its weight in gold. If you decide to join NAPP, use this link so I get my brownie points!

You might also consider contacting Jim Camelford at jim@photography.to. Jim is the local LR guru and not only does he teach LR courses but he imparts a great deal of wisdom about the right way of doing things.

This series of articles looks at three of LR’s strengths: “Organizing your pictures”, “Editing your Images” and “Creating Output Files”. LR does many things well, but these three were the factors that convinced me to convert to LR. Combined with Photoshop (PS) LR provides an elegant way to handle your workflow, whether you’re a high volume user or just starting to delve into the world of Digital Photography.

These articles are intended for those who have converted to LR or are considering doing so and want to start it the right way from the beginning. Or those who might need a little convincing!

/introduction

Summary of Part 2: Importing your images

Last time I talked about the concept of LR as it relates to importing your images. Here’s a summary:

  • Automate your import procedures by setting LR as the default program whenever you plug a flash card or camera into the computer
  • By setting up the import dialogue correctly, you can virtually eliminate any manual intervention during importing if you wish. However you may want to direct your images to a particular folder or add some master keywords at this point.
  • Wherever possible, create a backup automatically
  • Get rid of rejected images right away.
  • Create a scheme for flagging, labelling and rating images. By following it immediately after import, you can save a lot of time.
  • Save the “keepers” in a Collection, and keyword them logically right away.
 Part 3: Editing your images

This article presents an overview of the photoediting strengths and capabilities of LR.

Newsflash: Lightroom is not Photoshop.

LR will not replace PS as a high end photoediting program. That said, it will replace most of the other programs you might be using. I was astounded to realize how much less frequently I use PS now that I’m a LR convert.

A little history here. If you read my introduction, you know that I’m not a formally trained anything. I’ve dabbled with PS ever since it first came out in the early 90’s, but I really have no clue what I’m doing! OK, well maybe a little… I understand the concepts, I can work out how to apply them to images and achieve what I want (correct or otherwise) and I spend a Hell of a lot of time working on images in PS. I’ve been criticized for that: and rightly so. Instead of being diligent about what is or is not in a picture, or making sure of the exposure or composition (not much you can do about focus – yet!), I take pictures with the idea, “oh, I can fix it later in PS”. When I come in from a day’s casual shooting, I’ll probably spend 6 or 8 hours in PS on images I like and I may spend that long on one single image if I really like it and I get anal about doing the best I can.


The extensive background editing in this image is obvious. This kind of work cannot be done in Lightroom. There was also some dodging done on the student's face and the instructor and student were slightly enlarged to increase their presence in the image. If you want to learn to ride a motorcycle or scooter, there's no better place in the world to take the course than Humber College in Toronto. Click here to link to their website.
LR has changed my mindset. Now what I do is classify my images (read the previous article), then I work on the ones I like the best or that bubble to the top as being the most important. One of the things that LR does really well is to let you work in batches – on more than one image at a time.

Here’s an example: you shot a whole bunch of pictures out in the snow and everything is dingy and gray because you forgot to set your exposure compensation (come on, you know what I’m talking about. Your camera meter wants to set everything to 18% gray, not white). So you can pick one typical shot in the bunch, change the exposure values (and other stuff, we’ll see soon), and then apply those changes to ALL the pictures in the group with what, 3 keystrokes?

“But”, you say, “They’re not all exactly the same. What if I blow out some highlights? What if I WANT that image to be high key?”

That, dear reader, is the beauty of LR. You’re not actually changing your image files: you’re changing an instruction set of changes attached to your image. And you could easily throw out or just as easily change those instructions after the fact. You knew that. I told you that before. More than once. Weren’t you listening?

So not only does LR let you make changes to a single image or a whole batch of images, but it does it NON-DESTRUCTIVELY. Let me repeat myself: NON-DESTRUCTIVELY. Everything you do in LR is reversible. You can’t make a misteak. You can always fix it (did you catch the humour? Sure you did).

Nice segue, huh? I went from, “you can work on batches of images” to “NON-DESTRUCTIVE EDITING”. Here’s an example of DESTRUCTIVE Editing. You’re working on a picture in PS or some other editing program and you decide it would be cropped a certain way. Say as a portrait orientation 8x12. You crop it (actually you’re “Reframing” it, which is why the shortcut for that function in LR is “R” not “C”, something Jim Camelford pointed out to me the other day!). You spend HOURS retouching it. You go into PS, you create layer after layer, you paint, you burn and dodge, you clone, you heal, you create layer masks, you make a whole new sky or redraw eyes completely. You love it. You put the picture up somewhere on your gallery or on the NAPP members site and it gets chosen as the “Image of the Week”. Two weeks later you get a phone call from the editor of National Geographic who says, “I love your image, we’d like to use it for a two page spread pano pullout for an upcoming issue. But we need it in Landscape format”.

Uh-oh. You have to go back to the original image to re-reframe it. And you lose ALL those changes and artistic hours you put in. Can you even remember what you did? Can you recreate it at all?


Suppose this was your final image, but you wanted to go back to the one on the bottom and still keep all your edits, changes, etc. You can do it in LR, even 6 months after the fact. Closing the program does not lose the history!
OK, that was the best spur-of-the-moment example I could think of. Oh, and National Geographic? My contact info is at http://www.faczen.com/. Call any time.

A bit of a weak example because we all know (we do, don’t we?) that cropping is one of the LAST things we should ever do to an image, but maybe I got my point across anyway. What is the actual LAST thing, by the way? Output sharpening. To find out why, you’ll have to wait for my next article. Or you could research it on your own!

Anyway, here’s my point: EVEN CROPPING IS NONDESTRUCTIVE IN LR! You can change it at any time. And the stuff you cropped out ARE STILL THERE! (I use caps when I’m excited).


Again: You did a lot of work on this image. You cropped the one on the top out but now you want to go back to the one on the bottom. One click of the mouse in LR.
Okay. I’m not going to tell you HOW to edit your images in LR. Kelby, or Camelford, or someone else can tell you about that. I’m not the greatest at it anyway, but I’m pretty good on the concepts. So let’s talk concepts.

Up to version 2 of LR, everything you could do to an image affected the whole image. Exposure, contrast, black levels, white balancing, all that stuff, was “Global”. In Version 2, LR introduced the adjustment brush and a couple of other tools that worked on a portion of your image. Now we have some “Local” adjustment capabilities in LR. They’re pretty damned good. As I said at the beginning, I go into PS much less frequently now.

What I like about LR’s tools is that they’re much more subtle than the ones in PS. You can go nuts in PS. You can change that red ‘vette to a chrome yellow one. The best I could do in LR was to make it more of an orange colour. I guess the operative word in my mind, describing the controls in LR, is “soft”. Somehow the resulting image is a little more believable than the one you went crazy with in PS.


You can do both, of course. Using the same example as the picture above, I wanted to get rid of some of the stuff that took away from the image, like the sign on the pole, the post just left of centre, some stuff on the ground, the branch at the left edge… so I opened the image in PS (through the LR menu), created a new layer, did all that editing on the new layer, while I was at it, I used the burn tool to darken the wood of the pole and bring out the dark foreground branches and greenery.

Now if you simply save the edited image as a .psd file, and you return to LR, you would see both the original and the new version there. Opening the .psd in PS again, you’d see all the layers, although the history is gone. That’s why I work on layers in PS – I could just delete the layer and I’d be back to the original image. LR will, by the way, offer you options about which version of the image to open when you go to PS.

This was an example of using both programs to edit an image, choosing the best tools from each one. I got away from concepts, didn’t I? Well yes and no. The concept is, edit first in LR, then go to PS for the niggly little stuff and the off-the-wall creative, then take it back into LR to finish it.

One caveat: when you bring an image back into LR from PS, it creates a separate file. That new file does NOT contain all the LR history, it's a fresh copy imported from PS. So here's where the concept breaks down. You can get back to the original LR file with all it's changes, you can get back to the PS file as it was when you imported it to PS and of course if you worked in layers, you can roll back by deleting layers, but you do not have a continuous reversible history.

If you're very sneaky, suppose you wanted to backtrack to some point in LR and change or remove some sort of adjustment, then do the same edits in PS. The only way would be to open BOTH documents in PS (the new snapshot from LR and the original with all the PS edits), and then drag layers from one to the other. That doesn't always work unless you were really careful.

If you’ve used Adobe Camera RAW, the tools in LR will seem familiar. Actually, they’re the same. LR uses the same engine as ACR. Non-destructive editing is also available in ACR, but there’s no history. No way to go back part way – if you don’t like what you’ve saved, you can simply throw out the sidecar file – the .xmp file – and you’re back to the original.

Let’s look at some of the editing tools in LR. This is by no means an exhaustive or detailed look, just a few highlights.

Starting at the top in the Develop module, there’s the “Basic” tool set. These sliders determine the overall look of the image – exposure, contrast, black and white recovery levels and white balance. There’s a “Presence” section which you should not overlook: these three sliders can have a huge effect on your image. Look what happens when you pull the clarity slider to the left:

Seriously. That's all I did. Just the clarity slider.


Below that is the “Tone Curve”. Like curves in PS, you can control different areas. The steeper the curve is, the higher the contrast. But this one is soft and you can’t adjust stuff as much as PS. By the way, the “Targeted Adjustment Tool” – the little doohickey at top left beside the curve – allows you to adjust the curve by dragging in the image itself. Try it – it’s cool!

You can make subtle (and maybe not so subtle) colour adjustments in the “HSL” and “Split Toning” areas. Sharpening, Noise Reduction and Chromatic Aberration are dealt with in the “Detail” area. You can create vignettes in the next section – two different ways: for the image as a whole or applied dynamically to whatever your crop area looks like. This is a real breakthrough because in the past you had to come back to do this after you reframe your image (crop). Then there’s a “Camera Calibration” section so you can make the edited image you’re looking at match what you see on the back of your higher end camera.

All of the adjustment tools I just mentioned work Globally. On the whole image. In practice, if I were editing a picture, first I would adjust the colour balance and exposure, then tweak the curves, add some colour adjustment, sharpen it and then do the other stuff. All exactly in the order that LR presents it to you. Now I’m ready to work on individual spots in the image. The toolbar just below the histogram shows you a handful of tools. The one on the right is the “Adjustment Brush”. What you do is paint an area (use the “O” key to see what you’re painting) then you can apply a bunch of different adjustments to the area you just painted. The graduated screen’s good for skies and the like, although I had great luck using it as a “fill” light in a portrait. The spot removal took is effective too. Click it, don’t drag it. Check it out, or R.T.F.M. (read the F’in manual!).

You can selectively adjust clarity. Think “portraits”. Think about smooth skin without blemishes, but retaining the sharp pinpoint focus on the eyes and the detail in the hair. Like this:


You need to blow these up to see the difference. And I wouldn't output an image like the one on the right, I was just using it to illustrate the effect of the tool.

By the way, if you don’t like the “O” thing (everyone likes the “O” thing. A little humour...), just pull the exposure slider to the left when painting and you can see the areas you select darken as you paint. Then set it back to zero when you’re done.

World’s greatest portrait? Nah. But that’s just me. How long did it take? 30 seconds. Did I have to create fancy PS layers and change blending modes and use Gaussian blurs and select fancy brush sets? Nope. Adjustment brush. Press “O” to see where you’re painting. Paint the areas I wanted to soften. Hold down “Alt” to un-paint the areas I shouldn’t have painted. Pull the clarity slider to the left. Click the adjustment brush or press “Enter” to finish. If I can do it, think how great you would be!

We come to the crop tool. I love how it works, but it’s different from the one in PS so you have to get used to it. You’re cropping to an aspect ratio, not to an actual size or pixel count. You choose the actual size later, when you export your images. Oh, and if you can’t figure out how to change from a portrait to a landscape orientation, you’re not alone! Drag along the longer dimension and it’ll flip the other way for you. I found it disconcerting that you drag the image around behind the cropping borders rather than dragging the cropped area around the image, but that took only a few minutes to get used to. The little angle tool and slider lets you rotate the image to straighten it up, or you can choose a vertical or horizontal surface in the image itself.

So. Convinced yet? Here’s the thing. You can do probably 90% of your photo editing without ever leaving LR. Everything reversible. Everything done live, without ever looking at the histogram (well… you really should. Especially look for those two little triangles at upper left and right. If they’re lit up, you’re either blowing out some whites, or filling in some blacks and losing detail. Use the “recovery” and the “blacks” sliders to fix it).

What do I do now? I hit “8” on the keyboard to mark the image “ready to export” and go on to the next one. When I’m done, I gather all the pictures I want to output and, well, you’ll have to wait until next time!

Next: Creating Output Files.