Sunday, November 30, 2008

Long time No write!

What have I been doing for 2 weeks? Not writing in the Blog, that’s for sure.

The photo tip I have for you today is how to buy outstanding full colour business cards with your own artwork.

Lots of photographic stuff that I’ll talk about a bit; not all of it taking pictures that I can show you, though. . I’ve only been shooting pictures sporadically except for a couple of assignments (there's a lot of that going around. I just read Shannon's Blog and I think we're in the same place!), I’m up North and actually enjoying the onset of winter,


What happens during a power failure? With not much to do, I played with taking spooky pictures and I put my crockpot on top of the fireplace to hopefully keep cooking my dinner! This was a longish exposure, moving the camera, with a flash at the end.

I’ve been working on some workshops and seminars. Let’s start there.

I did a workshop on non-destructive Photoshop techniques for the Club that I wasn’t satisfied with. I got off-track and didn’t prepare well enough. You ever go brain-dead? How about in front of 24 people? How many times have I hit alt-shift and clicked on a layer mask to superimpose it on a layer so I could see both; I couldn’t for the life of me remember how to do it at the workshop. Lesson learned, I’ll do better next time. Best part of it was the “head swapping” exercise from the group shots that I mentioned a couple of weeks ago.

I’m working on developing some workshops which I’ll teach or work with experts teaching. We’re not there yet, but watch for it at http://www.photography.to/ (you have to admit that we got a cool web address!). Stay tuned.

On to some hardware stuff. I’ve tried to live a philosophy that I’d like to share with you. “Always buy the best”. It doesn’t always work — money jumps up and rears its ugly head — sometimes I buy lesser quality stuff just to try it, intending fully to upgrade later. Such was the case when I found a “cheap” graphics tablet at Tiger Direct. It was made by “Genius” and was only $70. How could I NOT buy it. I knew that I really should buy a Wacom tablet but this one leapt off the shelf into my hands.

Mistake. Not only did it cause my computer to crash (with no available restore points – another sad tale), but also I discovered that (a) it doesn’t work with dual monitors and (b) the drivers for CS4 aren’t written yet. Fortunately, I was able to get my money back. Now I’m looking for a REAL Wacom tablet. That said, although there’s a learning curve for working with a tablet, it’s very cool. I’ll get one soon.

Read my lips. “Always buy the best”. Don’t put yourself in the position of saying, “Gee, I wish I had bought the [fill in the blank here]”.

I mentioned above that I shot some assignments this week. I did. One was my usual ID card thing, I’ve got that down to a science. I shoot about 40 people, bring a small printer with me and by 10am, I’ve printed and delivered all their pictures.

Yesterday, however, I had an interesting project: I got to shoot some live models. As opposed to dead ones, like rocks and trees. Unfortunately, the client won’t let me post any of the photos I shot, but it was really fun. Let’s just say the goal was to create a holiday greeting card for a retailer and the idea was to have the store owner with a couple of beautiful women draped all over him, a glass of champagne, “Happy Holidays”. The women were spectacularly beautiful and so easy to shoot. We did do some really sexy shots as well that the client can’t really use publicly and I learned that posing them – especially the one girl who was experienced as a model – was not that difficult.

What was tough was the venue – a small store. Good backgrounds were hard to find (the client wanted to show the store, so I couldn’t bring a backdrop). They also didn’t want me setting up a bunch of lights, so… Gary Fong to the rescue! I love using this damned simple piece of Tupperware plastic and if you don’t have one, get one. Now. Go. (I’m a Loblaw’s commercial for Cheesecake). I wish I could show you the pictures. At one point, I set the D300 to commander mode and the remote trigger on the flash on. I put the flash over on a counter about 10 feet away from the camera. I added a little fill light from the on-camera flash (almost 2 stops under). Excellent!

Another neat trick was to use the radio remote shutter release. I set the camera up on a tripod, and I was able to walk over and talk with and position the models, get them looking in the right direction, and shoot by pushing the button in my hand. Or use Live View and stand back and compose the picture on the viewscreen.

It occurs to me that if you don’t have a D300 or at least aren’t familiar with some of the Nikon features, you won’t know what I’m talking about. “Commander Mode” is setting up the camera to control a remote flash, not attached to the camera. “Live View” is being able to compose your picture looking at the big LCD on the back of the camera instead of through the viewfinder.

I spent a few days up North last week, and the weather caused a few challenges. It snowed. In Toronto, they got a couple of centimeters, here: almost a foot. Heavy, wet snow. So heavy that the branches of my evergreen trees, which normally the oil delivery truck can drive under, were actually touching the ground!

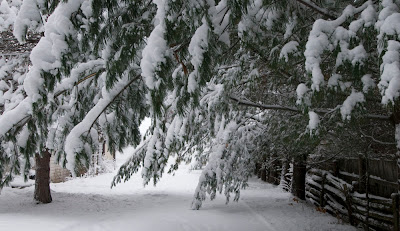

The stuff also stuck to my satellite dishes — TV was OK but the internet dish (Xplornet) couldn’t connect. I hate being off-line. I also hate ladders, but I did climb up and clean it off so I could get back on.


While I was up there, I plowed snow off the roof, then I cleared the driveway, breaking the shear pin in the snowblower.


Long day…

I was exhausted and although I shot a few pictures, I wasn’t inspired. However I did shoot this scene on the way home on Thursday.


There was no light in the cabin when I shot this. It was daytime. Can you say, "Photoshop"? By the way, this was a 1/20 sec exposure with the 200mm VR lens, resting on a fence gate.


So on to our photo tip of the day. Of the week. OK, of the semi-month!


FacZen Photography Tips

Business cards from your own pictures!

Due to my former life as a desktop publisher and print broker, I still have some wholesale contacts with people who don’t deal directly with the public. One of them is really great trade printer. Although they do other stuff too, they focus on Business Cards. And they’re really good at it. They do runs of 1000 cards or more at a time.

Their claim to fame is a full-colour card, printed on both sides of thick, rich stock, coated with a high gloss or now with a matte lamination. I tested the latter last week and I LOVE the rich results.

Now that said, you need to have the right picture to benefit from the matte finish. It should have plenty of “pop” and not too much detail and complexity. If it does, glossy works better. If you go to http://www.photography.to/, you can see what I put on the back of the card, although I punched up the saturation when I did. Those crop marks and stuff are part of my graphic design.

If you want some cards with your own images on them, I can get them for you. Here’s what you need to do:

  • For each side (of course you could leave the back blank) you need a 3.75” x 2.25” image at 300dpi. They’ll trim 1/8” all around so you end up with a 3½” x 2” card. There’s a template you can use to show you where it will be trimmed and the area you should keep your type in. Ask me for it.
  • You have to finish it completely. Lay all the type down, do all the stuff to complete it, flatten it, crop it to size, and sharpen it appropriately,
  • You need to convert it to CMYK from RGB.
  • Now save it as a .tif file, lossless if any compression.

How much is it going to cost you? $95 plus taxes and shipping. If you’re in Ontario, that works out to about $120, all in. Call any printer and ask them to quote on 1000 cards printed 4/4 full colour full bleed on 14 point C2S card stock with writeable aqueous coating on both sides. Delivered to your door in a week or so by UPS.

Subtract $15 if you only want it printed on one side. Add $35 if you want it on 16.5 point stock with matte lamination.

Remember: you’re doing ALL the artwork. We’re just printing what you give us, so we’re not responsible for any typos, errors, etc. Yes, I’m making a (small) markup on this, but someone has to pay for my Blog!

Contact me directly at photography@faczen.com for more information.

Sunday, November 16, 2008

Groups & Quick 'n Dirty Workflow

Last night, I shot the Humber College Motorcycle Instructors annual awards banquet. I told them I didn't want to be paid for the gig since I wanted to enjoy the evening, and I'd do photos for them (for us) as a favour. I also didn't want to treat it as a professional project, in other words, I didn't want to spend hours editing the images. That said, I do have some pride, so I wanted to deliver some quality images.

I was asked to capture the groups of people getting awards, and I also shot around the crowd to get some pictures of the audience. I used the Gary Fong diffuser on the flash all night -- some people asked me, "why do you have a tupperware bowl on your flash?" The answer is obvious when you look at the great lighting on the images. I shot a group of 8 people and had even lighting all the way across! Anyway, here are some tips about what I did to photograph the event.


FacZen Photography Tips


Shooting groups and quick-and-dirty workflow

  • I prepared the camera. Knowing I was going to use the diffuser and the flash all night, I set the ISO to 500, aperture to f/5.6, WB to 'flash'. I made sure I had an extra set of flash batteries and a spare camera battery too.

  • I took a couple of test shots and removed the top of the diffuser since the low white ceiling was great.

  • Almost every time I had a group to shoot, I shot at least two exposures. Invariably, someone closes their eyes or looked in an odd place and having more than one shot helped a lot a number of times (see below).

  • I made sure I focused on the eyes. With the D300 there are two ways to do that -- focus, then with the shutter release held halfway down, recompose the image; and move the focus spot to where the eye is in the composed image.

OK, I'm not really good at this stuff, but the results were pretty good, so I hope these tips made sense.

Now I got the pictures home, and uploaded them to the computer. I'm going to talk about workflow. Remember, I just wanted a quick-and-dirty method of producing the final images. In fact, I ended up with about 90 exposures and I posted 65 images to the site!

So here's the quick workflow that I used.

I opened the pictures in Bridge and ran a slideshow with my right hand over the Ctrl-Delete combo and my left over the 6. The former immediately discards an image, the latter marks it as an image I like.


  • When that was done, I created a new folder called "originals" and copied the remaining images in there.

  • Next I opened the images, flagged ones first. This time I shot in .jpg (usually I shoot RAW but I didn't feel like it yesterday). If an image looked like it needed overall colour correction, I opened it in Camera Raw.
  • Once in Photoshop, I adjusted levels, cropped, and cloned out obvious things.

  • I don't think anyone is going to print any of these images. So I started downsizing right from the beginning. After a while I decided not to bother, so I used a pre-set crop as much as possible. 4200x2800px is a 3:2 ratio, so I preset that. One click flips it from landscape to portrait orientation and back, so that's fast.

  • For most pictures of women, I softened the skin and reduced wrinkles. Here's how: first I duplicated the background layer (ctrl-J), then I used the healing tool to remove wrinkles, especially under the eyes. I reduced the opacity of the layer to leave a hint of the lines in the image -- you have to be a little subtle. Yes, you can turn a 40-year-old into a 25-year-old but who's going to believe it?. Then I flattened the image (Shift-Ctrl-E) and copied the layer again. This time I applied a strong gaussian blur to the layer, then used the eraser tool to erase everything except the facial skin. That means eyes, hair, lips, clothes, etc. Sometimes I would leave the background on the blurred layer too. Now reduce the opacity again until it looks right, then flatten it again.

    The other thing I did from time to time was to select the teeth (that new selection tool is quick!), copy them to a new layer, create a dedicated hue-and-saturation adjustment layer, reduce the saturation and turn up the brightness a touch, then flatten it down. It took me longer to type this than to do it. Voila! Instant teeth whitening!
  • Now I touched things up with the dodge and burn tools, looked at the background again, flattened it and sharpened the eyes. Always sharpen the eyes! I added a catchlight if necessary.

  • Save, and done. Next image. I know, I know. There are lots of reasons NOT to do it this way, but I told you it was quick-and-dirty!

  • Guys got much less treatment. I like heavily lined faces and lots of texture. Women are different (I heard that somewhere).


  • No texture in this one, but I loved Rob's expression. Ray, in the background was distracting, so I used the Blur technique above to fix it.

  • I did nothing at all to the "crowd" shots. They were there just for interest.


The entire process took 2 hours or less for 65 images (well I edited about 35 of them). Then the upload, and we're done.


There were a few interesting images, though. Remember I said to take more than one exposure when you have a group? Here's an example where one of the two shots was much better that the other, except for the one guy who closed his eyes. So I opened both, selected the better shot of that guy (CS3 has a great selection tool!) and pasted him into the other shot. Because they were shot from the same place and with the same exposure, I had very little fancy stuff to do to replace the person in the image. Here you go:


This was in the original image...
This was in another one...


...and this was the final product


There were 3 images where I had to paste in a face from another image. You guess which ones! Oh, and out of respect for the women whose faces I retouched, I won't post before-and-afters here. Some of them might be reading this! 2 hours including everything. It took me longer to write this Blog!

If you want to see the full set of images I shot (well the keepers, anyway), click here.

Sunday, November 09, 2008

The Comfort Zone

It’s been an interesting photography weekend. Quiet, but I’ve been doing a lot of photography-related stuff and I’ve learned a few things in the process.

To digress a little, I've been a touch under the weather -- I think I'm fighting something. It's making me sleepy, sometimes I fall asleep right in the middddddddddddddddddddddd...

Where was I? Anyway I went out and chopped some kindling in the snow, I actually felt better. I spend too much time at this damned keyboard! I actually started writing this last night but got too tired to finish it, so here I am in the morning, getting over my “lack of caffeine headache” (if I don’t have a coffee at least in the evening, I wake up with a headache. I must be actually addicted to the stuff), revisiting what I wrote and rewriting it all!

Oh, and climbing up to fix my satellite dish too!


On Saturday, I visited Shannon, she was exhibiting at a craft show in Huntsville. She sold a bunch of pictures... I'm envious. She has a great eye but she told me she’s weak on the technical side of things. I don’t believe it – a few of the techniques she talked about are beyond me, and I came home to try some of them. I was inspired to write the photo tip below after trying her “multiple exposure in the camera” technique. The results were terrible but I have a little insight in how to do it next time.


In addition to the prints Shannon was selling (and she did well with some very fine images), she had prepared some greeting cards which were selling well. There was another photographer there whose images were so-so and he was selling too! There’s hope for us all. Anyway when I got back I was determined to create some saleable products and I put together some “boutique” size frame able images (my name for it – I’m sure there’s an official name!) which are essentially 3½ x 5 images printed on 5 x 7 paper, with a title and signature. I looked at them last night and realized they are a bit smaller than I would like, so I’m going to revisit it today and make them bigger. 5 x 7 on 8 x 10, I think. I have to redo them because they’re too down-sampled to print well at the larger size. I’ll leave the small ones up but reprice them accordingly.

You can see these images at http://www.faczen.smugmug.com/.

There is now a link on the home page to the featured “Art Print” gallery. Please visit it and BUY SOMETHING! Christmas is coming and these prints make wonderful, thoughtful gifts.

So enough for the commercial. On to the Photo tip of the day.

FacZen Photography Tips

All Work and no Play...


...makes me dull. In the sense that you need to experiment in order to move forward. I’m self-taught, for the most part but I do appreciate the value of taking courses to learn new things from time to time. That said, the best way to learn is to try stuff! I joined the Richmond Hill Camera Club a few years ago so that I could learn from others. My first impression was that the club was a bunch of old fuddy duddies but I’ve come to realize that their wealth of experience is a valuable source of learning. Often, when I see how something is done, I want to try it – and that’s what this tip is about.

Try things. Don’t be afraid to experiment.

Digital “film” is cheap, so what if you burn some shutter actuations? It’s not costing you anything. You will be amazed at the things you can do. Let me give you a few examples.

• When I first joined the club, someone showed us pictures taken through “water glass”. I went to a local store, bought a few dollars worth of glass pieces with different patterns in them and played. I got a few acceptable images, but mostly I got an understanding of how it’s done.
• Maria, at the club, paints with light. She does studio still life setups but doesn’t use traditional lights, just a flashlight and long exposures. Her work is awesome. I tried it. I now have an appreciation for how hard it is, and I got an idea about trying the same technique on landscapes shot at night. I can’t wait to try it!
• “Panning”, or moving the camera to follow a moving subject is an art. There are some technical things you need to know, but how do you figure out what shutter speed you need to get the effect you want? The answer? Experiment!


This image was actually taken at 1/80 sec. I was amazed at how much motion blur you get at that speed when you pan the camera!


1/5 sec @ f/36. Again I panned with the bike but you can't be really smooth at that shutter speed.


• What about moving the camera when you shoot a long exposure? Or one that isn’t so long… remember that rule of thumb about what shutter speed you can handle? So turn it around. Try shooting at 1/10 second and deliberately moving the camera. Or put a flash on but leave the shutter open for a longer time.


1/5 second stopped right down to f/36 and I deliberately moved the camera while shooting.


• Move “parts” of the camera. Like zoom your lens or change your focus while the shutter is open.1/30 sec. I rotated th zoom ring while the shutter was open. Amazing what you can accomplish in 1/30 sec!


• “Play” in Photoshop. Do you know what the Art History brush does? Take an image and try all the different filters on it. See what they do.

Everyone has a comfort zone. Mine is taking pictures of rocks and trees. I realized that I've taken photos of the exact same log in the water near my house probably 30 times. Sure, I'm waiting for that day when the light will be magic or when a deer will walk out and stand where I want him to. Great, if that's what you want to capture, but get out of your comfort zone and play! You’ll be amazed at what you will learn.

I've been shooting 'people' pictures -- some candids and informal portraits; long time exposures at night; camera motion; slow shutter subject exposures and pans; architectural shots; I've been painting in Photoshop and using different adjustment layers; I've even tried printing some images (yeah well, I have a ways to go there!); I'm learning how to judge competitions; learning a new camera, preparing images for sale, researching and writing a blog and technical tips and I'm planning workshops... my bathroom reading is National Geographic and Scott Kelby. In short (OK, it wasn't short!) I'm playing. Learning all kinds of stuff. Now if I were retired, I could spend some real time on it!

Let me leave you with something DeWitt Jones said in his motivational video (paraphrasing from memory): "Mother Nature doesn't stand at a forest and say 'there is only one good photo here, one photographer will capture it and all the rest of you are losers'. " If you open your eyes and try to see things differently, there are a million different pictures to take. Go Play!

Thursday, November 06, 2008

Pixel Painting Revisited

I tried it again. I think I've found a technique that I really enjoy doing, and I owe Hilarie for my inspiration.

In fact, we corresponded several times by email and she has shown no hesitation in helping me to understand and use the concepts. If anyone is interested in a course on how to do this, please get in touch with me and let's see what we can put together. I already know two people in addition to myself who are interested.

Here's my second effort. It is very significant to me because Gary, the subject of the "painting" was a dear friend and he died in July at the age of 53. Two of the many loves in his life were motorcycling and sailing, probably in the other order. In August, 2006 I went out sailing with him on Dr. Ron's boat and took a few pictures -- this was one of them. I find Gary really at peace in this image. Click on it to blow it up. I hope you like it.

Tuesday, November 04, 2008

Pixel Painting

At the Richmond Hill Camera Club last night, we were treated to a presentation from Hilarie Mcneil-Smith. Hilarie is a self-proclaimed "Pixel Painter". She takes a photographic image and applies magic to it. I was intrigued.

I always wanted to do this but never knew how. I still don't know how, but I did come home and play with an image -- with no success whatsoever. I painted, all right, but handing someone a paintbrush does not make him an artist.

The evening started a bit slowly, I couldn't really get into it. That is, until Hilarie started actually creating a painting on the spot and it got exciting. here's a link to Hilarie's gallery, check it out: www.pbase.com/hilli

Anyway, this morning, I brought up an image I had captured yesterday and started playing with it. Two hours later...

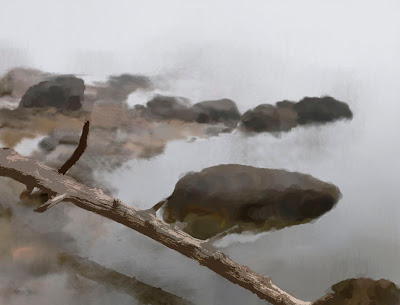
So everyone knows I like pictures of rocks and trees. Guess what I started with? I couldn't possibly tell you what I did in detail. I created a few layers, labelling them "log" or "rock" or "beach" or "water" and used different brush effects on each. Don't ask me which brushes! In the end, I didn't like the log, so I applied PhotoShop's "cutout" filter to its layer.

So here's my first attempt at pixel painting. Now if you came across one of Picasso's first original sketches, it'd be worth a fortune, right? So this is my FIRST pixel painting. Anyone want to buy an original print?

Sunday, November 02, 2008

Did you miss me?

I've been working away, doing stuff. I haven't had much time for photography, or for writing, which is why I haven't posted anything here in almost a week.


Did you have a good Hallowe'en? The only thing I really did that was Hallowe'en-ish was to wear some biker stuff to an early morning breakfast networking meeting. There were half a dozen people there in costume. Naturally, I took a few pictures which are in my gallery. This guy had fun, though:


The rubber nose (aw, I gave it away!) certainly didn't look real. It was off-colour, looked like plastic. A little Photoshop and...


Anyway, I drove up North right after the meeting and stopped for a couple of pictures along the way.


Aren't evergreens supposed to stay green?


Later, I took my bike out for the last ride of the year. I rode up highway 35 past Dorset, turning around just before Dwight. It's a great stretch of road. I stopped to see what pictures I could get at Wren Lake, where we were in September on the workshop. There's a parking area just North of the bridge that leads to a forested trail to the lake and I took some shots in there.


FacZen Photography Tips

Batteries, memory cards and third party stuff


Today I'll be talking about batteries and other stuff that gets attached to your camera.


  • Always carry a spare battery. Do you know how frustrating it can be to run out of battery in the middle of a photo shoot? Oh you do… and you don’t have an extra battery yet…

    Remember that in the winter, batteries can’t deliver their full potential, so you’ll run out sooner than you think.
  • And while we’re on the subject, what about memory cards? A high end DSLR shooting in RAW can fill up a memory card really fast!

    At a recent workshop, a friend of mine recorded a day’s worth of shooting on a 4Gb Sandisk Ultra III Extreme CF card. The best you can buy. When he plugged it into the computer, it failed. He lost a whole day’s shooting. S#(;@ happens. Wouldn’t it have been better to use a couple of 2Gb cards instead, or even change cards during the day just for security?
  • I also bought a remote shutter release online, from the far east. OK, well eBay. The price was very low and I did read a couple of reviews of this manufacturer's product which said their quality was really good. The jury's still out.

    While the release (made by Phottix) worked really well in tests -- I was able to trigger the shutter from about 100' away -- I'm not sure it's perfect. I wanted to use it for long exposures and the specs say you can set it up to do that: press and hold the release for a bit while in "Bulb" mode and it'll lock the shutter open until you hit it again. It's only doing that intermittently, sometimes it just fires the shutter for some (short) indeterminate period of time. The thing is, when it's holding the shutter open, it's draining its battery, which is a CR-lithium one which ain't cheap. The other night I shot half a dozen time exposures totalling about 20 minutes. A couple of nights ago, I tried it again and I got one 10-minute exposure before it died. I talked about it with Jim and he told me to bite the bullet and buy the Nikon release. Guess I will.

It’s up to you, but I tend to buy off-brand batteries on eBay instead of the expensive OEM ones. The OEM (Canon, Nikon, etc) will warn you that off-brands can damage your camera. It’s your choice if you believe that or not. Compare Nikon’s eL-en3e battery at $79.95 locally with a no-name equivalent shipped from China at TWO for $20 including shipping. But for memory cards, I stick with originals. Sean found out that they can fail too, but I’m not willing to risk the same thing happening on an off-brand.