Thursday, July 30, 2009

Two events of interest

Well of interest to me... and hopefully some of you.

Before I get started: I have a question for those who are more knowledgeable
than I. I just joined FaceBook because "everybody" told me I should. I have
absolutely no clue how this can help me. As far as I can tell, I have everything
FaceBook offers already in place: I have my Outlook address book (complete with
pictures), I have a photo gallery, I have this blog, I have distribution lists
for people interested in certain subjects: for instance motorcycle instructors,
photographers, etc., and a personal "friends & family" email list.

So what is it exactly that I would do with Facebook that I'm not already
doing?
Send me an email to give me a clue, please.

Event #1: the Tilley Sale
Every August, Alex Tilley holds a warehouse sale. If you're not familiar with Tilley products, check out their website here. They make arguably the finest outdoor, adventure and travel clothing anywhere, as well as the trademark Tilley hat. I've been wearing Tilley's since the early 80's when I outfitted the entire Ontario Combat Pistol Team in Tilley's for the national championships.

The sale has products at half-price or better. Of course it isn't cheap stuff to begin with, but the value is there. The dates announced for the sale are August 6th to 16th, but they don't tell the public that: for those not in the know, it only starts on the 8th. Their new location this year is 1100 O'Connor Drive (Google map here) and they open at 9:00am. Get there on the 6th or 7th: you may think it's crowded then, but it's nothing compared to what it's like on the 8th. And the selection is at it's maximum.

Two warnings: it is usually a total zoo. You may have to wait in a Looooong lineup for the better part of an hour to check out. And it's like going to Costco: you know, you went in for one item worth $20 and when you get to the cash you have a full basket and swallow really hard as the cashier rings up $300 on her register.

I find the Tilley hat superb for photography. It offers full sun protection all around, stays on your head and the floppy brim doesn't get in the way when you hold the camera up to your eye in portrait rotation like a baseball cap does. Their vests have so many pockets you can't count them, although I haven't found one big enough to accept a 70-200 lens, I have to admit.

Event #2: The 2009 Great Lakes Police Motorcycle Training Seminar
This is to be held at the Ontario Police College in Aylmer, ON from the 19th through the 22nd of August.

Whether you are a motorcyclist or not, this is an event worth visiting. If you visit their website, you will see that this is where they train already superb police motorcyclists to become outstanding riders. The venue is open to the public and for me, it represents a superb photo opportunity. Check out the videos and photos on their site.

There are competitions throughout the event, but looking at the schedule, the Friday and especially the Saturday events are going to be the most fun to watch (and photograph). Click on "events" on their site. I notice the Golden Helmets (OPP Precision Team) are doing a Friday afternoon show in St. Thomas.

I have a couple of photos to show you -- one was from the BAD Ride in May where the Toronto Police Winged Wheels did a demo -- this image has been in the blog before. Another is from a practice session at last year's event, held at Humber College. It shows RCMP Sgt. Luc, a friend of my friend Lori's, practicing on his bike.


Although it's a 2 hour drive down the 401 from Toronto, I think it's well worth the time. If I can get away, I'm planning to spend a couple of days down there.

One final note: for those concerned about my health issues: I'm fine. I've come through the surgery OK, with only some lingering voice problems which will eventually go away. I tell you what, though: I'm going to do something about my knee issues before it turns into surgery. This is the second time I've shared a room in hospital with someone who had knee surgery. Let's just say both of them gave their morphine pumps a lot of exercise and I'm not into that.

These issues have kept me from shooting pictures the past few weeks and although I had great intentions to work on my book, I've not done much. Watch this space for progress in the near future!

Friday, July 24, 2009

An update and a few photos

Many of you know that I had surgery on Monday. They went back in to clean up a cancerous node where my Thyroid used to be. According to the surgeon, they got it and I should be OK. He used a different "C" word: "CURED". There were some issues, especially with my voice, which is barely there but which should come back in a matter of weeks.

I need to take a moment to thank everyone who showed they cared so much. I was inundated with good wishes, visits, lifts, phone calls (I told you, I can't talk!), magazines, books and chocolate! All of the nurses at Mt. Sinai were great, there was one special one, though, named Mielana or "Mills" who actually went down and got me a Tim Horton's coffee when I said I was dying for one. She always had a smile and really cared, even when she was sticking needles in me!

I'm home, bored to death, but can't really get motivated to work much, although I did do some work on my First Aid website and some bookkeeping. I should be back in the swing of things next week. I have a Monday appointment to get the stitches removed and maybe I'll go up North for a couple of days.

So I can't write a Blog entry without some photographic content. I took a self-portrait with the Blackberry a couple of hours after surgery. Just thought I'd share...


A couple of weeks ago, Ron Goodlin and I shot the whitewater kayaking races up in Minden, then we drove around and got a few other shots. Here's one of the kayak images that I kind of like: although it's high key, it typifies the action that day for me.


We drove up to Dorset where I took this shot on the dock. I did a burst in order to create an HDR of the image, in an effort to capture the texture of the wood and the blue of the sky as well. Not dramatic, but I think it worked.


I love shooting pictures of moving water. "Painting with Water". You have to experiment with the exposure times -- for me, somewhere between 1/2 sec and 1/10 sec seems to work best. Here are a few examples.


I took a series of pictures here, each with a different shutter speed.
This one was 1/6 sec. Needless to say, a tripod is not an option.


This was an HDR composite. Then I converted it to black and white and cropped it a bit. I was trying to capture some of the detail in the rocks and the moving water. The early morning mist and soft lighting adds a different dimension to this image.


Again, I took a series of pictures here, each with a different shutter speed. This one was 3/10 sec.
Needless to say, a tripod is not an option.


This one is cropped really tightly. I was actually trying to enhance the noise and the texture in this composition. The original photo was not spectacular, but if you use your eyes, you might come up with something unexpected.


I'm almost ready to start putting the next book together. It's going to be quite an effort, but I'm sure it will be worth it. Catch you later!

Wednesday, July 01, 2009

Testing some new techniques

I spent a little time looking through the workbook and my sketchy notes from the Adobe seminar. What the seminar was about, was to point out useful features in Photoshop. He did a quick demo of some of those features and then left the participant to go home and play with them. As I said, if he had spent a little more time explaining "why" he did certain things and how to use the features better...

Anyway, one of the things I've been meaning to do is to learn about "smart objects". So I created a poster (below) just for playing purposes. I used some of the font techniques he talked about (knew them anyway), did a couple of drop shadows because I think he showed an alternative way to achieve the same thing but I didn't get it, and tried the 'flaming ribbon' thing he presented. Oh, and I used the pen tool to create a path and then stroked it. If you read my Blog you'd know I do use the pen tool, but this is a new way of achieving stuff.

It's not great art but it's a basis for trying new things.


The picture of the kayaker is a 'smart object'. It's a simple matter to replace it with another image and retain all its characteristics. And rescaling it doesn't create resolution or resampling problems. Cool. Of course I'd have to redraw the ribbon if I changed images. Click on the picture to blow it up.

I have to spend some more time with some of these techniques before I can share them with you. Of course they say the best way to learn how to do something is to teach someone else how! Give me a few weeks.

There are a number of people asking me for Photoshop lessons. Most of them are almost new at it, or have minimal practice with the program. So I'm considering structuring a one-day seminar to show people some of the basics. I don't want to fall into the same trap that Corey Barker did, so I need to put some thought into it. If you're interested, email me and tell me (1) what version of Photoshop you have and (2) how much you've played with it. You could also send me an image or two that you've done and tell me what you did. Let's see if we can't get this together in the next couple of months.

I'm looking forward to the weekend shoot at the above venue. I was there yesterday scouting shooting points and I think I found a new one I like on the other side of the river. I plan to get there fairly early on Saturday, and Sunday morning Dr. Ron is coming up to join me so watch this space for some neat images.


Tuesday, June 30, 2009

Adobe Seminars -- are they worth it?

First the answer to that question: yes.

However, some are more worth it than others. Sound a little trite? Kind of obvious? Well, OK, but let me elaborate a bit.

Adobe is the undisputed expert when it comes to making photo manipulation software. Undisputed by me, anyway: PhotoShop is the standard that other products aspire to. But they haven't rested on these laurels: their vector graphics program (Illustrator), their web development product (DreamWeaver) and Adobe Acrobat for pdf files are tops: so is, supposedly, InDesign for page layout, although I haven't used it because I don't do much page layout and the old PageMaker (Adobe, of course) is good enough for me. That's the good news.

These programs are all massively deep. The learning curve is humungous. One could spend a year doing nothing but Photoshop and studying it, and still not know it all. So Adobe has gotten together with Scott Kelby to provide training in how to use their products. Kelby & co. designs, creates and markets a variety of training courses and presents them in a variety of locations, including Toronto. But it all comes back to the people who do these courses and some are better than others.

Bottom line: with a program, or a topic with as much depth as Photoshop, unless you use the tools all the time, you're not going to remember how to do so without in-depth workbook materials and I personally felt that was the area where this last seminar fell short.

Last year, I attended the Photoshop CS3 for Photographers workshop. It was wonderful. Ben Willmore, who probably didn't design the course all by himself, realized that, and the methods and techniques he presented stuck with me. I learned a lot. And I have the workbook to fall back on when I can' t remember how to do things.

Last week, I was at the "Down and Dirty Tricks" seminar put on by Corey Barker. If the Willmore session was a 9 on a scale of 1-10, Barker's was a 5. Why?

Well for one thing, the seminar was directed at Graphic Designers. Not at photographers. One of the first things he said was that he wasn't going to teach us how to use Photoshop, just some tricks. Fair enough, that's what the course description said going in. But here's the problem: he went 'way too fast, for me anyway. Right near the beginning, I put down the workbook, because I had to focus on what he was doing and looking away to look at the book, I would have missed stuff. Important stuff because skipping a step in some of those techniques, they don't work.

Anyway, Corey knew his stuff. He was an articulate speaker but he wasn't a teacher. Oh, he had a few glitches, sometimes things didn't work as planned (if I recall, Bill Gates, when he introduced Windows XP, had a "blue screen of death" right there in the presentation!) and often he had to take a minute to look at his notes to remember what or how to do the next step. But my main issue was that he would perform a function, often loading a pre-designed image like an existing selection, do the 15 steps to come to the desired result, show you the finished product for about 10 seconds, then kill it and go on to the next thing.

Having attended this seminar, knowing now what I do, would I attend it again? Yes. In addition to some neat tricks and graphic techniques (reflections, for instance, or painting with light, or using the vanishing point tool, I learned an important thing for me: I already use a lot of these techniques and I have a good basic background knowledge in graphic design that I shouldn't be afraid to use.

Do I recommend Adobe seminars for everyone? No. I think you need to get beyond the basics and become comfortable with the concepts of the program being taught before attending one, or you will be frustrated because you won't be able to follow, or later implement any of the techniques.

I'm going to try to use some of these techniques in the weeks to come and I'll post some images here. Watch this space.


In the meantime, I can't leave you without a couple of pictures to look at. Here's a pair of hairy woodpeckers that visit my feeder regularly.

Hairy Woodpecker Couple (picoides villosus). The male woodpecker (red patch) has a peanut in his mouth. But he didn't get it from the feeder, the female did and gave it to him. Manipulated some in photoshop with "poster edges" filter applied to increase the detail and texture layers. I used the art-history brush for the edge effects on the vignette.


A few nights ago, I was sitting at the computer at 1:00 am and a crash outside caught my attention. I thought it was the bear that had visited last week but this time it was a raccoon. Cute, but destructive. He worked diligently at tearing my peanut feeder apart, then sat on the ground gorging himself on peanuts. I happened to have the camera handy, and I took 50 exposures ranging from available light (the floodlights on my deck), to the pop-up flash on the camera, to my SB-600 external flash and finally to the flash with the Gary Fong diffuser on it. The low light shots were done at very high ISO so the noise was obvious, but with the bigger flash, I was able to bring that down to a reasonable level.

Now animals have very big pupils, especially if they're nocturnal, and the flash created really ugly reflections. So I used the techniques I learned from Hilarie and re-drew the eyes, or at least added catchlights. Pretty good, if I do say so myself!


This is the "before" image: as taken. I used the Gary Fong diffuser on the external flash
to light this shot and look what it did to the eyes!


...and this is after working on the eyes. Hilarie taught us that drawing a soft reflection of the catchlight on the opposite side of the eye makes the eye really pop out.

One final thought: Microsoft seems to have gotten their act together with Internet Explorer 8. I downloaded and installed it and it works well. Among other things, I can now read the fonts onscreen MUCH better. Websites have a much cleaner look. And their "Accelerators" seem to work well. I hope I'm not speaking too soon when I say I like it.

Tuesday, June 23, 2009

Top O' the mornin to ya

Here I am up in Minden, on a beautiful summer day. It almost seemed that summer would never really appear but here it is! I've been working on some other things and haven't spent much time behind the lens but hopefully I can change that.

Here are a few shots I took at the house. The tree is just outside my front door and the attraction is a couple of bird feeders. By the way, a small black bear came by the other day and ripped one of them down, for a few peanuts. It's the first time I've seen one on my property. I just wonder where momma was!

Blue Jay (cyanocitta cristata)

Cedar Waxwing (bombycilla cedrorum)

Purple Finch (carpodacus purpurpeus). This fellow was hard to identify. I actually bought a "Birds of Ontario" book and looked him up, without success. Finally I posted this picture and sent the link to a site called "whatbird.com" where I had an answer within about 10 minutes!

At the end of this week, I'm attending Adobe's "Photoshop CS4 Down and Dirty Tricks" seminar. I was at one of their sessions last year and came away with a bunch of new techniques and ideas. Hopefully the same will happen this time. Watch this space for some neat stuff.

On July 4th weekend, Whitewater Canada is having a Whitewater kayaking race event, called "Gullfest". It's being held at the Minden Wildwater Preserve which is 6km from my house. I've contacted them a few times to request press accreditation, but nothing yet so I'll have to take my chances. Here's a link to the event (click here).

I had posted some pictures here a few weeks ago last time I was there. I went again this weekend with the intention of trying some different techniques. I was only moderately successful. Last time, I froze the action with a high shutter speed, this time I decided I wanted to bring some motion into the shots by using a slow speed. I quickly settled on shutter speeds between 1/20 sec and 1/30 sec. Anything slower and there was too much camera shake (well I did it deliberately a couple of times but it's really hard to control).

Normally, you would pan with the moving target (the kayaker) but if you watch these guys, they tend to stay in the same position on the water. So the best technique is to hold still and use the slow shutter to capture moving water. Like I said, very hard to control and I didn't get a lot of successful images. Here are a few, though.

1/30 sec at f/18, ISO 200, 24-120VR lens set at 70mm. I love the water motion in this picture. I didn't really do anything to it in Photoshop, and it's just slightly cropped from the original.


Exactly the same exposure, zoomed in to 120mm, taken a few seconds later. I think you can see what I mean: he's holding the kayak in position, not moving. By the way, if you haven't figured it out, these guys generally point their boats upstream. I imagine they'll be facing the other way when they're racing next weekend, unless they're trying to get through some slalom gates.


Again, this is the same exposure but I moved the camera as I took the shot and got this abstract effect. Very hard to control.

Let me leave you with one image that I really like. I'm not sure exactly why... just the feeling in the image. I call the shot, "Together".


This couple was doing the same stuff that the little single kayakers were doing, but less aggressively. They then moved over to this calm spot, took the boat out and portaged it upstream so they could run the part of the river that I think is called the "Otter Slide". Go to my June Smugmug gallery to see them back enjoying the action after this quiet moment.

Tuesday, June 16, 2009

Quiet Month

Despite the fact that I haven't had much time to get out and shoot pictures, I feel the need to post here to update the Blog. I haven't been totally idle: for instance, I participated in the B.A.D. Ride with over 1000 other motorcyclists. It was a long day since I rode back up North right afterward, but it was a day of "participation", not "observation". In other words, I didn't shoot a lot of road pictures as in previous years. I did get a couple of good images, including this one during the demo from the Toronto Police "Winged Wheels" Precision Motorcycle Team.

I had decided in advance that I was going to do some slow
shutter speed shots. It's tricky.
I didn't shoot anything in the city for a couple of weeks. But when I went up North, I went for a short bike ride (disappointed: the Fiery Grill in Dorset is closed on Mondays!) and took a few shots while I was there. There were some brightly coloured things, like picnic tables, windows, etc. And a long pier that called to me..."wide angle", it said. "Wide angle..."


I used the Perspective control while cropping this image in Photoshop. It wasn't anywhere near as wide as this when I shot it.

Then finally, when I got home, I saw a guy go out on the lake on a seadoo. The attraction of this toy escapes me. He went out for 5 or 10 minutes, did a few donuts and then returned to the dock. I'm sure it's fun for a few minutes, but what do you do after that?


Well, back to the city on Thursday. I'm slowly working on my next book and dealing with some other issues. Watch this space for our plan to run at least one course this summer... we're still trying to decide what level we're going to teach. All kinds of people are asking for a basic DSLR course, and basic Photoshop, but we want to do something more advanced. Now's your chance to let me know what YOU might want. email me.

Tuesday, May 19, 2009

Whitewater Fun and other stuff

It's been an active weekend shooting pictures. I'd been meaning to drop into the Minden Wildwater Preserve (for those who were on that course last fall up here -- do you remember the cemetery we visited? This is right around the corner). I've been here before, but never when there were actually kayakers on the water.

Would you believe I actually filled up a 4Gb CF-card? And ran out of battery? (I changed the battery, but had left my spare memory cards at home). Anyway, what fascinating photo-ops!

Here are a few shots:


For more, go to my smugmug gallery (click here), find the May 2009 monthly gallery and scroll about halfway down. There are actually two batches, from Saturday and from Monday. Saturday was more challenging because it wasn't sunny and bright and I had to increase the ISO to capture the action.

I wanted to share some pointers with you that might help when you get in an action shooting situation.

Basic rules:

› either use a fast shutter speed or pan with the action (which takes lots of practice)

› be prepared. Things happen fast

› test. Get the lighting, focus and composition set up in advance.

I can't say that I don't enjoy having an excellent camera like the D300. It lets me do some things that lesser cameras don't: but some of these features exist on earlier models (and even on Canon equipment -- LOL!). One great feature is the 6 frame per second high speed mode. And another is the ability to lock the autofocus on a moving target. That feature got me some razor-sharp images of fast moving targets. The trick to tracking moving objects is to keep them in the finder with the release button held halfway down. The computer in the camera will do the rest (sometimes! It can be fooled).

If your camera doesn't have this feature, one suggestion is to manually focus on a predetermined spot and shoot when the target reaches the spot. A higher depth-of-field helps too.

I chose to stop the action using a fast shutter speed. It was a bright, sunny day but when I set the lens to its sweet spot — f/8 — I got about 1/500 second, so I decided to crank the ISO up just a little. I set it to 400, which gave me shutter speeds around 1/1000 sec. I was going to slow things down and pan with the boats, but then I ran out of memory, so I'll save that for another day.

I thought about how to meter the exposures. Averaging didn't work well (I tested it). The excessive brightness of the sun reflecting off the water swamped everything, so I went to spot metering. The D300 lets me move the metering spot off-centre, so I did: I moved it up and to the right, which is mostly where I would put the subject when I composed the shot, so I was usually metering on the kayaker or the boat. It didn't always work, sometimes I composed the photo differently; but it did most of the time. Still, in the end, the bright water did get in the way. Photoshop to the rescue.

When I got home and downloaded the almost 300 images I had shot, I wondered how I was going to decide which ones I liked best. I don't use LightRoom, I prefer Adobe Bridge, but both of those programs will let you flag images. I set the slideshow function in motion, with my hands hovering over the keyboard. Pressing the number 1-5 while viewing an image assigns that many stars to it; pressing ctrl-delete trashes it. Anything soft focus went immediately in the trash.

I assigned "1" to any image that was vaguely interesting for later review. "2" was used for what I thought was a better picture. "3" was for one I definitely wanted to work on, and "4" and "5" were reserved for images I absolutely loved. Out of all those pictures, I gave two 4's and one 5: they happen to be the ones above. The first one got the 5.

Then I went back and looked at the "1's". I upgraded a few. Then the "2's". Same thing. I ended up with about 80 pictures rated 3 or better. I opened two new folders, called "selected" and "alternate" and sorted further. Sometimes, with burst shooting, I had 2 or 3 very similar pictures: one was selected, the others moved to the alternate folder. There were several shots that told a story: a kayaker capsizing, with half a dozen images of the event. I moved those to another folder called "sequences". I actually have those still to work on; I want to do composites or storyboards with those.

Now to the editing. I won't bore you with excessive detail (OK, OK, I already did! But I think the workflow is important when you have several hundred shots to go through) but I will comment on one more trick. In Camera RAW 5.0 there's a great new feature: an adjustment brush. On almost all of the pictures, I used it on the kayaker's face in order to boost the brightness of the face. It works really slick: you paint an area with it then set the attributes for the painted area: exposure, brightness, contrast, black point, etc etc. The face is almost always in shadow (I avoid shooting with direct sun on the face) and it needs a couple of stops more light.

Most of the shots needed some white recovery to minimize the blown out whites on the water. So I created a default correction set and used it almost all the time. Once I had the image in Photoshop, it was a matter of cropping and saving. Nothing fancy.

By the way, the sharpening and other tools in Camera RAW are soft. By that i mean that their effects are subtle even when you crank them up fairly high. You can rarely overdo it. Try it, you'll like it!

So I bent your ear enough. Watch this space: next time I shoot there, I'll try slower exposures and panning with the boats. That will make the images more dynamic, some hints of motion.

Here are a couple more images to enjoy before I go away.

Trillium shot with my ultra wide-angle lens.
I altered the colour of some of the dead foliage in the background.


Rose-Breasted Grosbeak male on my bird feeder.

Thursday, May 14, 2009

Springtime and other stuff

I'm still not feeling very creative. But I have been out a few times to shoot some pictures, and I thought I'd share some of them with you.

If you're afraid of spiders, close your eyes:

Someone already said that I had a lot more nerve than they did. I can only respond by saying, "that's not MY hands!" They belong to Irina Popova who has a lot more nerve than me! Shot with my handheld strobe as described
in the text below.


The Richmond Hill Camera Club hired a company to come in and set up a bunch of "critters" for us to photograph. It was a well-choreographed event where some eight stations were set up and about 40 photographers had a chance to shoot what they wanted. The best part about it was that they set up strobe lighting with soft boxes for each setup and provided a remote trigger so that the photographer at the setup could trigger the flashes.

I used their setups some: but I also tried different lighting and my favourite was to use my SB-600 flash off-camera and control it in commander mode -- something the Nikon D300 does well. I usually held the flash in my left hand, low and up in front of the camera, and I usually had the Gary Fong diffuser on the flash to soften the light. What I like about ihis arrangement is that it does cast a soft shadow, to give a 3D feel to the subject and it brings out the texture.

THere are a bunch more "critter" shots from that evening in my April 2009 gallery here.

Aside from that, I have been out shooting a bit more stuff. I found a waterfall -- actually a white water park -- near my house in Minden one day, and took a few shots there and of the "bazilliums" (there are bazillions of trilliums in the woods in May) nearby. There are kayakers who frequent this water on weekends, I'm going to try to get some of them on digital film this weekend. Here are a few shots from that day:


Again there are a few more of these images on my SmugMug gallery here.

OK, a couple more images to share. I was asked to shoot the new Kimco scooters at Humber College and while doing so, Marshall (one of our Chief Instructors) came by and we did a few action shots. The marvellous selection tools in Photoshop CS4 made a closecut selection quick, accurate and easy so I superimposed Marshall and the bike on another picture.


As mentioned in the text, Marshall was riding in the parking lot at Humber College. I superimposed the closecut picture over a shot of one of the nicest riding roads in Ontario, Muskoka Road 13 out of Bala.


And finally (hopefully you are disappointed, not looking forward to seeing the end of this posting...) I was on my way to an early morning meeting when I was greeted by a very misty, foggy morning. But the sun was up, and visible in the fog. It was interesting that the thickness of the mist made looking directly at the sun very pleasant and I drove for probably 15 minutes looking for a place to pull over and get a good image. I was resigned to the fact that I may not find a spot -- by now I was on the 404 highway; then out of the gloom the Slovak Cathedral of the Transfiguration in Markham appeared. I pulled over and took a few images. When I opened them in Photoshop, I couldn't decide how I wanted to render them. I tried a bunch of different effects, and I kind of liked these.


I created a threshold layer and blended it into the original image to produce this textured effect. The saturation on the grass was increased. The image below was done similarly, but with higher opacity. I left it in colour instead of converting to black-and-white because I wanted the subtle shading in the sun to appear.


Wednesday, April 22, 2009

I'd like to thank all the little people...

Recognition: ain't it great?

I like a lot of my images. But it's SO much better when other people acknowledge that they like them too. So, without further ado (but a virtual drumroll...)

My Mountain Man digital painting took FIRST PLACE in the ADVANCED CATEGORY at the Richmond Hill Camera Club Print Competition this week.

It wasn't the printing quality: All the prints in the competition were put on paper by Costco, all to fit within the same size mat.Three professional judges loved my picture.

Ah, the glory. The adulation. The women falling all over themselves just to be near me... OK, but I'm still proud of the work I did on that picture and I do want to thank Hilarie for teaching me how.

PS. Scroll down to the March 24th blog, or search for "Mountain Man" to find it.


On to bigger and better things. I'd like to show you an image I worked on this week in Photoshop, tell you a little about how I did it, and introduce you to a tool you likely haven't used. I'm also looking for comments: the jury's out as to whether I like this image treatment or not. Do you? Please post a comment. Anyway here goes:


FacZen Photography Tips

The pen tool in Photoshop


There's a tool in Photoshop that lets you make the cleanest, most precise selections possible of smooth geometrically shaped objects. It's the PEN tool, and it works with Bézier Curves.


Greek, right? Well not really. Pierre Bézier was a French engineer who used them to design automobile bodies.They were actually first developed in 1959 by a fellow by the name of Paul de Casteljau (Wikipedia, where you can learn more than you ever wanted to know)

I'm not going to try to give a lesson in higher mathematics. What you have to do is try it and figure out how it works for you. Bear in mind that the [alt] and the [ctrl] keys ([cmd] and [option] on a MAC) will modify how the tool works.


What you do is to select the pen tool, then draw a path around the object you want to select. You do this by adding points as you go around the object. Put one wherever the curve changes direction or changes shape. Now go back and with the alt key, you can move the points to exactly where you want them. Now click a point with the "convert point tool" which is nested under the pen. It changes it from a linear point to a Bezier one. You will be able to drag two handles away from the point -- and the distance and the direction that you drag them changes the shape of the line joining the points. Try it. It's easier to do than to say.


The path is very precise. And because it's a vector, it's perfectly smooth. Blow your picture up and get to work until the line matches the area you wanted to select! Here:


(the lines are faint. Click on the image to blow it up to see it better). The path doesn't exactly match the curve. But watch what happens when you drag the handles:


Voila! Perfect selections. Here's another view of a different area of the curve:


OK. When you're done, you've created a PATH, not a selection. Now you have to save it as a selection and I'll leave it to you to figure out how to do that (hint: there's a "Paths" palette, just like the "History" palette or the "Layers" palette"). Now you can do whatever you want with that selection -- put it on its own layer, fill it, stroke it, warp it, whatever you want!

So here's an image I created using this technique.


What I was trying to do was to enhance this image of a steering wheel and dashboard. I wanted to add some 'artsy' effects to the dashboard and frame it with the texture and curve of the wheel. So I used the pen tool to select the dashboard and put it on its own layer. I converted the original to a duotone and added some lighting effects to bring up the texture. Then I went to the dashboard layer, added some strokes and stuff in "Filters", played with the blending modes and gave it a green glow.


So take a minute to comment: do you like the image? Hate it? Want to pay $1000 for a signed original?

The bottom line: There's a selection tool in Photoshop that allows you to make VERY precise selections. It's a little tough to use at first, but it's worth it!

Tuesday, April 07, 2009

The Creative Juices are starting to flow

More input from the world of, "gee it's boring out there". I'm not feeling really creative with the camera in hand, but when I sit down to Photoshop, it gets better.

There's no colour out there. Everything is muted greens and browns, and, especially after the early April snowfall we had, white. Blah. So I did two things: found colour where it was and punched it up in Photoshop, or got rid of it to create monochrome images. I also tried to focus on shapes and motion. Anyway, here's a couple of my efforts:


This image was really of two dull, lifeless, faded canoes. I selectively increased the saturation, painted a reflection of the sky in the open water, and cropped it tightly to emphasize the curves.

Today, as I was driving back to Toronto, I noticed a stark, lonely laneway in a pine forest by the roadside. I made a U-turn, parked and tried unsuccessfully to capture the essence of the scene. Sometimes I see something in a scene but can't figure out how to capture it in camera. I took this shot to record what was there:


Then I shot a few exposures with camera motion (I seem to be stuck temporarily in that genre!). When I got it home and started playing with it in Photoshop, I cropped it and decided that even that effect was boring, so I looked for some filters to add an interesting effect and came up with this result using the reticulation filter.


There's still art out there at this blah time of the year!

Sunday, April 05, 2009

Model Releases

I posted to the blog this morning, and forgot to tell you one thing.

Remember the painting I posted a couple of posts ago? The one of the "Mountain Man"? Scroll down to see it. There's a story to be told.

Iris and I were at the High Falls Gorge centre in upstate New York last summer. I took a bunch of nature images during the day and when we were done, and wandered back into the building itself around lunch time, I saw this amazing man there. Turns out he works there: his name is George, and his job involved working outdoors, maintaining the natural and beautiful surroundings (sounds like an oxymoron: how can you maintain it and still call it "natural"? I'll leave that topic for another day).

Anyway, I was taken with George's appearance, especially the beard. I asked him if it was all right if I took his picture, and he agreed, and posed for me in the light from a nearby window. I liked the composition so much, I forgot to take more than one exposure!

So I did some photoshop work on the shot, and then, during and after Hilarie's course, I decided to try to paint it. I loved it. I got to thinking that George might like it too, so I tracked down the High Falls Gorge website and sent them an email, asking if they could put me in touch with him. I admit that I had an ulterior motive as well; I didn't have a model release from him, and thought I'd try to get one.

To make a long story short (how come whenever anyone says that, it's too late?), they wrote me back: George has passed away. He died of cancer a few months ago. They loved him and are dedicating a cabin to his memory, and I'm sending a print of the painted image for their dedication.

So: model releases. If I use this painting for my own purposes, in fact even if I sell the image as art, or if it appears in a dedication to George somewhere, I wouldn't have a problem with copyright or issues around using his image. But what if a beer company saw the picture and decided that it would make a fantastic background to a print ad, or if it was used by a Hollywood producer in a promo for a new film called "Mountain Man"? Or if I submitted it to a stock photo agency? And what if George (before I knew he was dead) or one of his relatives saw the picture and decided to sue me? You never know what might happen with one of your images.

Get the subject, or if it's a kid, his/her guardian, to sign a model release. You can Google the phrase and find some suitable wording, or drop me a note for a copy of the form I use. This is like insurance, folks. You should do it...

Spiffing up boring scenics

I was debating which of two photographic techniques I wanted to talk about today. I haven't been doing much photography over the past few weeks because I've been busy with work and other stuff, but there were a couple of learning experiences I wanted to share.

I decided that a discussion on spiffing up some forest shots in the boring and ugly early spring would be good to do first since it might inspire a few of you to go out and try it, instead of sitting at home bemoaning the fact that the world isn't pretty out there right now.

The other topic worth writing about is a foray into HDR, because the results can be fascinating and the technique is not entirely intuitive. I teased you a couple of weeks ago with an unfinished HDR image, I can document how I did it, but I'll save it for next time.

Before I get into it, I had occasion to shoot the Group photo for the Humber Motorcycle Instructor cadre a couple of weekends ago. I was looking forward to it because I have the new D300 and last year's shot, with the D70 was excellent. I looked forward to surpassing it. I was a little disappointed. Last year's was better. Somehow I managed the perfect exposure last year (I don't mean in terms of f/stop, etc -- I mean the ease of manipulation of the RAW file, the resulting super sharp image). Odd, because I used the same lens, the same camera location. It just showed me that you don't need 12 megapixels to do a sharp 18" wide print. Anyway, here's this year's shot:


As in previous years, I learned that you have to take several exposures when you're doing a group shot. Invariably, someone will have their eyes closed or a funny expression on their face, so you have to have a backup photo that you can clone a face from, etc.

I put some effort into arranging the people this year, according to height. It worked, but I think I'll do something different next time because the group is too big, the photo too wide. I had to clone in all kinds of vegetation around the sides. I'm thinking about shooting from higher overhead, getting people into a more square grouping.

OK: let's get out in the forest!


FacZen Photography Tips

A silk purse from a sow's ear!


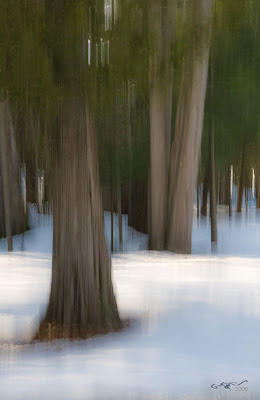
You know that expression, right? In this case, I had the camera out with me and the whole world was just shades of mud, with a sprinkling of snow. So I tried something different, something that I mentioned before: I tried moving the camera during the exposure.


Here are a few images I took over the past few days:


Early Spring 2


Early Spring Forest Giant

Still Frozen


On the Lake

So what do these pictures have in common? Lots of obvious things, but there's one point that really stands out in my mind: No Photoshop!* They aren't even cropped! They are exactly what came out of the camera!

All of the effects that you see here were created by moving the camera during the exposure.

* OK, not quite. You have to know me better than that! All I did was to open them in Camera Raw, tweak the exposures slightly, REDUCE the clarity to make them softer and increased the vibrance, a minor curves adjustment to the dark tones, then opened them in Photoshop, straightened a couple of them up slightly, added a new layer and stamped my signature and date on, applied a bevel/emboss to the signature layer and reduced its opacity, saved them, flattened them, then saved them again as jpegs. Like I said, no Photoshop!

So let's get physical. What do you have to do to capture these kinds of images? There are two main things that effect the kind of results you will get (apart from the obvious, making sure the exposure is right, the composition and focusing on the right spot). They are: shutter speed, and how you move the camera.

Of course you know I'm going to tell you to experiment. Digital film is cheap and you might be amazed at the different feeling you get with different techniques, but after some playing around, I decided that for me, an exposure around 1/15 second was the best. Slower than that and you get too much blur and it's hard to control; faster and the effect is too harsh if you can see it at all. I also discovered that you have to move the camera parallel to the direction of the trees. In other words, up and down. But look at the last image. I moved the acmera at about a 30 degree angle for this one. Different effect!

So I set the camera so that I would get a good exposure at that speed (some were shot at a very low ISO and some with a very small opening like f/22). Then I focused on the the main object in the picture and as I released the shutter, I swung the camera upwards.

Although the rules of composition still apply (rule of thirds, interesting foreground/midground/background, etc), they become less critical because the motion, the "painterly effect" adds an interest of its own.

So pictures which would be exceedingly boring, in fact downright ugly what with all that mud and muted colour, become interesting. For what it's worth, I had a couple of these printed as 18x12 images and they're out being framed even as we speak!

Tuesday, March 24, 2009

I'm so ashamed!


Hi, my name is Glenn.

"Hi, Glenn"!

I'm a blog-a-holic. And it's been 34 days since I Blogged. I'm so ashamed.

I could tell you how busy I've been (I've been busy!), how I've been focusing on other things (I've been focusing on other things), how life has thrown me a few curve balls (life has... you know) but in reality, I haven't been motivated for the longest time.

It's winter, coming into spring. You know, that time when the earth renews itself, when animals come out of hibernation, where the days start to get longer and warmer... SO WHEN'S THAT GOING TO START?


There are a few exceptions. This roadside rock formation gave birth
to an Ice sculpture with that blue colour one normally associates with
icebergs.


Truth be told, this is the ugliest time of year. That crisp, white snow is caked with mud; the trees are naked, the earth is brown. the melting ice on the roof is dripping down in the house. Yuk. But OK, we got through it! I went for a walk on a muddy country road without putting on gloves or a hat, I did shoot a few pictures, the creative juices are starting to flow again.


That said, I'm lying. Just a little. I have been doing some stuff over the past several weeks, not the least of which was to attend Hilarie's Pixel Painting Workshop 10 days ago, and, well, I've added another brush to my palette, another tool to my chest. Throughout the course I kept bemoaning the fact that I'm not an artist. Several people challenged me on that but I still think I'm not one. I did manage to create a couple of images that I like, here's one:


Mountain Man. Created by painting on top of an existing image,
using Photoshop and Corel Painter 11

The course was an eye opener. There are other things in life than sharp focus. And as I read somewhere and have said before, photography is all about what you put INTO the picture; painting is about what you leave OUT. So if you have a photo that would be great except for the background, then when you create it as a painting, DON'T INCLUDE THE BACKGROUND!


Anyway, I was out shooting a few pictures today, a different technique so I don't know how they're going to come out. I'll share them in the next Blog. For today, I'll add a couple of images I took a few weeks ago, of people ice fishing on 12 mile Lake.


Portable Ice Hut. It was really chilly out but nice and warm
inside, despite the fact that there was no floor.


It was already starting to thaw. In fact, most of the ice fishing huts had been brought in for the season. These guys were being quite careful how and where they walked.


Not this guy, though. He blithely drove his truck out on the ice, through foot-deep puddles of water. Apparently there was about two feet of ice thickness, even on a warm day like this one.


Allow me to leave you with one more image. I was asked to shoot some photos at Humber College, some detail shots of a new straight truck they had in their training program. While I was at it, I shot a 5-shot burst and created an HDR image. I shouldn't post it before I clean it up completely, but... here it is