Showing posts with label fall colours. Show all posts

Monday, November 07, 2016

Gales of November


Please forgive my long hiatus. I've been dealing with some serious family medical issues that have kept me away for the last month. Frankly, I wasn't motivated to pick up the camera even once in that time, except for my trip up to Wawa but I did keep up with my Facebook friends and enjoyed the pictures and stories, especially those in Algonquin Park. I'm so jealous of all those great moose pictures!

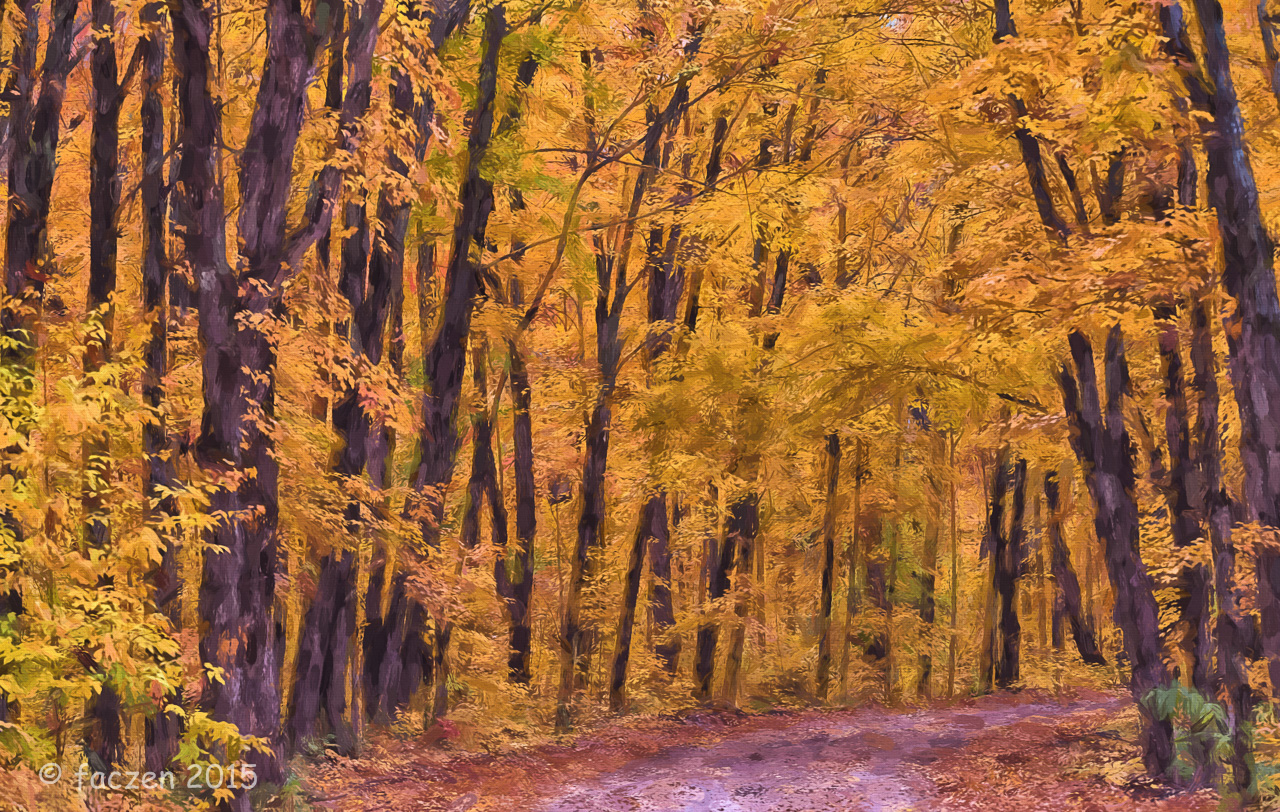
 Fall colours this year are outstanding. I missed it in the Park but came home in time to get some shots here in the Highlands. I used this one as my Facebook header photo:


RAW vs. JPEG

Try this analogy: JPEG is like going to the store and buying a jar of pasta sauce. You can get it home and add some stuff to it to change it a bit but it's still store bought pasta sauce. RAW is like making it from scratch with tomatoes you lovingly grew yourself and garlic and spices and onions and other ingredients from your own garden. Much more work but if you know what you're doing... it can be much better than the store bought stuff. Using a preset in LR or a plug-in is like looking up a recipe and following it, not using one is like making it the way your mother taught you years ago, a pinch of this, a teaspoon of that, but it has a lot more of "you" in it. Let me add one more thing to the analogy: if you buy a jar of pasta sauce you can prepare it just by tossing it in the microwave. But if you make it from scratch, you need to have a real stove and pots and pans and knives to chop with and a spoon to mix with... in other words if you shoot RAW you need to have the tools – like LR or PS – to make those ingredients into sauce. Make sense?


While chasing fall colours, I ended up at Bob Lake just West of Minden around sunset. I saw this and HAD to stop to take this picture. 

I worked hard for this shot. This is one of those examples of "working the scene" to find the shot that made me stop. I had to climb down to get the proper angle, I tried different positions until I found the perspective I wanted. By the time I was ready to take it, the sun was long gone, but there was enough light left to do a 5-shot HDR burst. The middle shot was 4 seconds @ f/16, ISO 1100, for what it's worth.


GALES OF NOVEMBER

The Gales of November workshop on October 20-23 was attended by nine very talented photographers. I had said that I promised them "weather" but didn't specify what kind... it turned out that it was much more benign than I had hoped. No "gales"! 


Group photo courtesy of Jim Camelford. I just did a tiny amount of LR tweaking.Shot with his Olympus E-M1 mirrorless camera. Very tempting... 

My rĂ´le was to facilitate. I chose some venues that had different challenges and tried to ensure that the participants had some knowledge of the techniques needed for each: an easy job because everyone was so experienced! For example we had scheduled a short lecture on using Neutral Density filters and long exposures. Ron (who was leading that one) asked, "who is not familiar with using ND filters?". Everyone said they were, so that was the shortest lecture ever!

I tried to challenge the group by focusing on the concept of pre-visualization. The intent was to highlight a technique that was probably in their toolbox but which can add to the way they approach their photography. I plan to create a mini-workshop on this topic for photographers of all experience levels soon. 

What I found fascinating was how differently everyone approached each venue. For example, there was a tree, reflected in a pool of water (I think in Katherine Cove), and I looked at it and failed to see anything interesting; yet at least four of the participants disagreed and got some outstanding shots. I'm hoping we can put together a slide show presentation of a compilation of their best shots and I'll link to it here. Also in the works is a Blurb book.

I shot a lot of "people" pictures. Sadly, I haven't gotten around to processing them yet, so you'll have to wait to see them. But here's a selection of landscape images I took that weekend. Most of them post-processed in my usual impressionistic style. 


Spectacular Fall colours! I took this shot with my iPhone on the way up. Just off Highway 69, south of the French River. Although it lack some of the quality of a similar shot I took with the D800, I think I like it better! Picture postcard perfect!


I took this shot a few minutes later with the D800. It's rendered using Topaz Impression with my favourite "Impasto" preset. 


Next day, en route between Sault Ste. Marie and Wawa. Although the colours aren't as eye-searingly brilliant as those further South, the scenery on the shores of Lake Superior is incredible. I was thinking of renting a cabin up there for the month of October next year, just to explore and photograph this 200 km stretch of highway. Who's with me? 


One of the spots I scouted for the group was this blueberry field on the way to High Falls. I was really taken by the textures in the vegetation. 


We went to the beach on the Michipicoten First Nations Reserve where I did this impression looking out over the Michipicoten Bay. Because it was so calm, I felt the need to add these textures to make it match my vision. I used pre-visualization techniques to compose and render this shot.


This was shot on the last morning as I drove to the Lodge. It's one of my favourite pictures of the trip. I knew it the moment I saw it. This one will be printed for sure! 


Where to stop! It's such a spectacular area. I'm planning to do this again next year, if you want to come along, drop me a line and I'll put you on the list of people I keep in the loop!

To close this blog, here's an image I took in front of the Rock Island Lodge. 


I think it was Jim's idea to drag these Muskoka chairs down to the beach but it was someone ELSE's idea to provide this awesome lighting just after sunrise! Textures added in Impression.


OK, one more! 


Shoreline rocks worn smooth by millions of years of Lake Superior wave action. Pastel colours and textures enhanced in Topaz Impression. It reminds me of a Microsoft screensaver, only better! 


So many others! I've added these and other images on my 500px site (just getting that under way) where they are available for purchase. I'll be updating my RedBubble and Fine Art America portfolios as well. They provide prints and other products at very reasonable prices. 

More to come!

— 30 —

Wednesday, September 21, 2016

Fall is coming. Do you know where your pictures are?

Fall Colours are coming!

We all have our favourite spots for taking fall pictures. And we all know of spots we'd like to visit, Every year I say "I'm not going to shoot the colours again" and yet every year I do!


Obviously, the bright colours are the most addictive: but why? Bright colours are all around us, what is it about the autumn leaves?


Obviously I used Topaz Impression 2 (my favourite preset is "Impasto") on this image, but there's more to it than that! I did a lot of extra technical work to make this picture look like what I had in mind when I shot it. For one thing, it's an HDR merge of 5 bracketed shots so that I could work with the full dynamic range. And I used some secret sauce (see below) to bring out the colours of the foliage which were not anywhere near that intense so early in the season. I actually muted and blurred the background just a bit to enhance the foreground subject. 

I think the answer lies in the colour palette. I don't know enough about colour theory but from my painting experience, I know that the basic fall colours all come from the same set of basic pigments: reds and yellows and greens. They're balanced by the skies and the water. I wish I could achieve this look with brushes and oil paint. I've taken a sabbatical from painting for a while to get past this frustration, but looking at scenes like the one above is tempting me to take them out again.


So: two things. First, a few years ago, I wrote a "Guide to Shooting Fall Colours" and I published it as a pdf book online. Here's a free link to the guide: http://www.photography.to/fallguid.pdf. Enjoy. All I ask is that you find me on Facebook (search for "faczen") and tell me what you thought of it. Feel free to share: I've given up trying to make any money from these publications, I share them in the spirit of education! (well, if you decide to donate something, you could follow the link at the beginning of the book!). And if you're not a subscriber to my newsletter, do the right thing! Click the link at the top right of this blog.


The second thing: I watched a presentation by Scott Kelby that he gave a few years ago at B&H Photo. Towards the end, he did a segment on enhancing fall colours in Photoshop. He demonstrated a simple technique which really works, although I don't really understand why! It's only 4 steps: here goes!


You need Photoshop for this. Do it on a copied layer (ctrl-J or cmd-J on a Mac) so you can change the intensity easily later. Here's the starting image:


Remember you can click on any image to blow it up full size 


  •  convert your image from RGB to LAB colour


  • Apply the image


  • Change the blend mode to "Overlay" (you can experiment with other modes, like "Soft Light" for more and less intense effect); and select the "b" channel. This menu pops up when you click "apply image" in the previous step.


  • Now simply switch back to RGB so you can continue editing, or output a normal Jpeg. If you did this on a fresh layer copy, you can now change the opacity or blend mode, or you can mask areas as you wish.

Here's the resulting image after those four steps. 


I used that brilliant free stitching program from Microsoft that I wrote about last week, again (what a convoluted sentence!). This is another shot from the marina where I dock my boat, like the first picture on today's blog.


This was carefully cropped and straightened up using the perspective cropping tool in Photoshop (People don't seem to know about this tool. It's simple to use and so effective!) . The original image was an amazing 266 Mp in size; this crop is almost 60 Mp! Again I used Impression/Impasto, and I added some texture using Topaz Texture Effects.  

Here's the link to that Microsoft stitching program, "Image Composite Editor" or "ICE":

http://research.microsoft.com/en-us/um/redmond/projects/ice/


Here's the blog banner I just replaced. I need to do this so that the old one doesn't just disappear into cyberspace:


Gales of November: less than a month away and I'm excited because (a) there are some outstanding people attending and (b) we have some fantastic venues to shoot and some great programs planned!
Despite several last-minute inquiries, we still have two spaces available in the first weekend (October 20-23) AND a lodge room has opened up. Also there are still 4 spaces on the second weekend. Jump on it, folks! YOU KNOW YOU WANT TO BE THERE
Visit www.photography.to/gales for details and if you want the first weekend, email me directly. The October 27-30 session can be booked directly online. 


Open Canoe Races

The open canoe event took place on the Gull River at the Minden Wildwater Preserve last weekend and several camera club members came out to take some pictures. Here are my two favourite shots from the event:


A picture is worth 1000 words.I don't need any words for these pictures, do I? 


Parting Shot


Here's a fall sunflower on the side of the road that called out to me to have its picture made. 


—30—


Sunday, October 25, 2015

Look where you want to go

Some words of encouragement.


Look where you want to go


Luc is a Staff Sergeant with the RCMP, a motorcycle trainer and all-around good guy.
I have 1000 pictures that illustrate this concept. 

This is a sentence pronounced by every motorcycle instructor who ever lived. Not once, not 10 times, 10,000 times. It's one of the first things every motorcyclist needs to know, to love, and to live. It's something you need to do, and being reminded of it will often get you out of trouble. But this is not about motorcycling.


You need to do this with your life.

I have a friend, in a place where I never want to be, and neither do you. George is in the middle of chemotherapy and radiation treatments and having a tough time. Today he said to me, "...my resolve is cracking...". This is one of the toughest guys I know, he does everything well and to the best of his ability and clearly he's being pushed to the limit, but I know he's going to come out the other side. He needs to keep his eye on the prize... to look where he wants to go. As a Chief Motorcycle Instructor at Humber College, George knows this in his heart, but we all need to be reminded from time to time. Hang in there, buddy.

It occurred to me, as I wrote back to him, that this applies to almost everything in your life. First you need to figure out where you want to go, then you have to focus on getting there. Every day, every step you take, should be in that direction. There was another concept called "True North" that I wrote about some time ago on the blog (perhaps worth a read. Here) that tells a similar story.

There are so many trite phrases rolling around in my mind as I write this. I'm not going to say them. Just think about this for a minute in context of where you are right now and where you want to be.


Now Look Where You Want To Go.


It's coming!


For the past few years, I've made available my 2012 "Winter Wonderland" eBook at no cost to subscribers to my blog. It's that time again. It's a 56-page PDF eBook with tips on winter shooting and a small composition section at the end. It's not rocket science but it might help some of you with your mindset when you go out to shoot winter pictures.

If you already subscribe to the blog, you've already received the link to the eBook. If not, just click "Newsletter" at top right and follow the bouncing ball. You can unsubscribe afterwards with one click if you really must. I'll send the eBook link again in next week's update. I would just ask you not to reproduce the eBook or send the link on to others, send them here so they can subscribe as well.

I'm Addicted. I admit it.

I'm addicted to images taken in the canopy on Arowhon Pines Road when the fall colours have peaked. I never get tired of them, or of making painted variations of them.


Here's another shot taken in Algonquin Park last week. Yes, the colours were spectacular. Not a lot of reds, though, I will admit.


I was up in Algonquin again on October 24th.  I was with Genny and Dean Ribalko (Genny is with TDPC and was up here a couple of weeks ago, couldn't stay for the Algonquin trip). We met some really interesting people and, it turned out, had a great photo day!

You probably know that names and I don't get along: but if you have a computer to remind you... last week Amin and I met Wesley and Mitch and Stephen (and I don't remember who the fourth person was!). On Saturday, it was Rico and Kent and Jim and Joe. All great photographers and good people. I was especially impressed with Kent's knowledge and experience (and great clothes and equipment!). Off-topic, he had a Canon 100-400mm lens that was able to focus to as close as about 50cm! Nice. Rico had a 500mm f/4 prime, really sharp but it didn't focus close at all. Jim had the Tamron 150-600 on his D7100. Rico and Jim have met Dr. Ron (and me, at Carden Plain as well). They said they have sites where there are literally dozens of snowy owls... hoping for an invite!

Kent, especially, knows where the wildlife live in the Park. He took us to one and while the rest of us were chatting he disappeared and came back a few minutes later and said the father fox was back, and was napping in his den. For proof: a photo on the back of his camera of the sleeping fox (link)! He also called in a bunch of grey jays, to Genny and Dean's delight! We all got great pictures.

I took lots of fox pictures when he came out to greet us after his nap! So many good ones that I'm having a hard time choosing which one I like best.


This one is straight out of the camera with no editing whatsoever. Not even a crop: this is straight out of the camera.


I think he was yawning, not growling! Cropped tight and brightened but that's all.


I did edit this one, but only slightly! Some contrast and tonal balance, a small crop, and I removed one weed that was almost in front of his face (so I can't use it in Nature competitions). I will put this up on RedBubble or be happy to talk to anyone who wants a print or other product with this image. 


Rico and Genny have visits from Grey Jays*!


Battling over a peanut! 
I just got told it's "GRAY" jays, not "GREY" jays and that I don't really want to know why! LOL. I stand corrected, Dan!

Some of us wandered off through the park in search of moose... no luck that day. We embarked on an almost-6-km-hike down the bike trail behind the Mew Lake Campground to see a moose carcass reported in a pond where bears were seen feasting on it. Basically nothing left to see. At least I got a little exercise!

All in all, a great day. And as Ahnold says, "I'll be baaack".

Products with my pictures on them


Normally I don't sell stuff here. But I just think it's so cool having products with your own images on them, that I had to share. No pressure: just showing you some stuff you can get!

A couple of months ago, I had an iPhone case made with one of my images on it. 


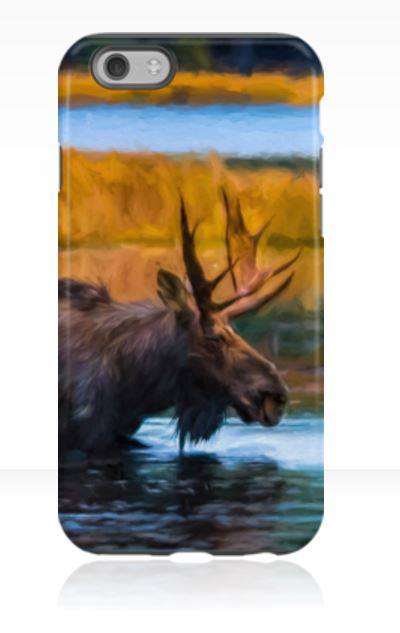
Although I love it, I think you need a strong image as opposed to a subtle one to give it some impact. So I just ordered a new case, that looks like this:


The case is a "Tough" case. It has a hard plastic shell and a soft rubber insert. You can get them in various sizes, for iPhones, for Samsung phones, etc. The only problem I've had with them is that the opening where you plug in an external speaker is a bit small and I had to open it up with a scissors (a dremel would have been better) so I could plug into it. Just saying. 
Then I decided I would also like a throw pillow with the same design, here I used the full picture instead of the cropped one on the iPhone case.


The pillows come in 3 sizes, this is the largest one. I ordered just the shell, not the complete pillow insert because shipping costs were lower. I'm just going to stuff an existing pillow inside the case or if worst comes to worst, go to Michaels and get some foam rubber. 

I order these products from a company called "RedBubble", where I also have fine art prints listed. If you would like to order one of these (or any of the other products they have with this image on it), go to this link. If you want to see other images that I have on that site, use this link. They are very fast and reasonable, and the quality is great! I can add pretty well any one of my images there, if something else strikes your fancy. Email me.

I also added the fox picture. You can buy 20 different products with that image on it from RedBubble for very reasonable prices! Link


Here's an example: a tote bag! Available in 3 sizes, prices starting at around $10. You can also get prints, canvas prints, smartphone and laptop cases, even spiral notebooks!

By the way, I sent a pillow with the baby owl picture (here) to my granddaughter and she loves it!

See you next week!


— 30 —


Saturday, October 17, 2015

Bullwinkle, At Last!

Uh oh. I've been musing again...

I came across this quote today and find it very appropriate, especially in view of the show that Nature is putting on for us out there at this time of year:


"Look deep into nature, and then you will understand everything better." Albert Einstein

Some more musings:


I did a whole bunch of work yesterday and today and when it was done, it didn't look as though I had done anything. And it occurred to me that's how it should be when you use Photoshop... sometimes!


Here's the work I did. When I moved here (8 years ago!) I had a truckload of gravel brought in. Before that, it was impassible in the spring when the ground was muddy. But over the years, my car had dug a couple of tracks into my "driveway" so I added a few cubic yards of gravel/tar mix – won't tell you where I got it! – using my ATV and the little trailer I have on semi-permanent loan from Styles. Then I tamped it down with the ATV and by driving back and forth over it with the car (a roller would have been better but I didn't have one). Now it's nice and flat.


My arms and pecs are sore from shoveling, it took me about 4 hours to do (do you know how much you need to fill in a 6" or 8" deep rut? Or how heavy a cubic yard of gravel weighs? Kudos to those who do this all the time!. In a few days, you won't be able to see the difference, as the pine needles cover it. But the puddles and soft ground after every rainstorm are gone. It will be invisible.


Loading the gravel from my secret source with my ATV and my trusty "555" Styles trailer 


...and unloading it on the driveway. This is about the 6th load, and it's day 2: a little rain last night told me which spots needed a bit of touching up so I got back to work. If you're going to do something, do it right. 

So I worked away and sweated for several hours for what? If you look at my driveway a few days from now when the pine needles are covering it, or a month from now when it's blanketed in the white stuff, you won't be able to tell that I did anything – unless you were there when I started. The same thing is true of Photoediting. 

Your work in Photoshop or whatever editor you use, should be invisible. But you need to address all the details: no dust spots; no unwanted lens flare, toning and skin just the way it's supposed to be, a slightly burned edge, horizons level, and so on. Address all the details. And don't stop until you're done.

Of course sometimes you edit an image with the INTENT of making it look surreal or impressionistic. I do that a lot. But I think that somewhere during the editing process, you need to bring the image to the point where it's perfect and your editing should be invisible. Something to strive for.


Fall Colours are Addictive!


Every year I say I'm not going to shoot the colours. Every year I do anyway. How can one not: when you see something this spectacular, you have to share it! So here are a few shots around the Haliburton Highlands.


If you are located in the Highlands, perhaps these images won't 'grab' you, but many of my readers are from other parts of the world and this is for them!


This is not an uncommon look, since Richard Martin espoused the concept of moving the camera while the shutter was open... however that's not how this image was done. The motion blur was added in Photoshop to a more traditional picture. I did it this way because, well because I CAN. Besides, I wanted to draw the viewer's eye to the birch tree and its colleagues just right of centre, done with a layer mask. I also added a texture overlay.  


I shot this on October 9th, on Oliver Crescent just off the west side of Kushog Lake near Carnarvon. The colours had peaked in spots like this one. I added a touch of Topaz Glow and a smidgen of the Degas preset in Impression, just to add some texture. 


At Hall's Lake. The brilliant colours stand out even more against the rich greens of the pine trees. I used the "coloured pencil" preset in Impression as the baseline from which to edit. 


Tired of fall colour pictures yet? I have bad news for you: more to come! I took a trip yesterday with Amin Shivji from HHCC to Algonquin Park, in search of fall colours, and moose. Let's just say we had a good day!


On the way up, the sun broke out momentarily as we were passing (I think) Kushog Lake.  


As we got into the park, we stopped at Fisherman's Point on Smoke Lake, where we found, wait for it, some fishermen (OK, "fisherpeople"!).  


As we continued further East, we stopped at spots where we hoped we would see moose. Nada. But we did find this wetland on Opeoongo Road, which I thought was quite scenic and told the Fall story.  We went for lunch at the Mad Musher in Whitney where we ran into a quartet of photographers, one of whom, I discovered, reads my blog! (Thanks, Mitch). Another guy has wildlife pictures published all over the place. He reluctantly told us about a spot where he'd seen, not only moose but wolves as well. I promised not to reveal its location. It was threatening to rain, and it started while we were at lunch.


Indeed. I took this through the windshield (thank you, Adobe, for the really nice de-haze filter!). I even blurred the trees a bit to soften it and make it three dimensional. 


As we continued westward, we came across some spots where the colours were spectacular. We stopped a couple of times. 


An impressionistic view of the outrageous colours in a maple bush. 


On to the secret spot. These mallards flashed through the sky overhead, but I had something in my left hand, so I could only swing the camera (complete with 1.7x converter and 70-200mm f/2.8 lens) with one hand, pressing on the back-button focusing while tracking the birds. It wasn't perfect, so I turned it into a sketch, which I call "Couples". 


And now, la pièce de rĂ©sistance, a bull moose swimming across the water about 100 meters away.  


Here's another shot, more tightly cropped. 


Using Topaz Impression to turn it into a painting, I edited the same image as the cropped one, to tell more of the story. 

We had a good day! I can't wait to visit Algonquin Park again soon. 

— 30 —